There are a number of steps you have to complete to be able to login to Twitter. First, go to the Identity Providers left menu item
and select Twitter from the Add provider drop down list. This will bring you to the Add identity provider page.

You can’t click save yet, as you’ll need to obtain a Client ID and Client Secret from Twitter. One piece of data you’ll need from this
page is the Redirect URI. You’ll have to provide that to Twitter when you register Keycloak as a client there, so
copy this URI to your clipboard.
To enable login with Twtter you first have to create an application in the Twitter Application Management.

Click on the Create New App button. This will bring you to the Create an Application page.
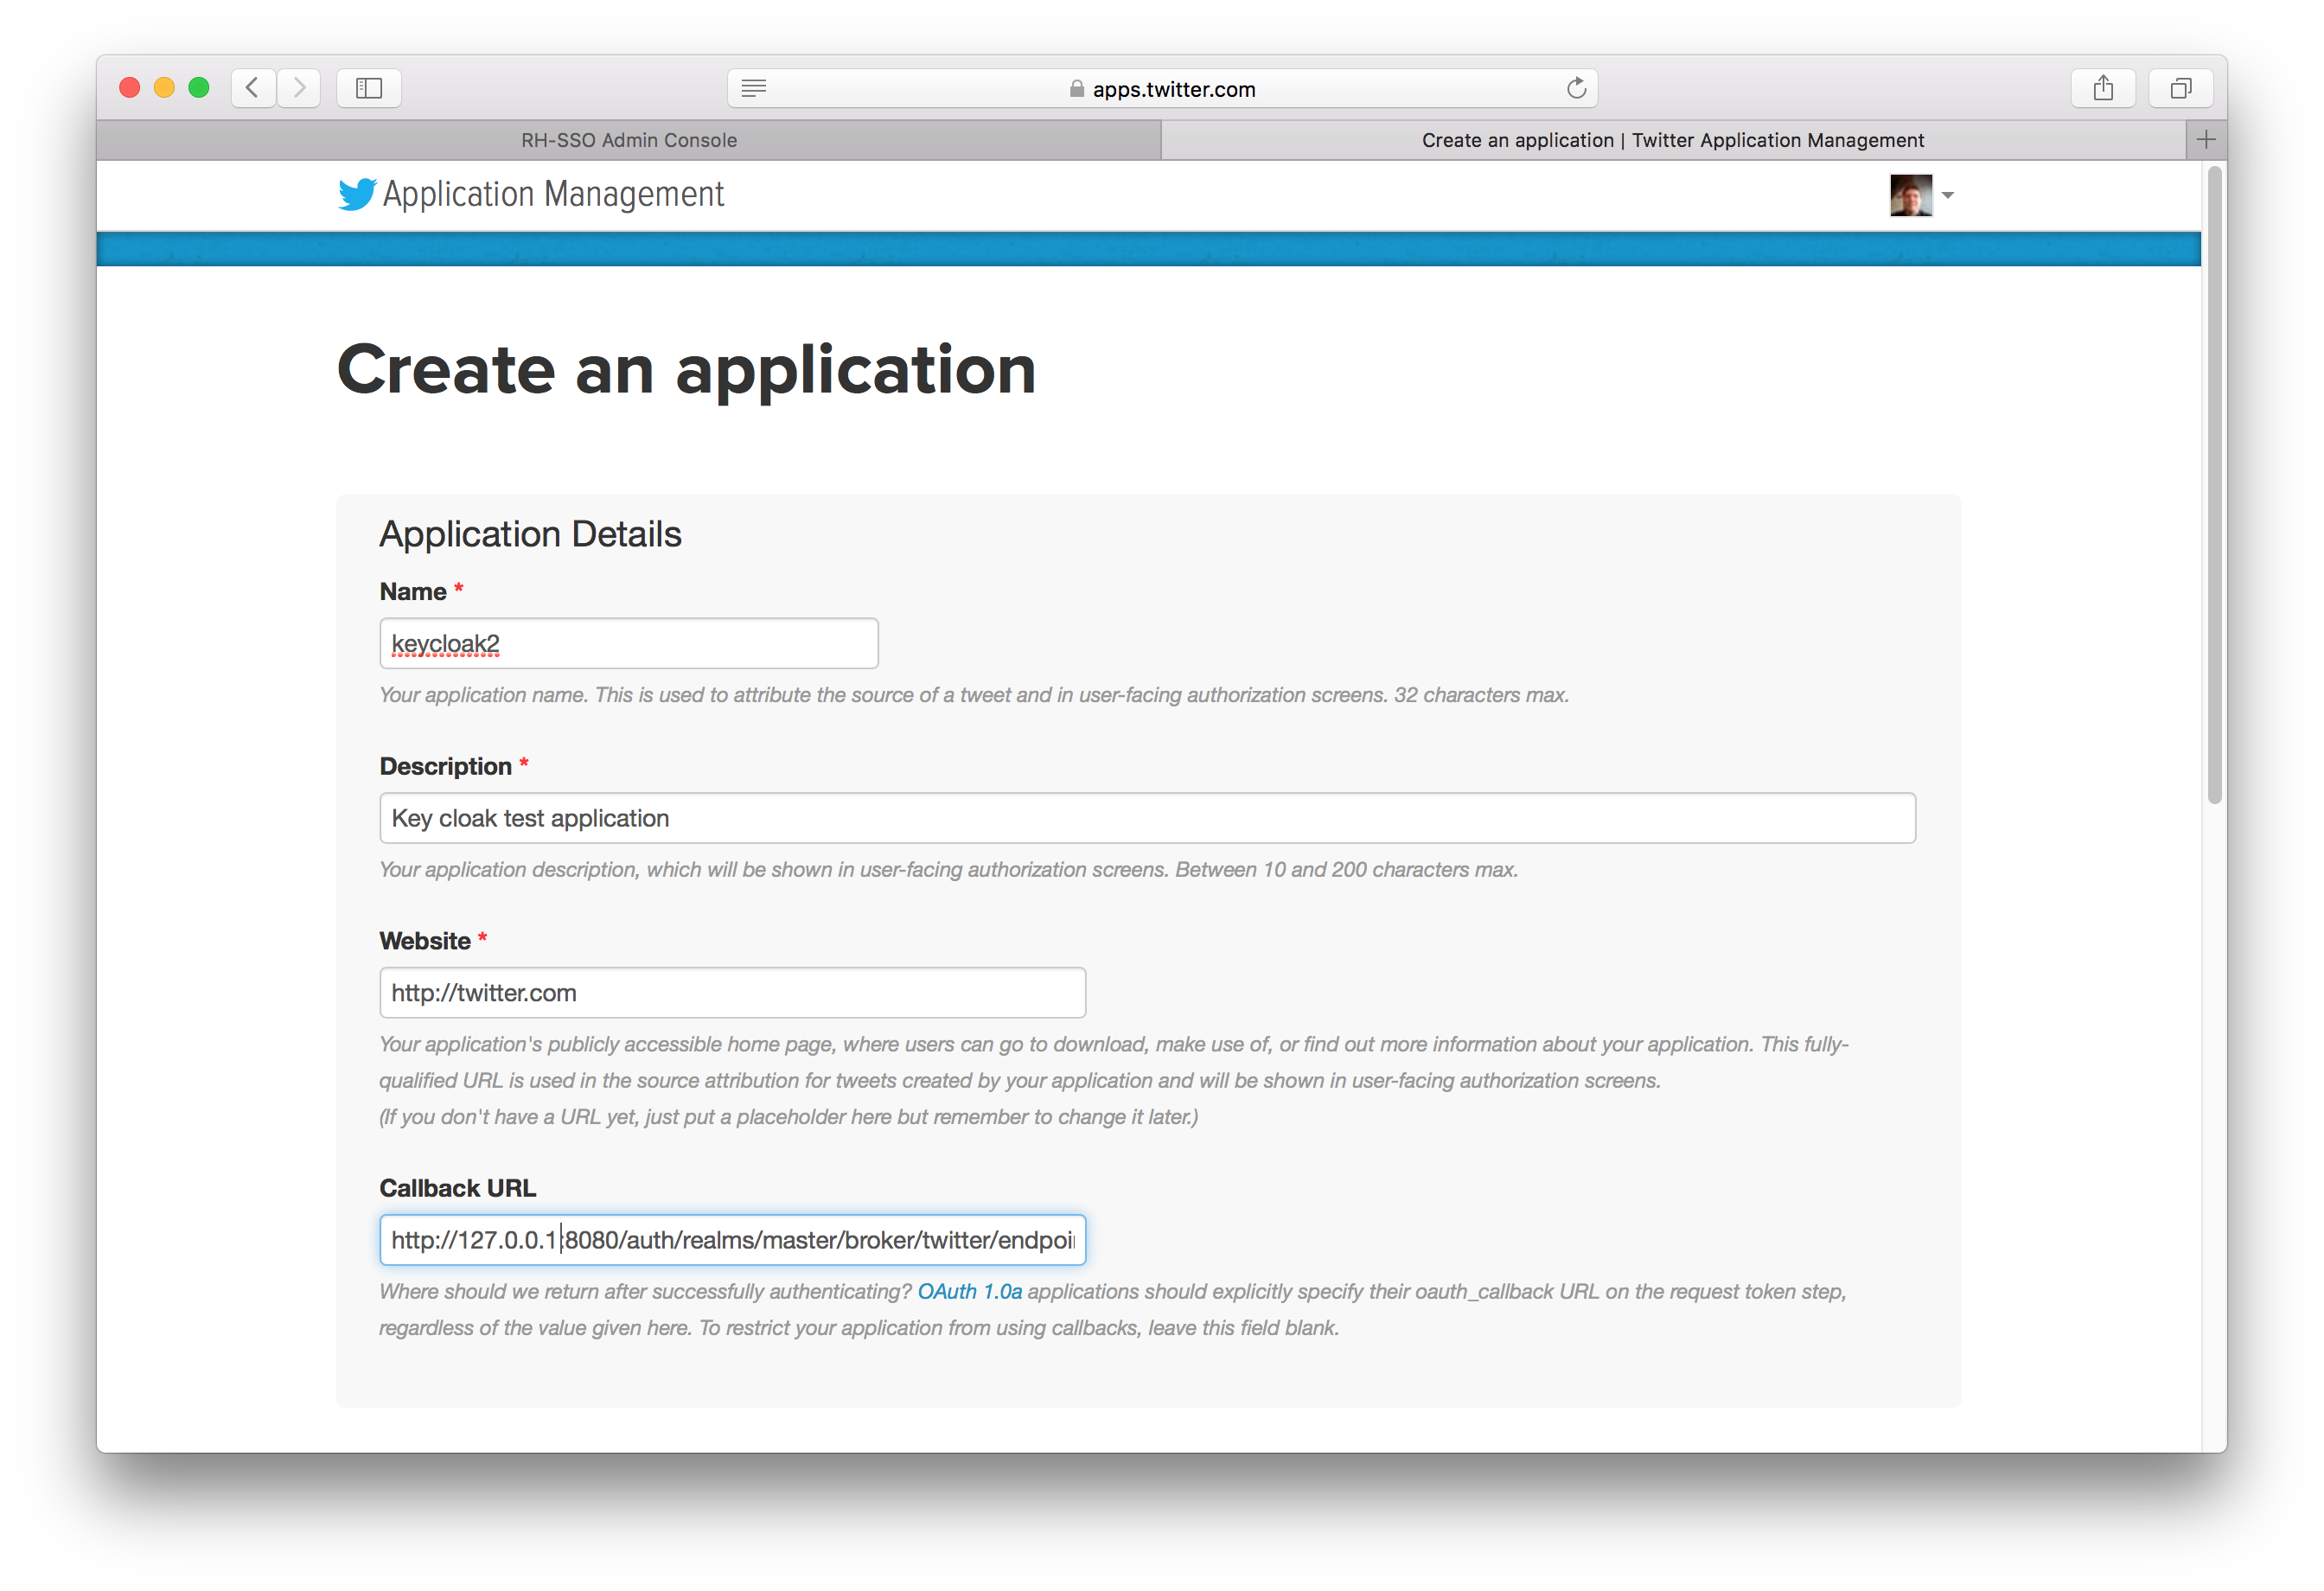
Enter in a Name and Description. The Website can be anything, but cannot have a localhost address. For the
Callback URL you must copy the Redirect URI from the Keycloak Add Identity Provider page.
|
Warning
|
You cannot use localhost in the Callback URL. Instead replace it with 127.0.0.1 if you are trying to
testdrive Twitter login on your laptop.
|
After clicking save you will be brought to the Details page.
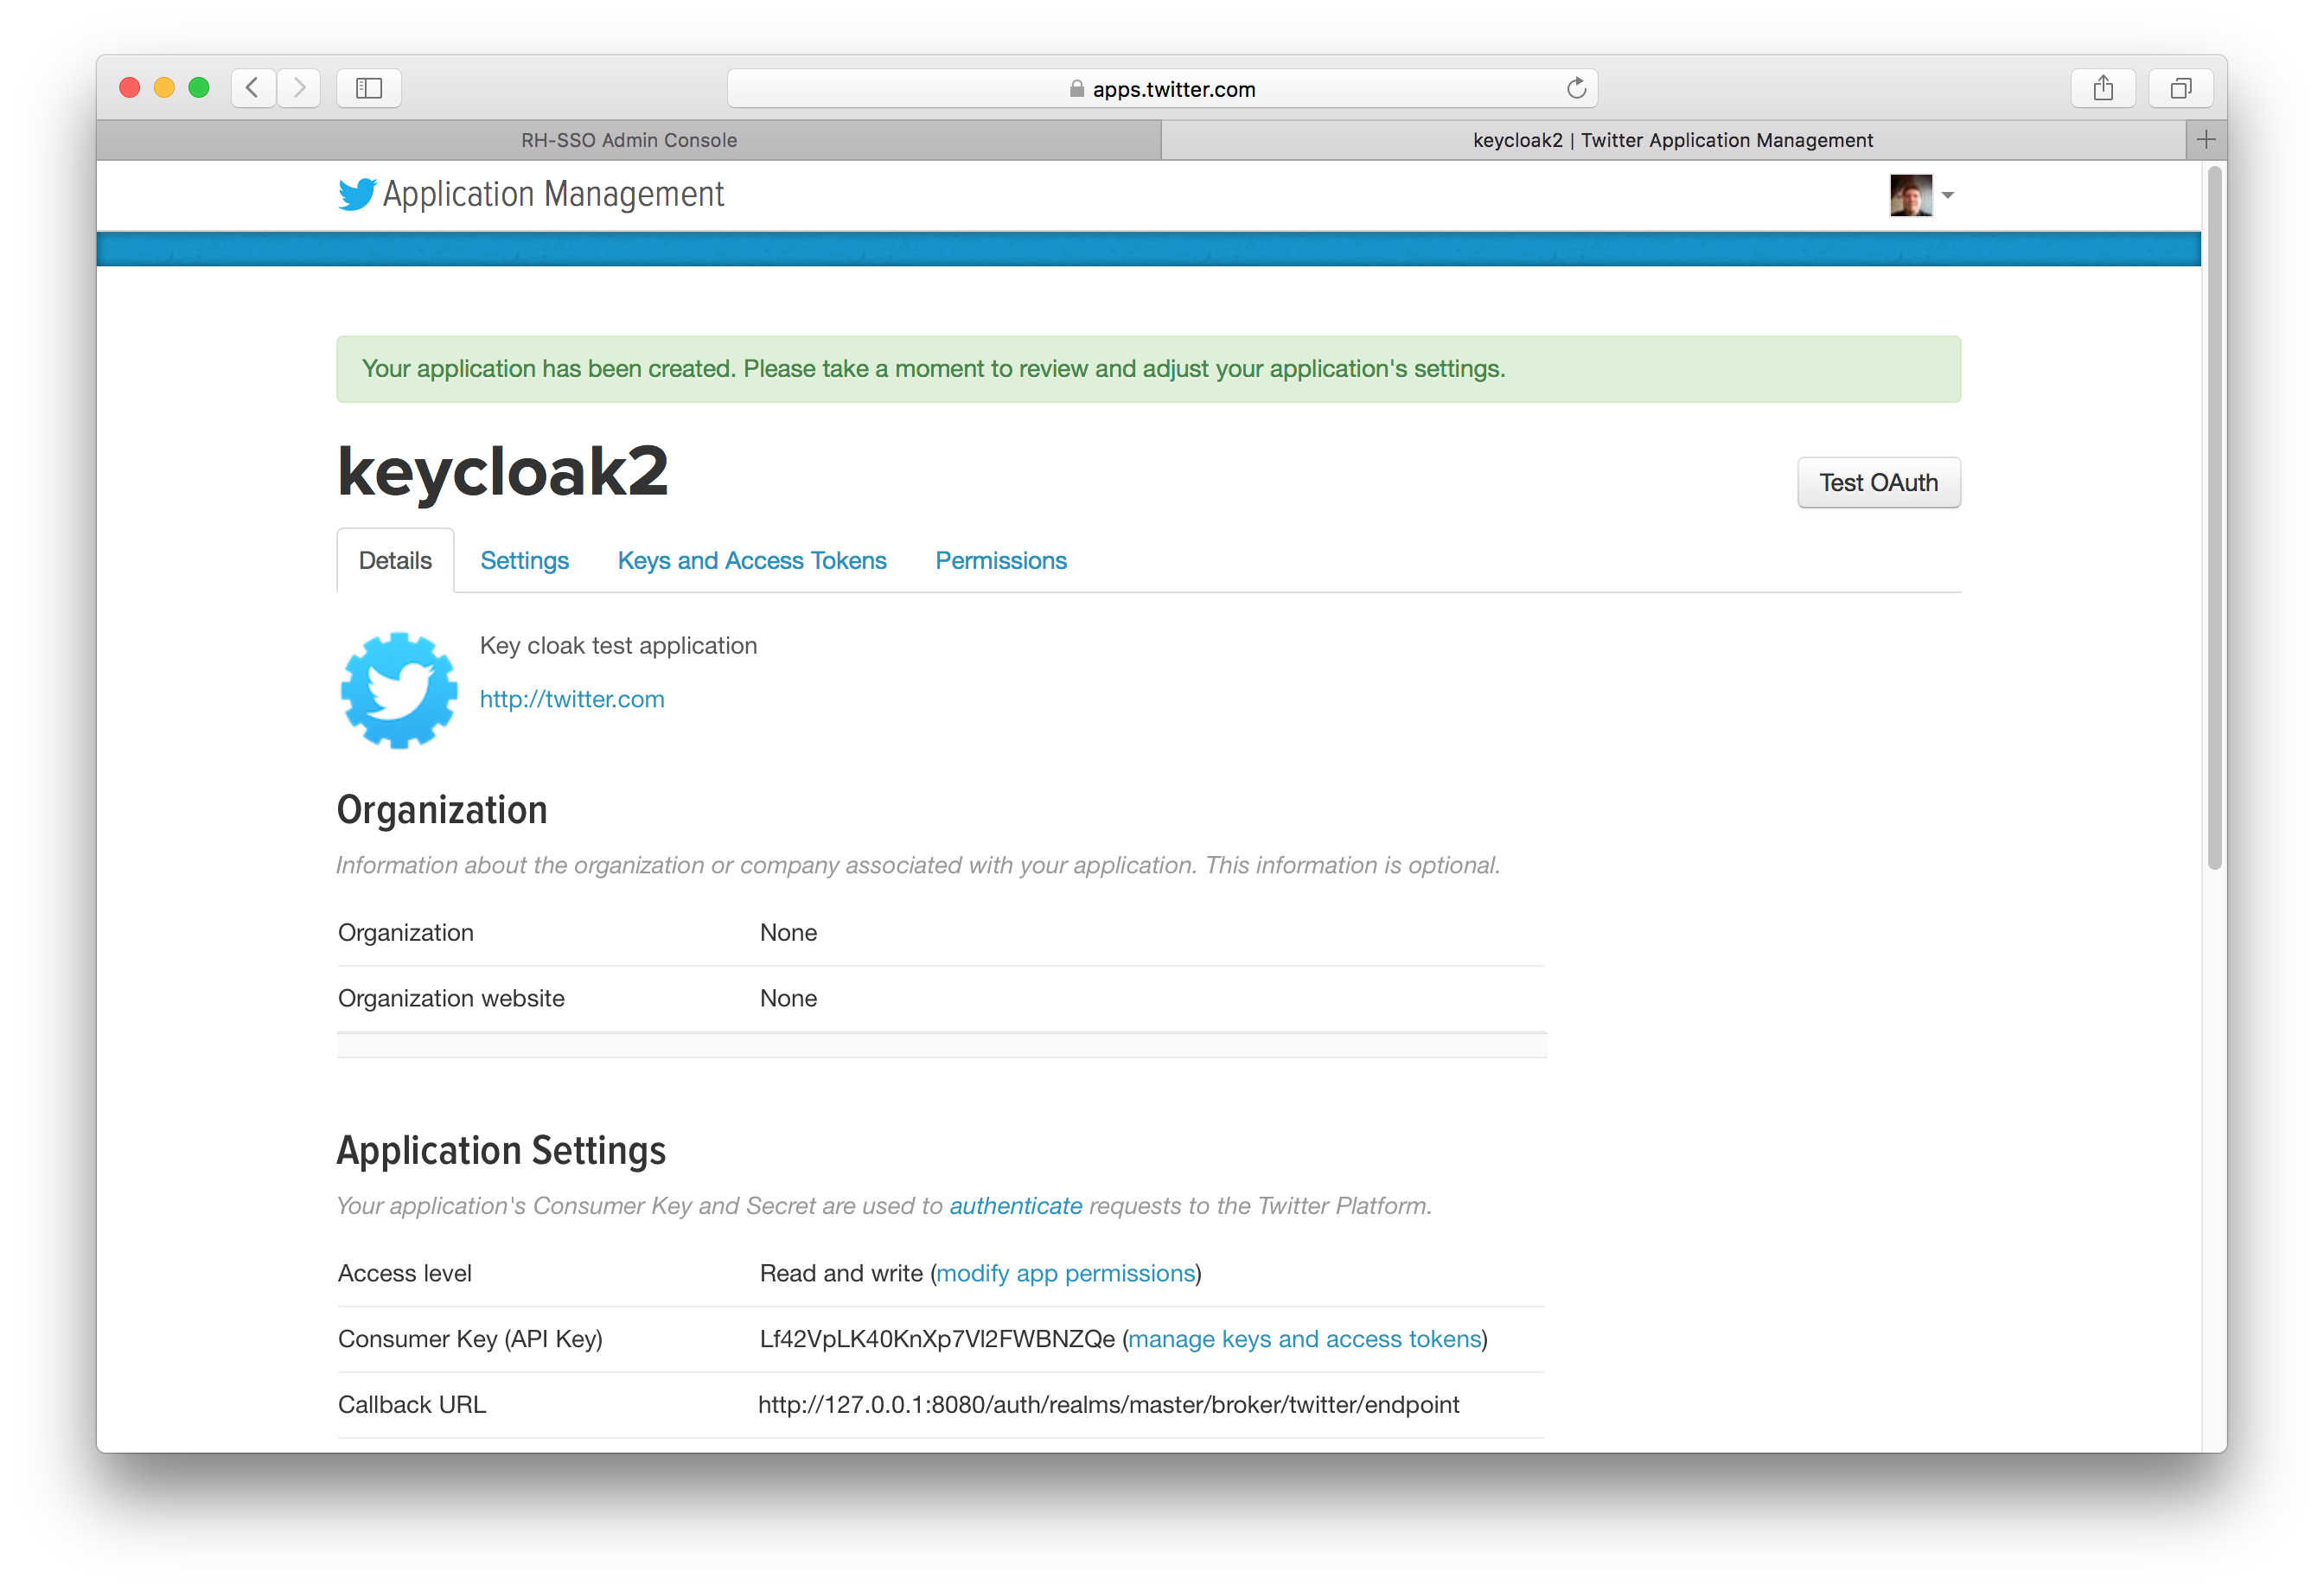
Next go to the Keys and Access Tokens tab.
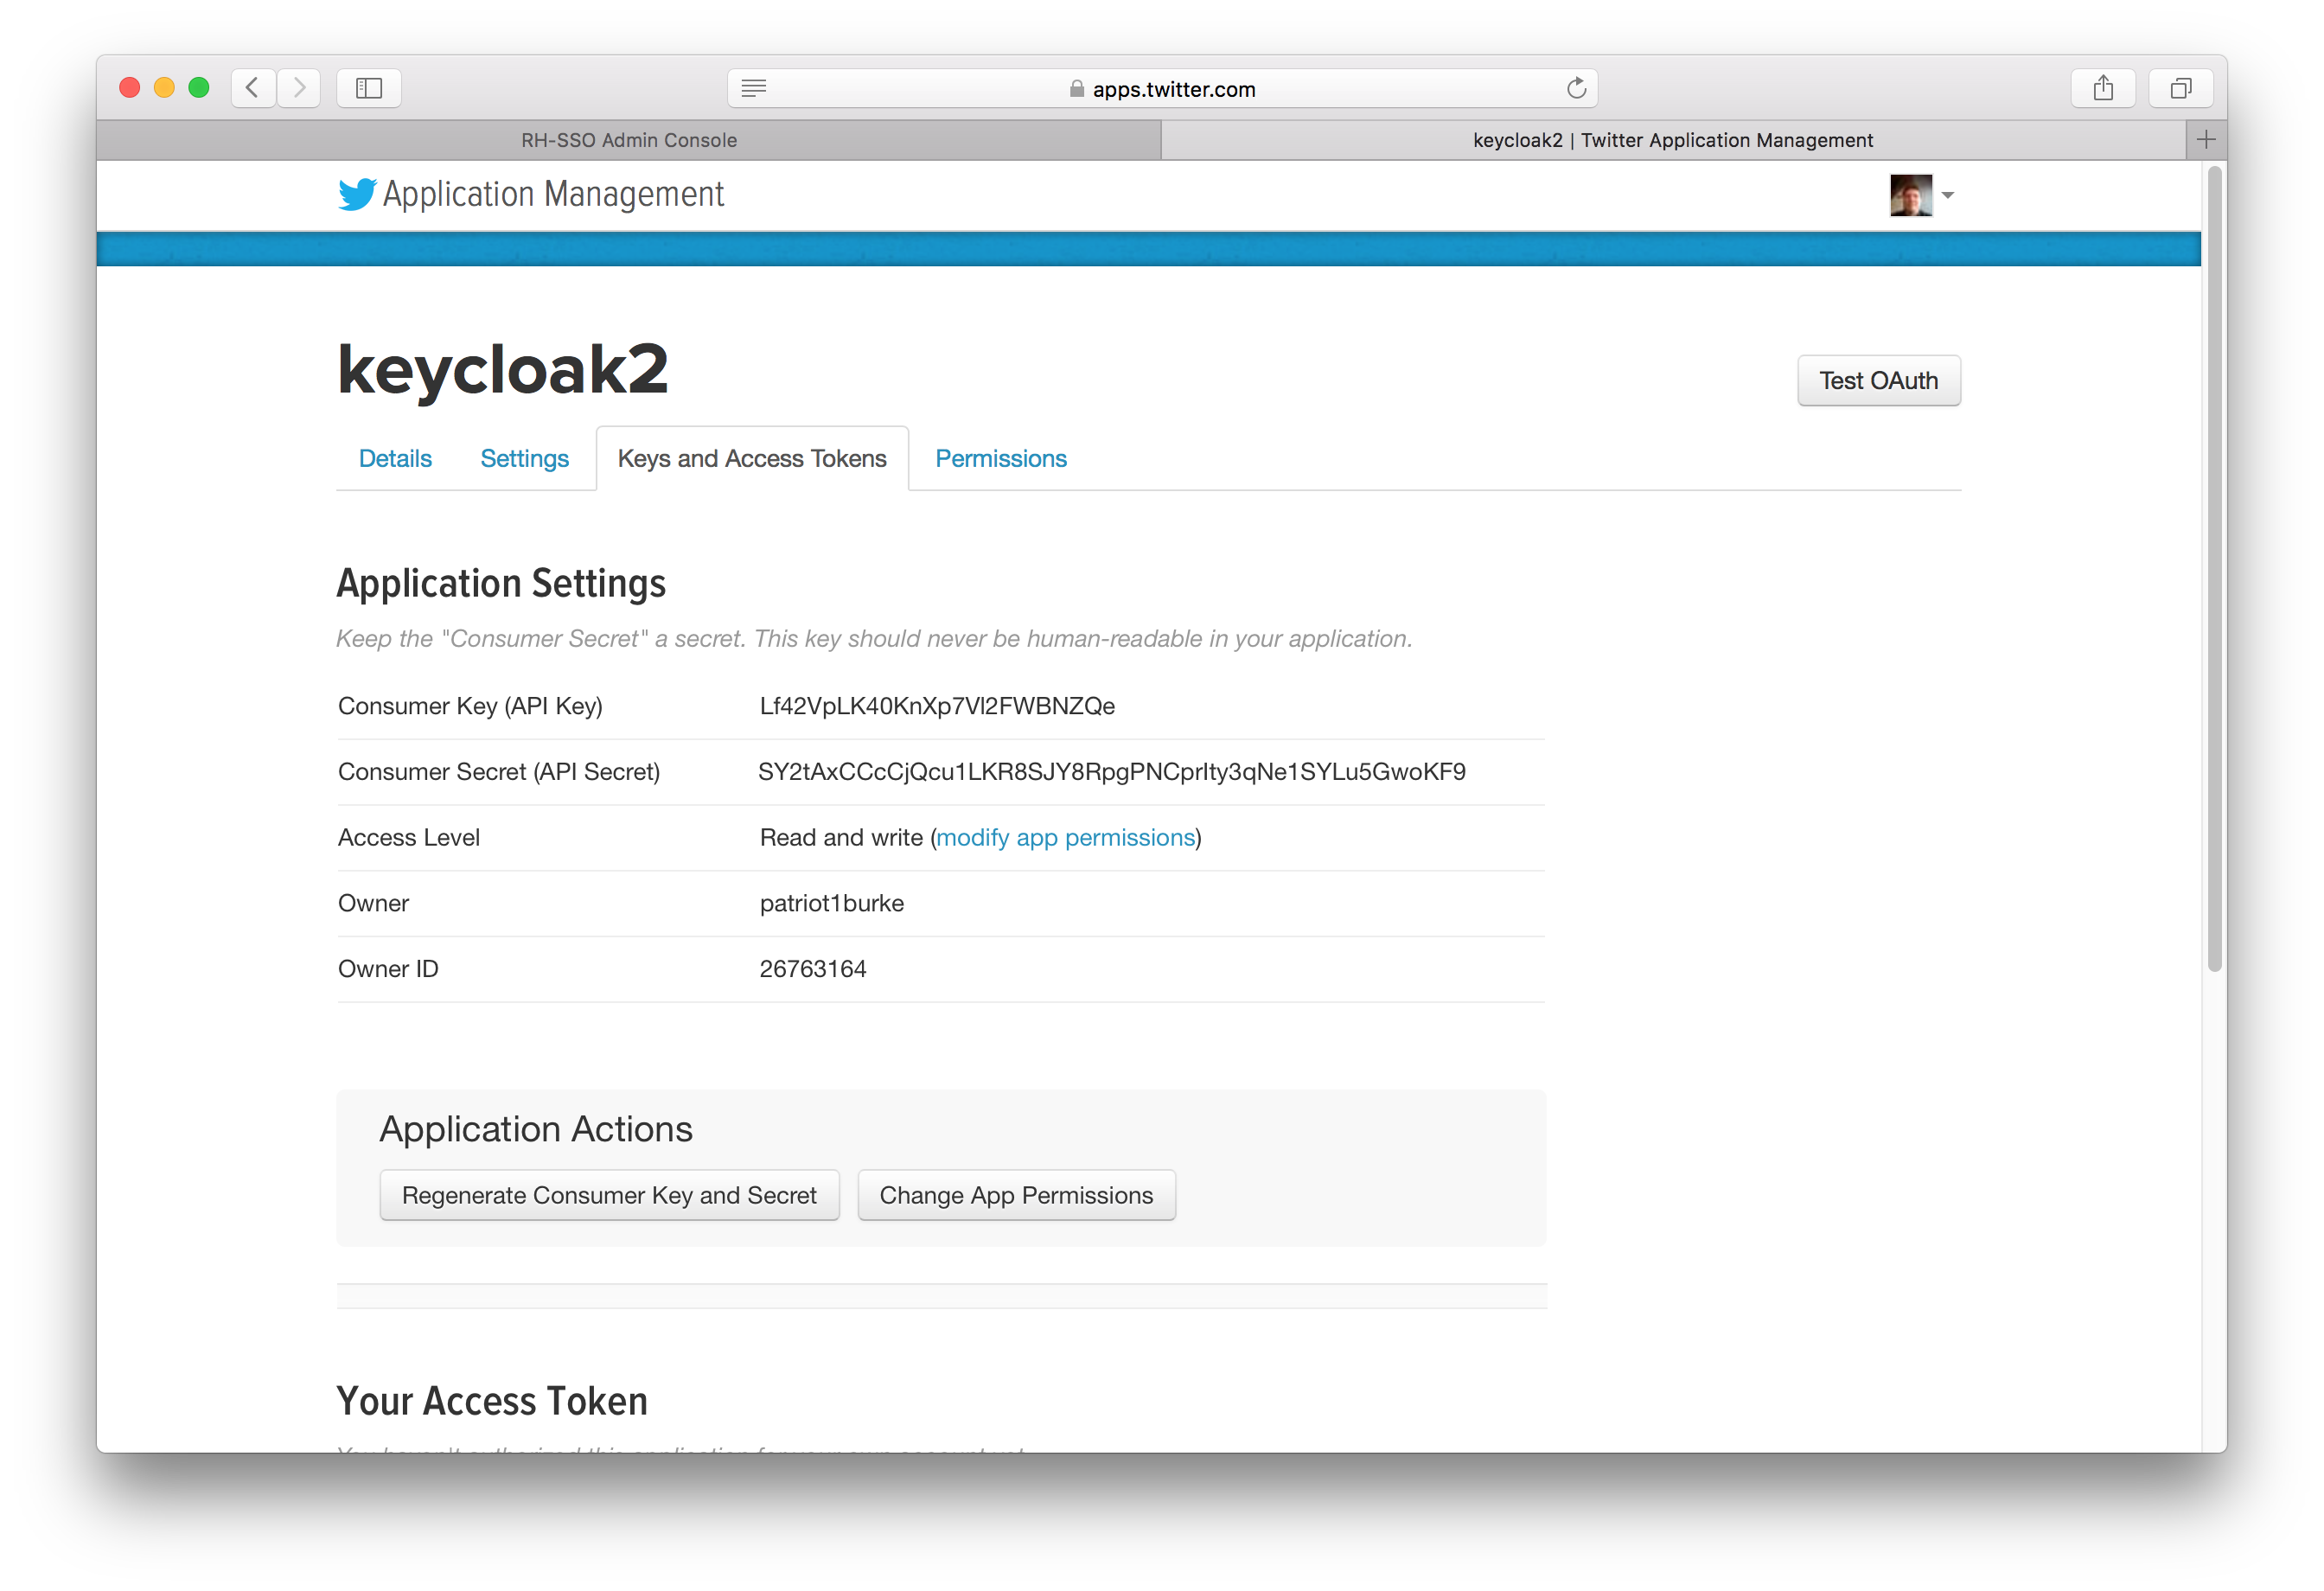
Finally, you will need to obtain the API Key and secret from this page and copy them back into the Client ID and Client Secret fields on the Keycloak Add identity provider page.