There are a number of steps you have to complete to be able to login to Google. First, go to the Identity Providers left menu item
and select Google from the Add provider drop down list. This will bring you to the Add identity provider page.
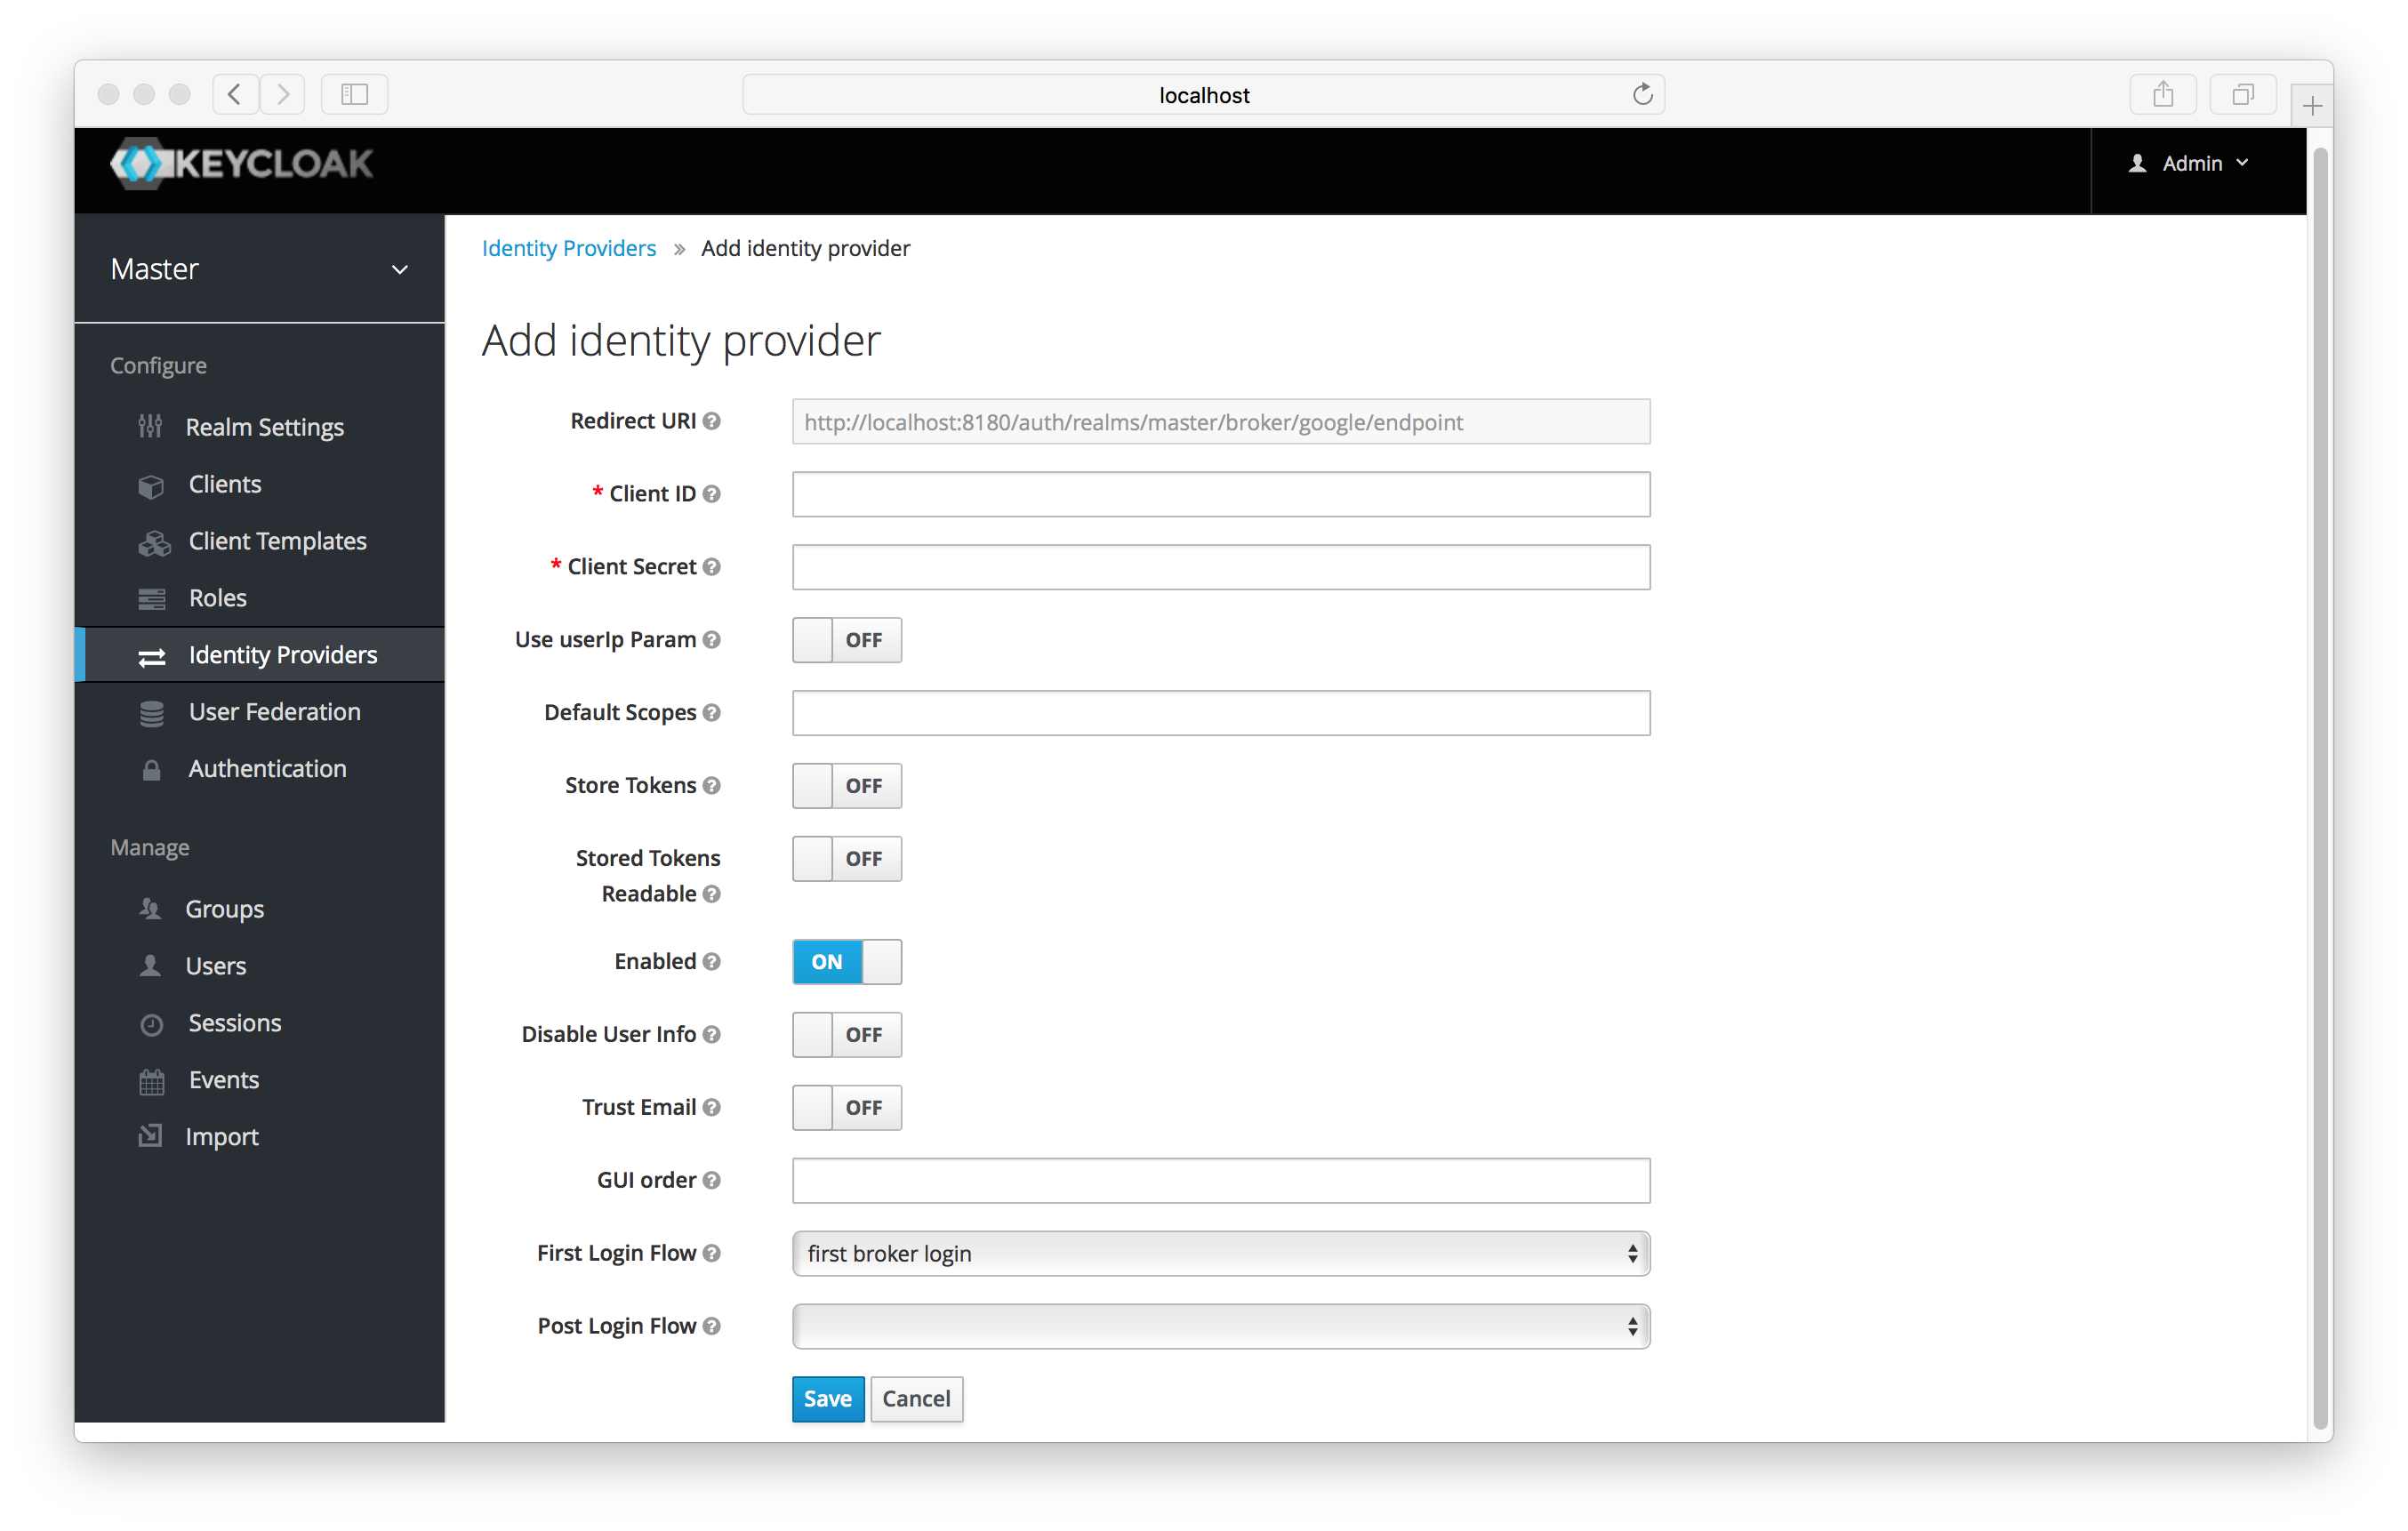
You can’t click save yet, as you’ll need to obtain a Client ID and Client Secret from Google. One piece of data you’ll need from this
page is the Redirect URI. You’ll have to provide that to Google when you register Keycloak as a client there, so
copy this URI to your clipboard.
To enable login with Google you first have to create a project and a client in the Google Developer Console. Then you need to copy the client id and secret into the Keycloak Admin Console.
|
Note
|
Google often changes the look and feel of the Google Developer Console, so these directions might not always be up to date and the configuration steps might be slightly different. |
Let’s see first how to create a project with Google.
Log in to the Google Developer Console.
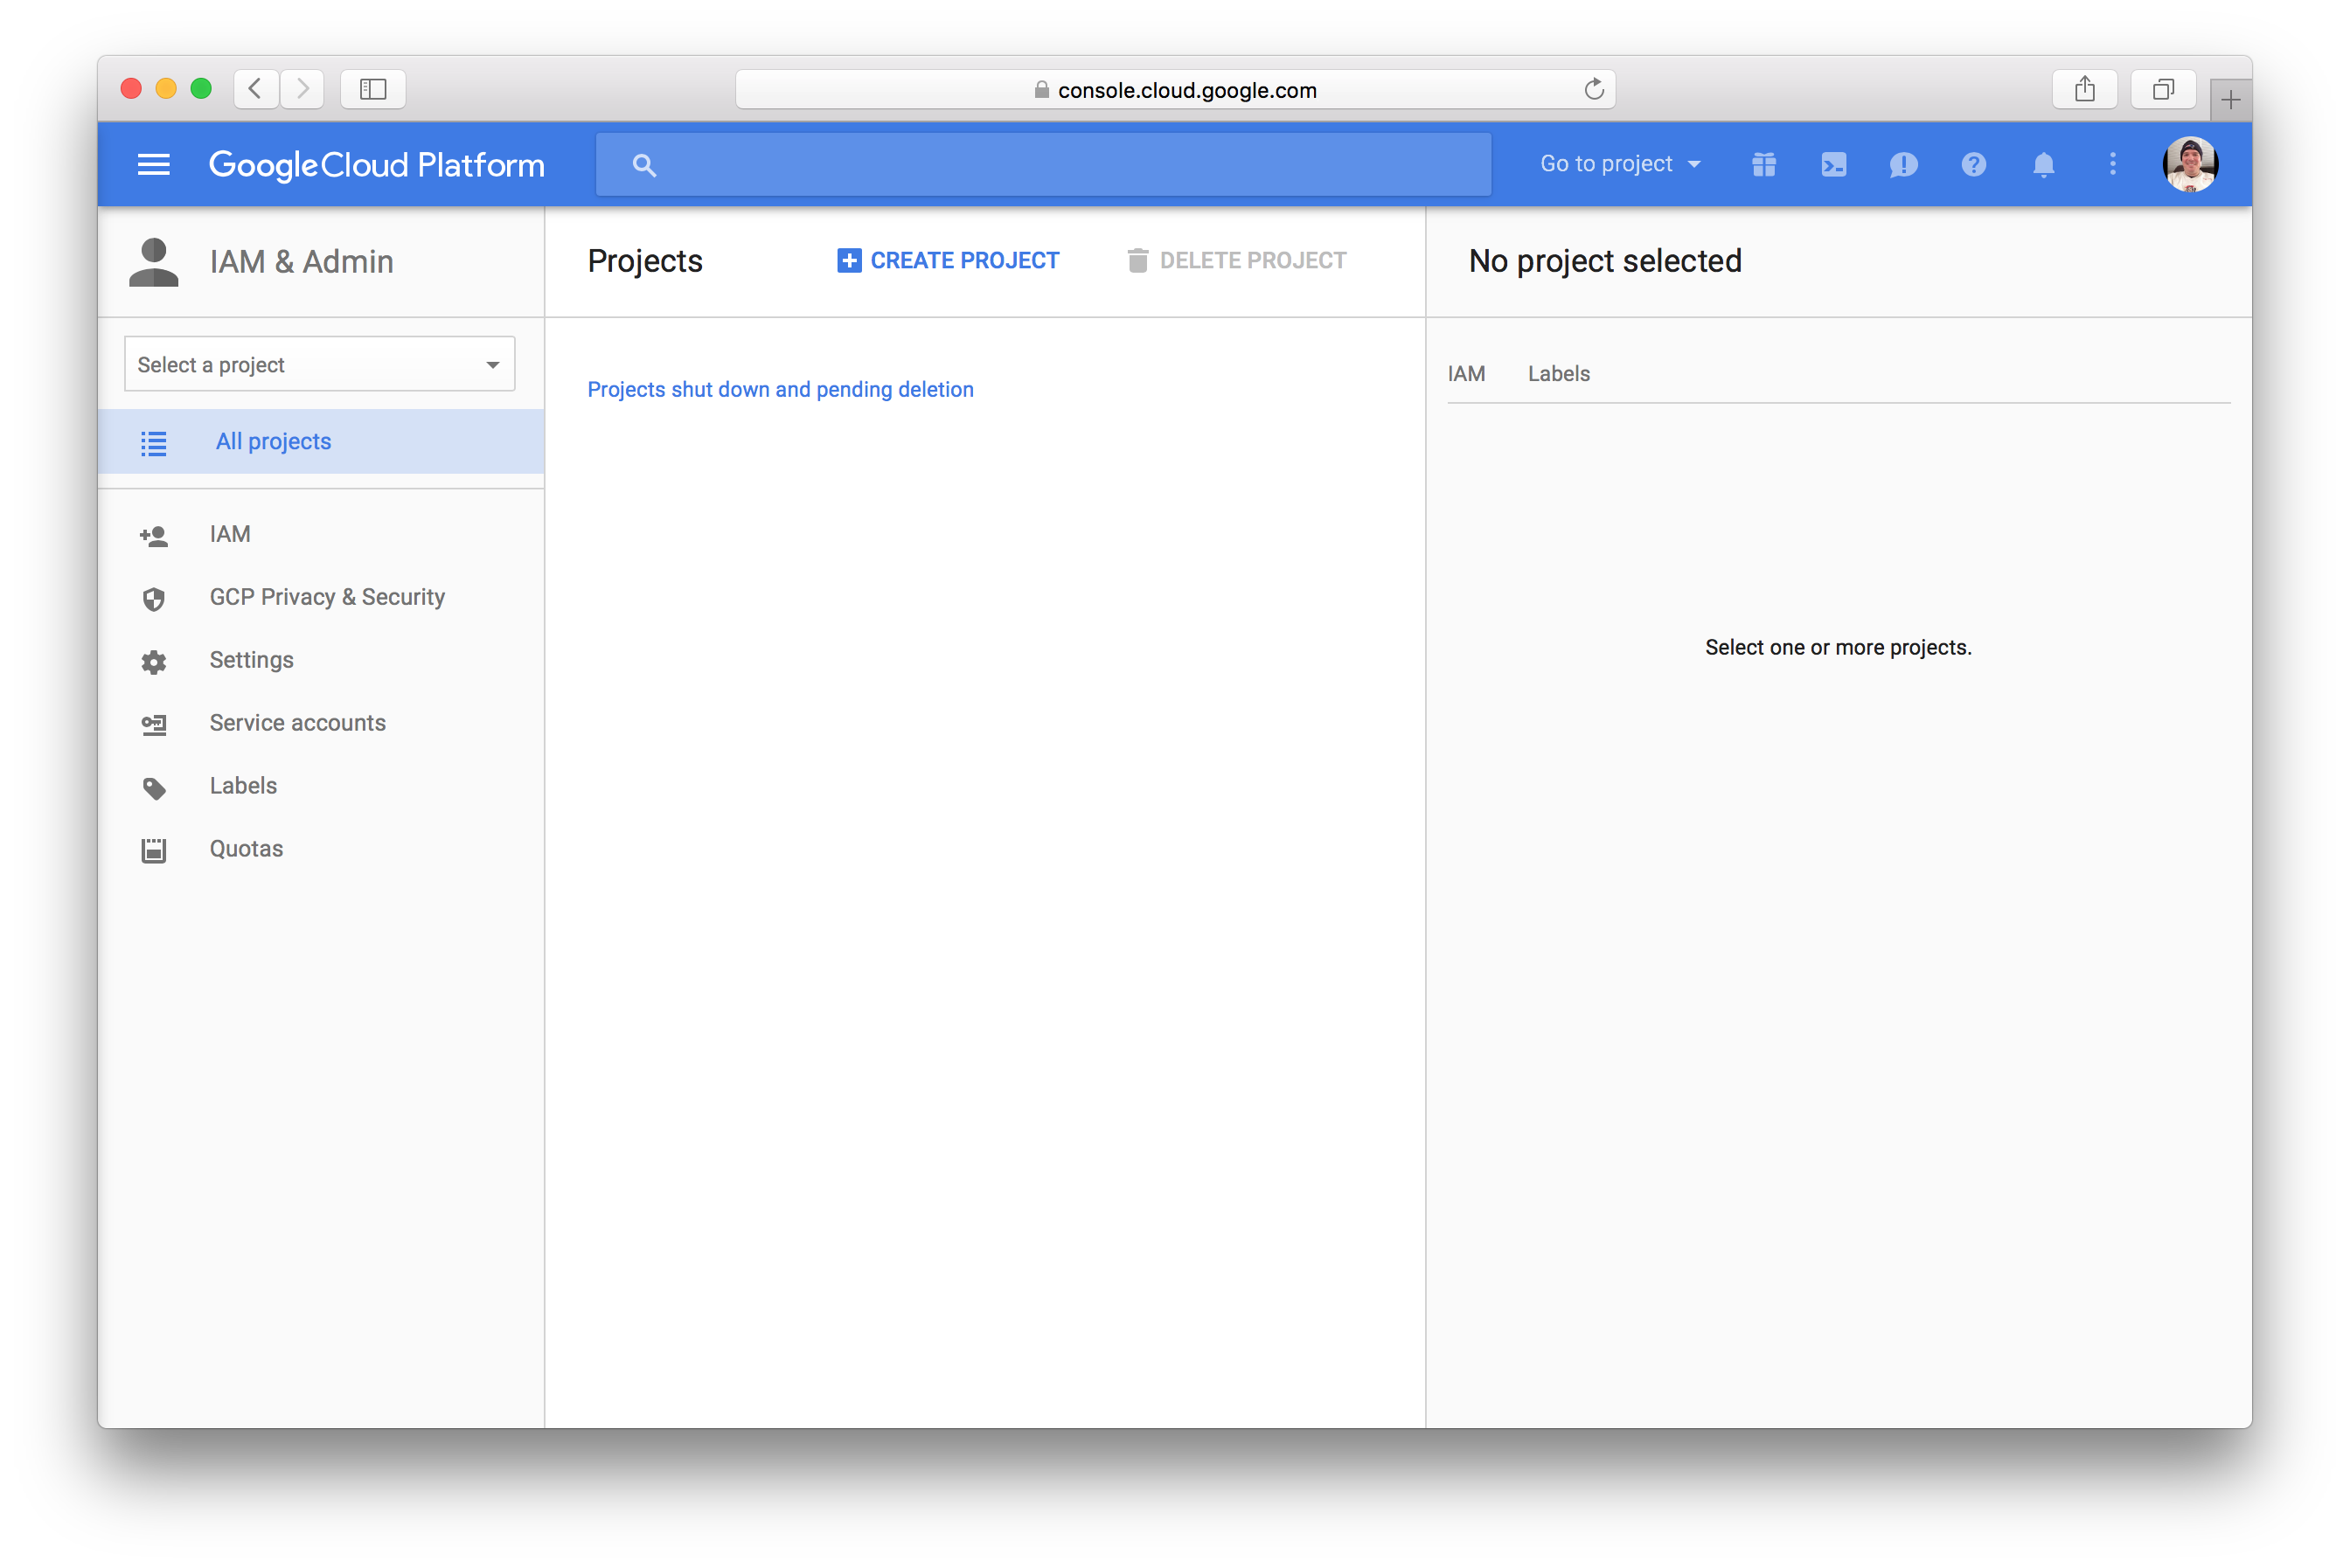
Click the Create Project button.
Use any value for Project name and Project ID you want, then click the Create button.
Wait for the project to be created (this may take a while). Once created you will be brought to the project’s dashboard.
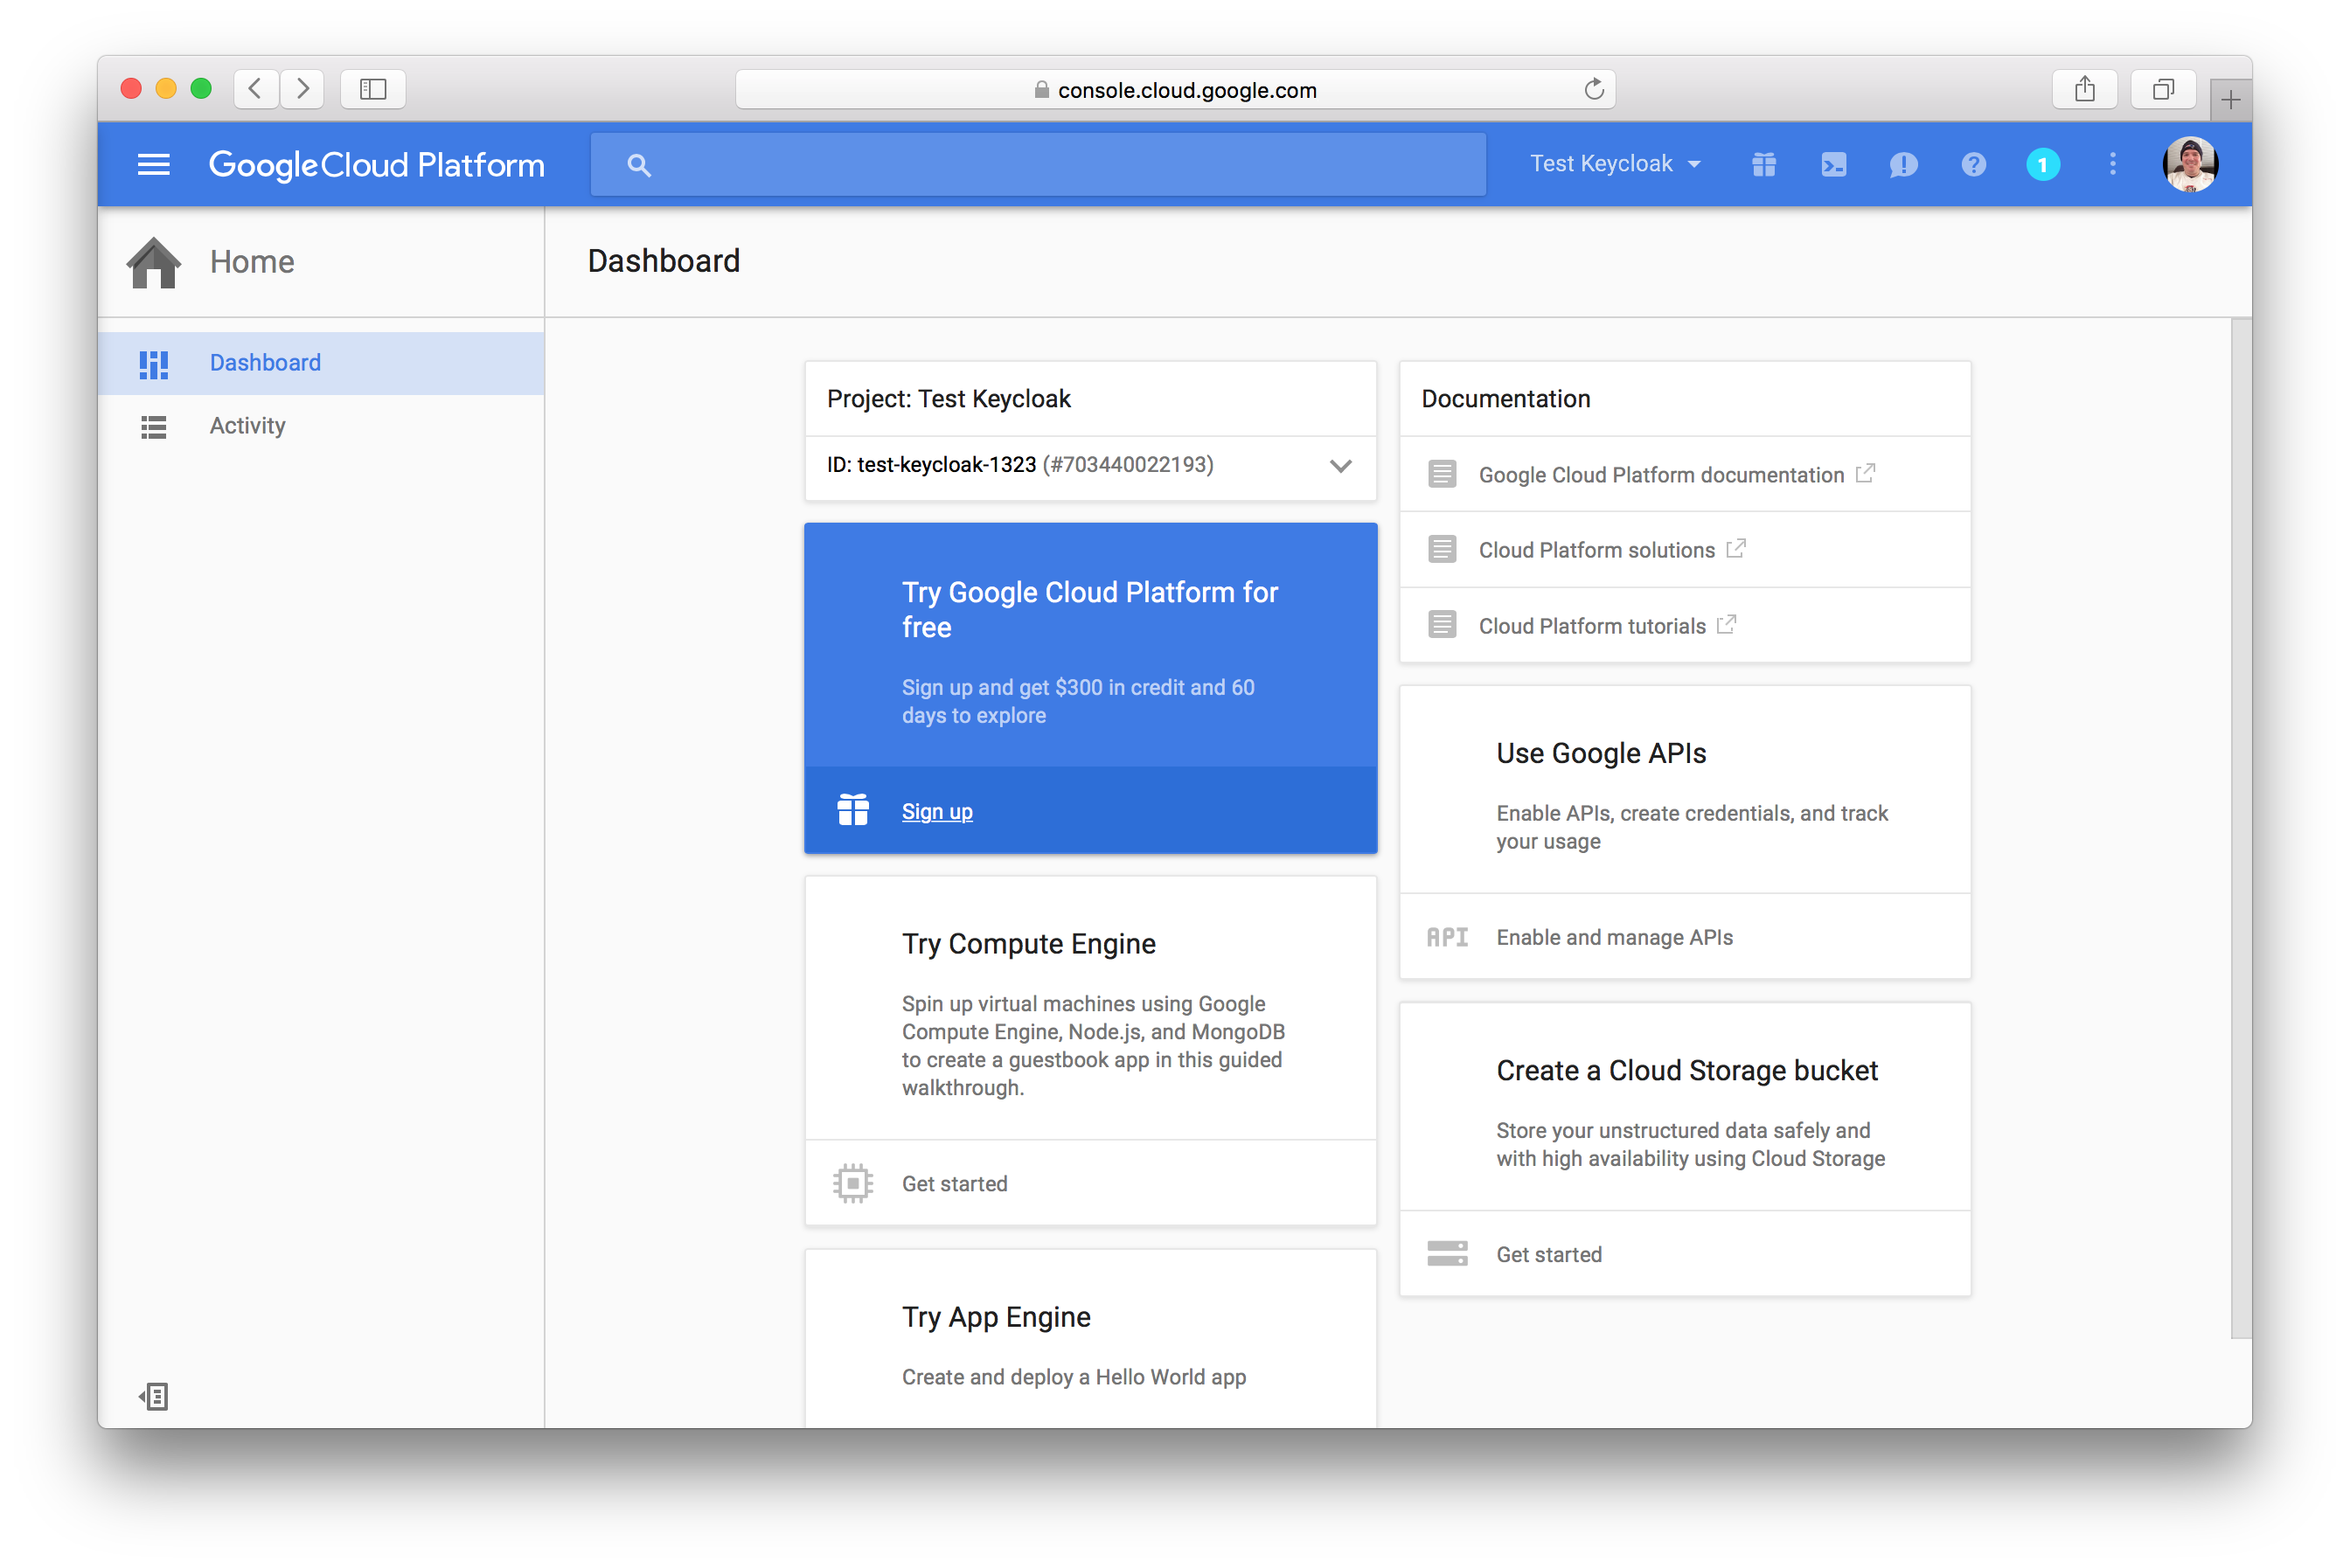
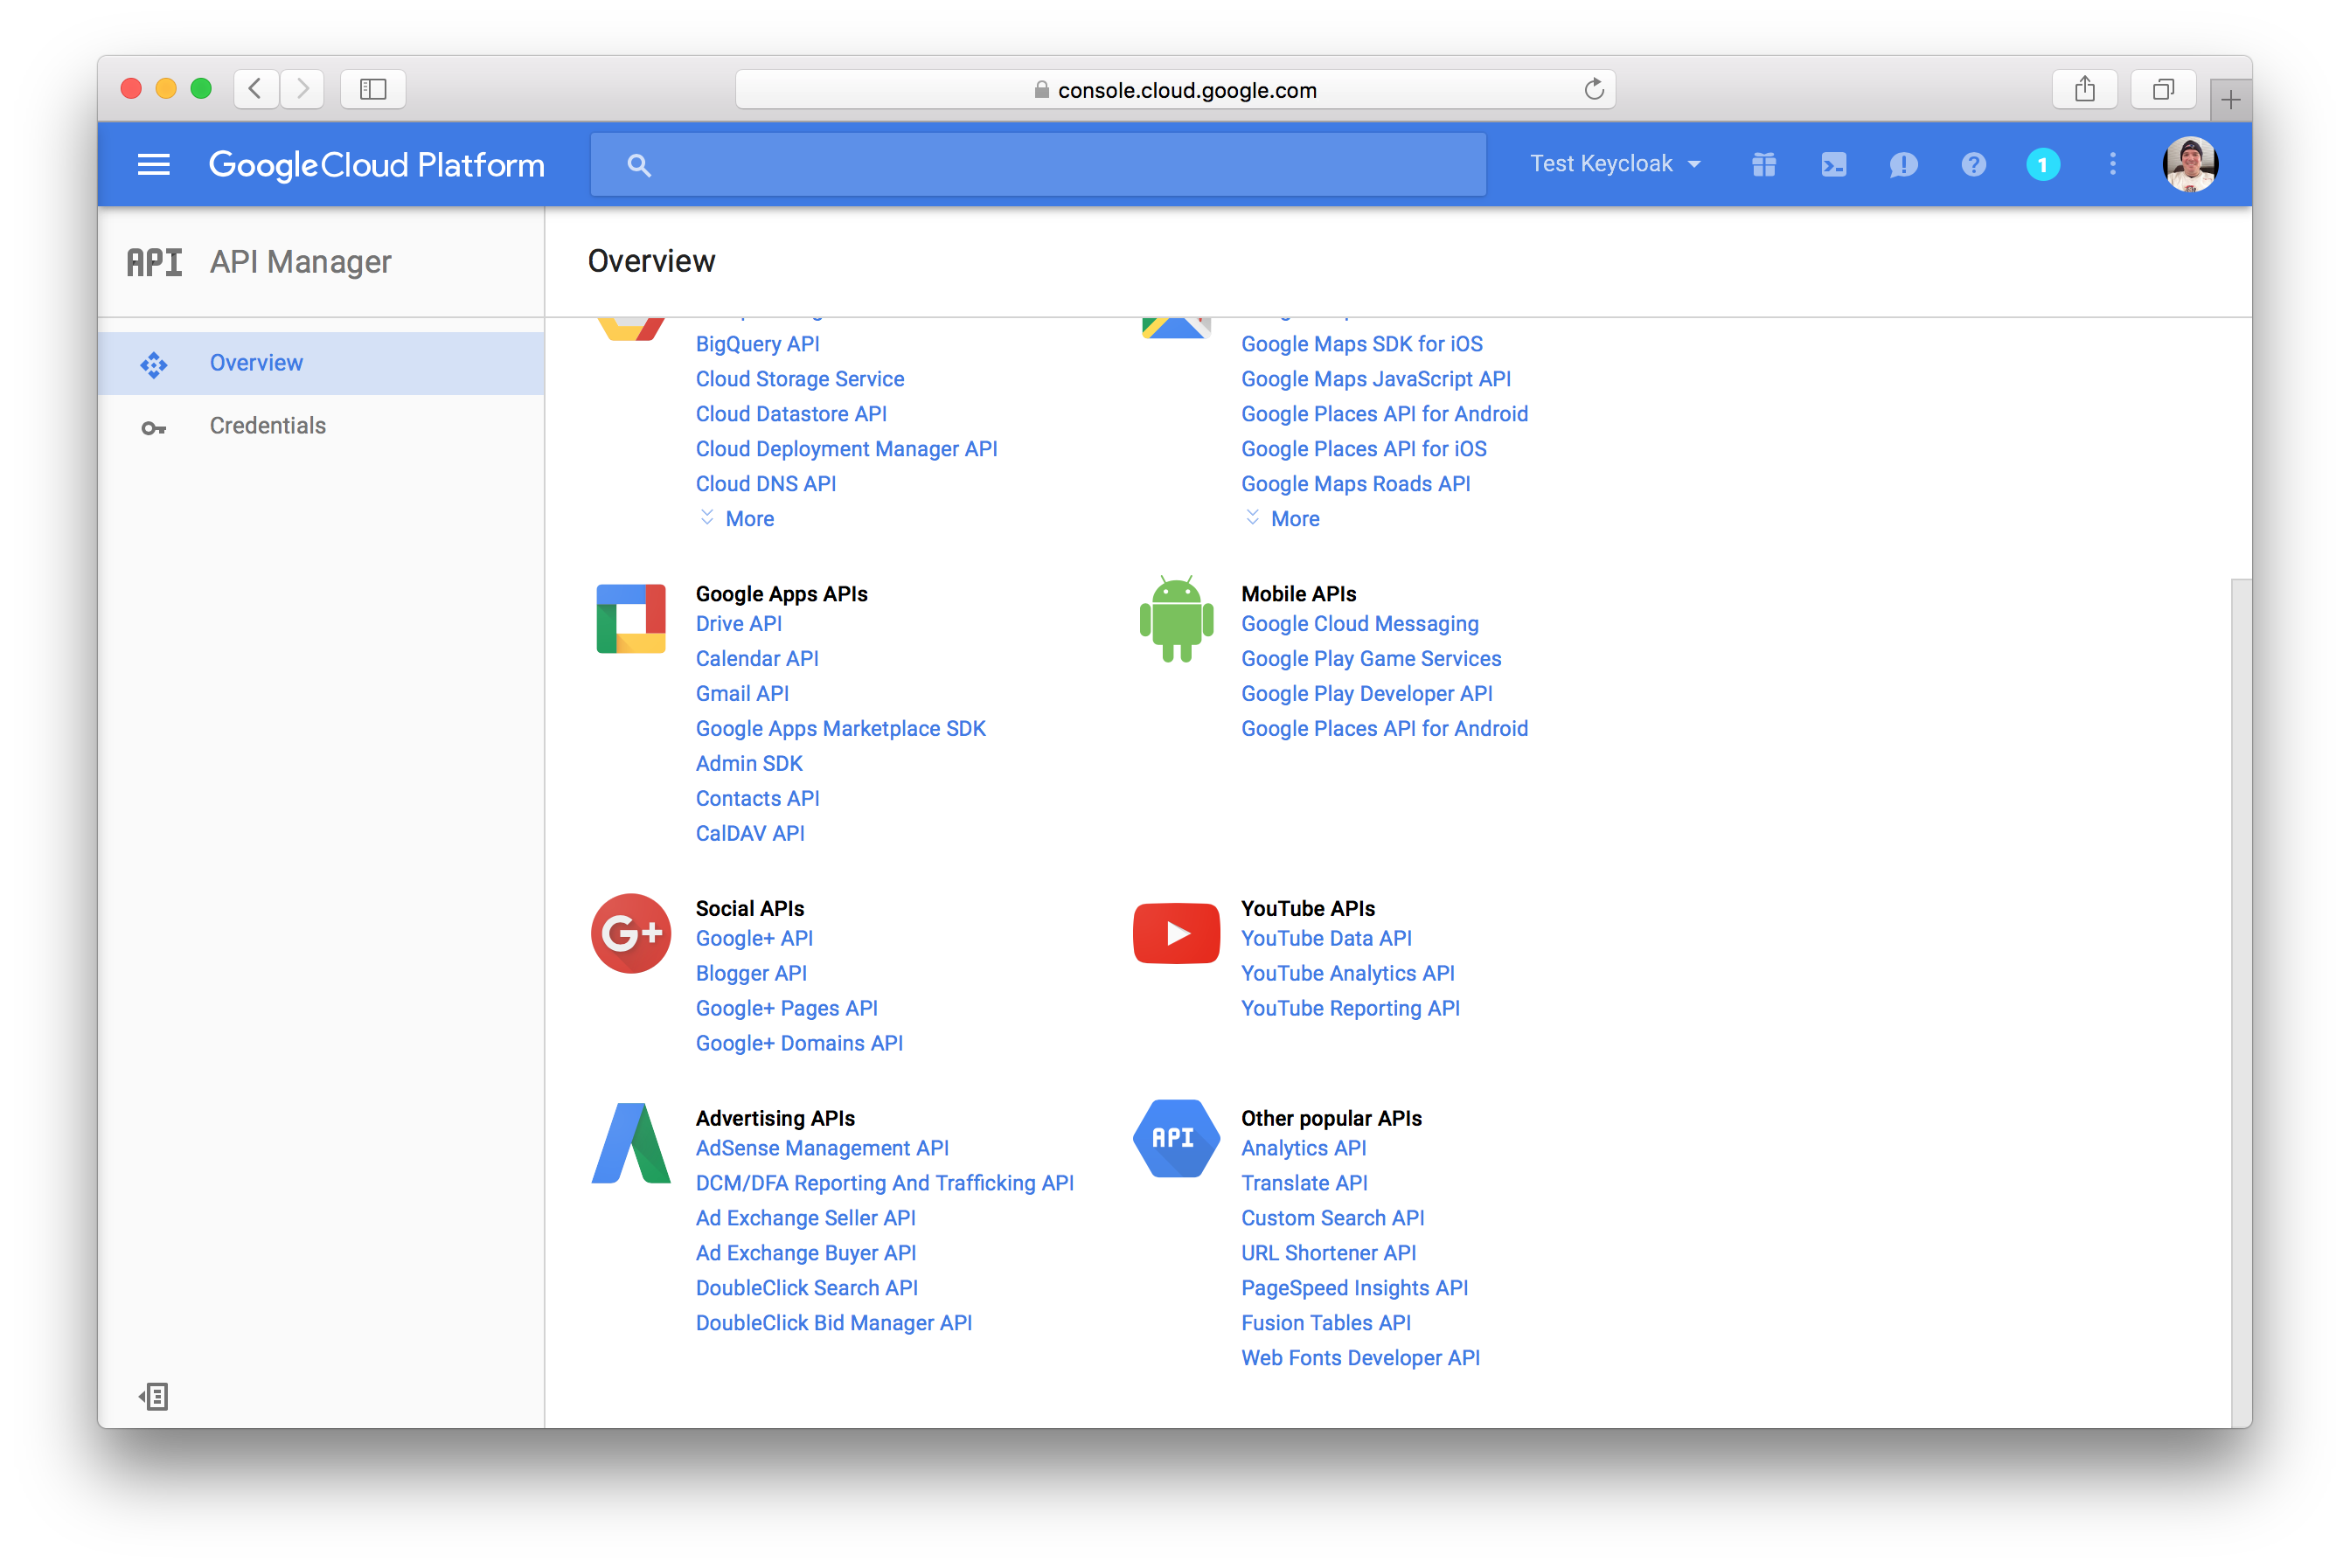
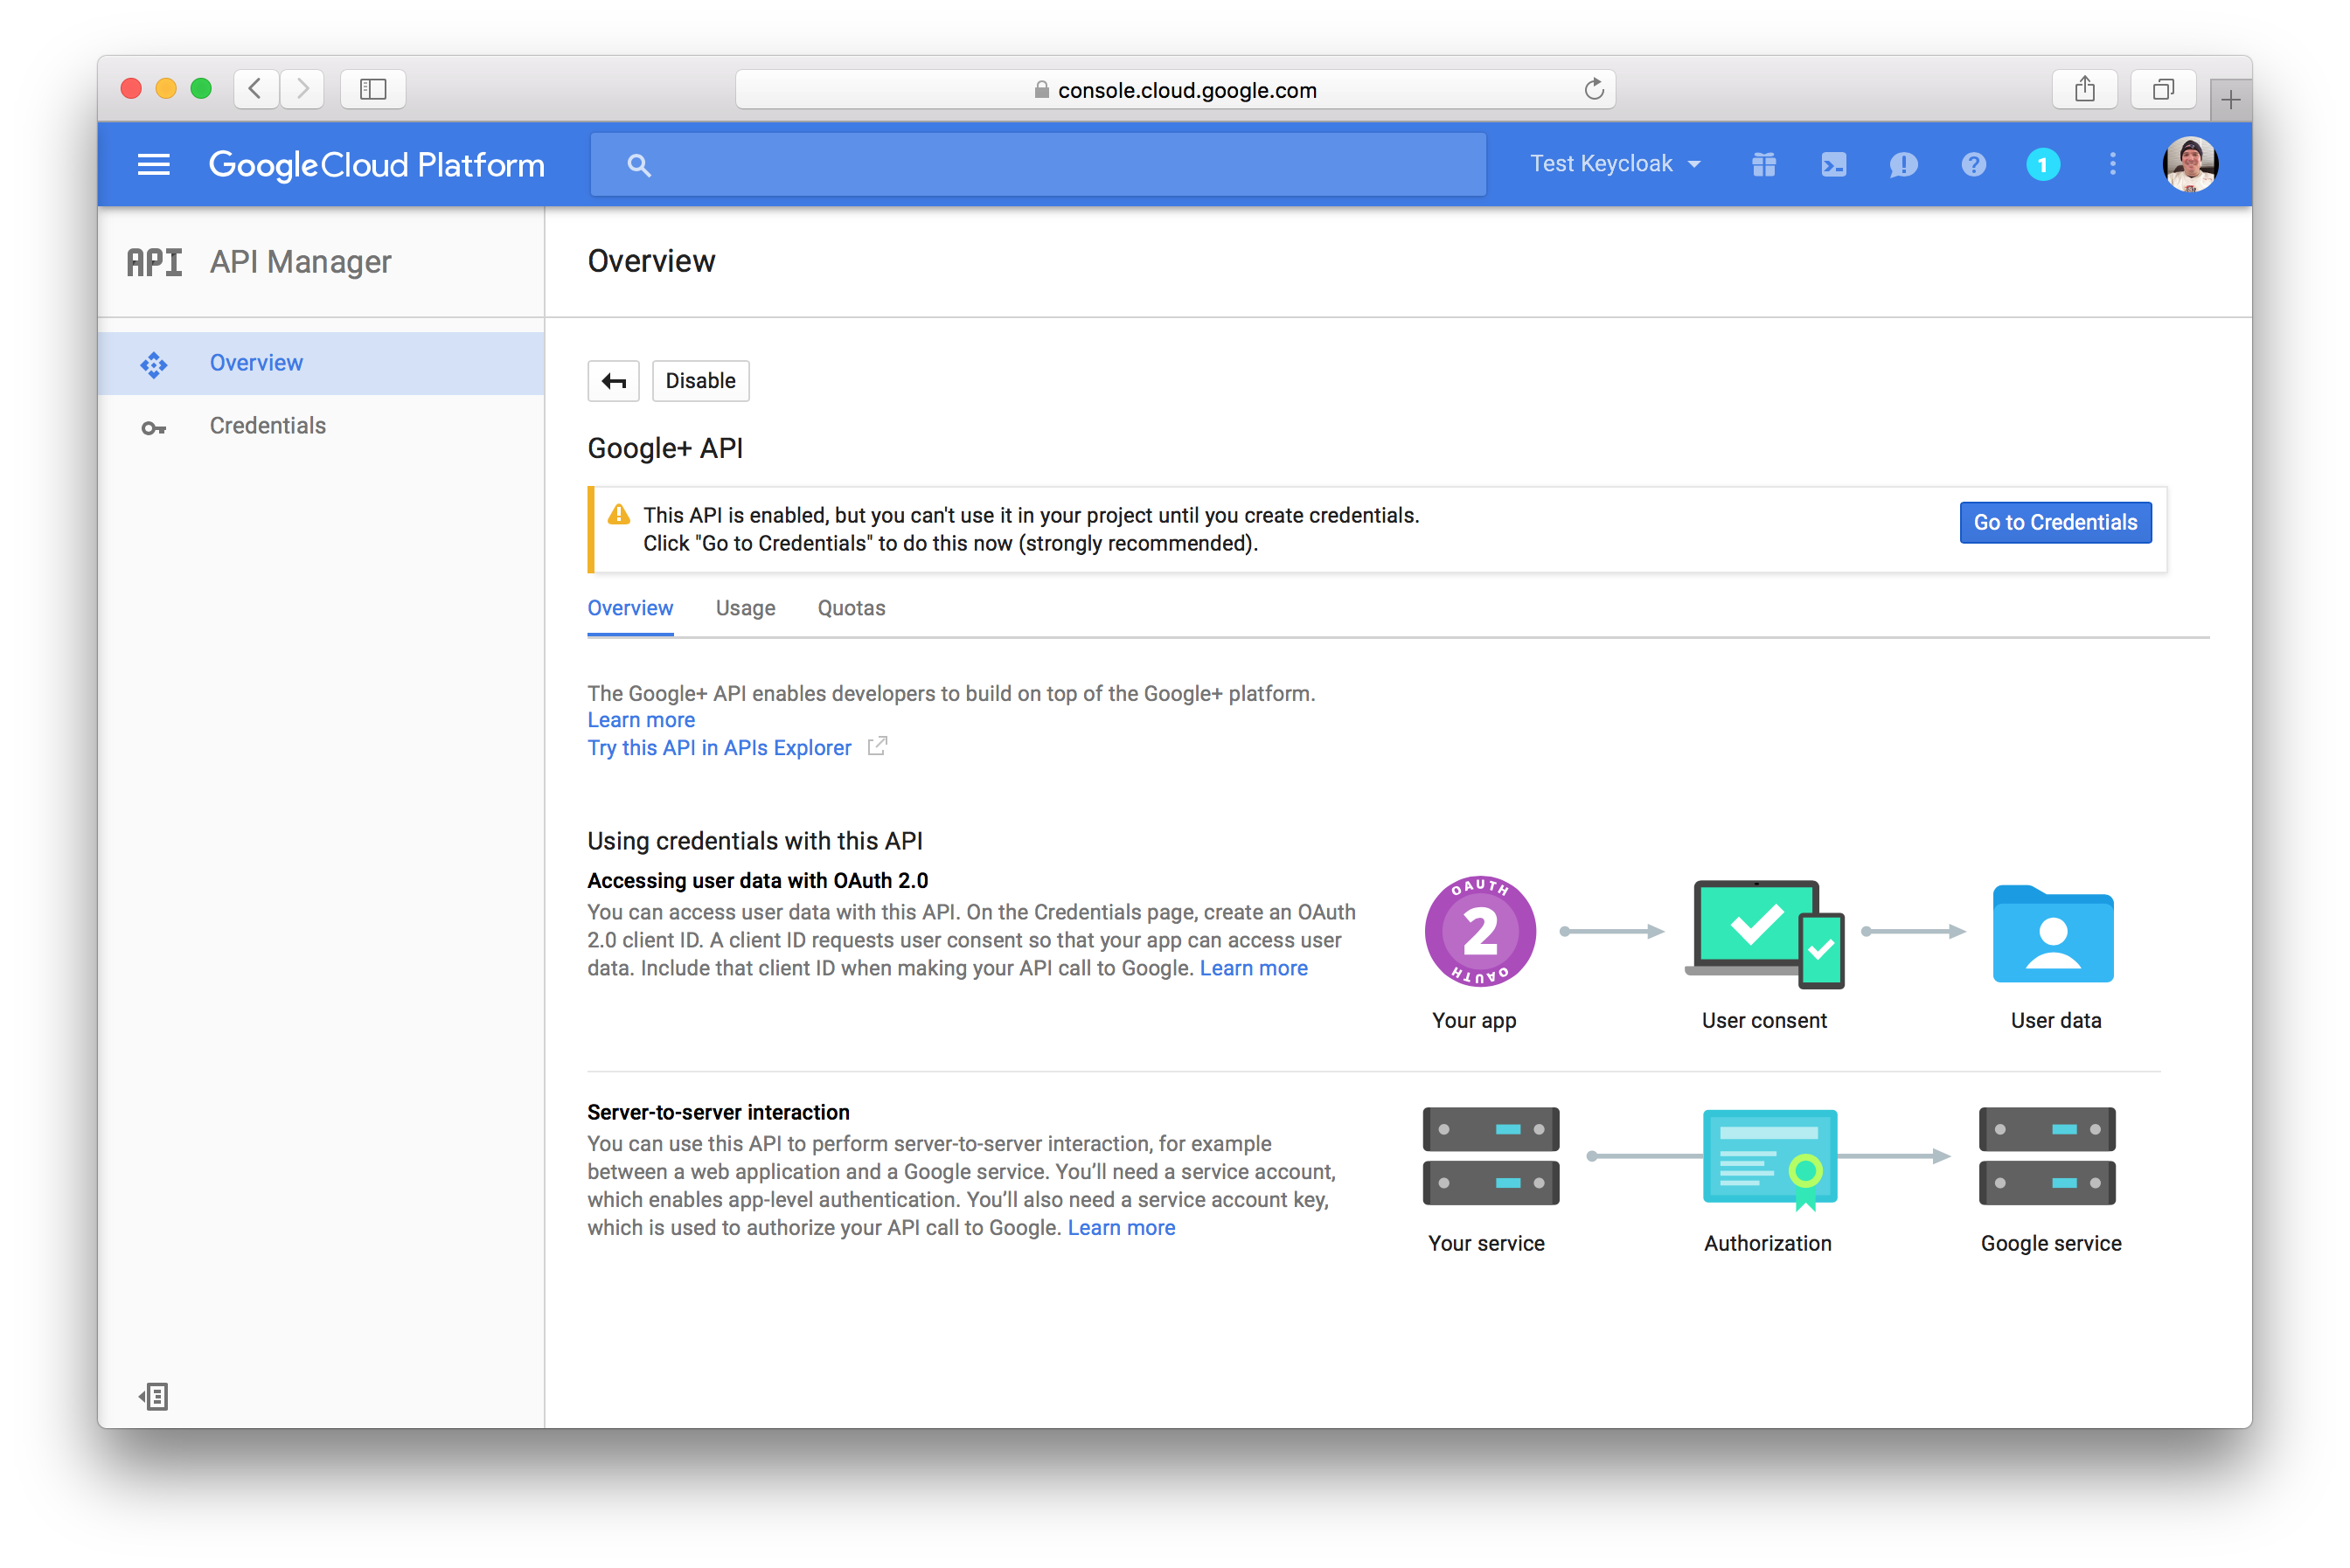
To be able to retrieve the profiles of Google users, you need to turn on the Google+ APIs. Select the Enable and manage APIs
and click the Google+ API link.
Click the Enable button on this page. You will get a message that you must create the credentials of your project.
So click the Go to Credentials button.
You will then be brought to the credentials page.
|
Note
|
If you logout in the middle of this, there is a menu in the top left hand corner. Select API Manager and it
will bring you to your desired screen.
|
You will then be asked to specify what credentials you need and what type of data you will be accessing.
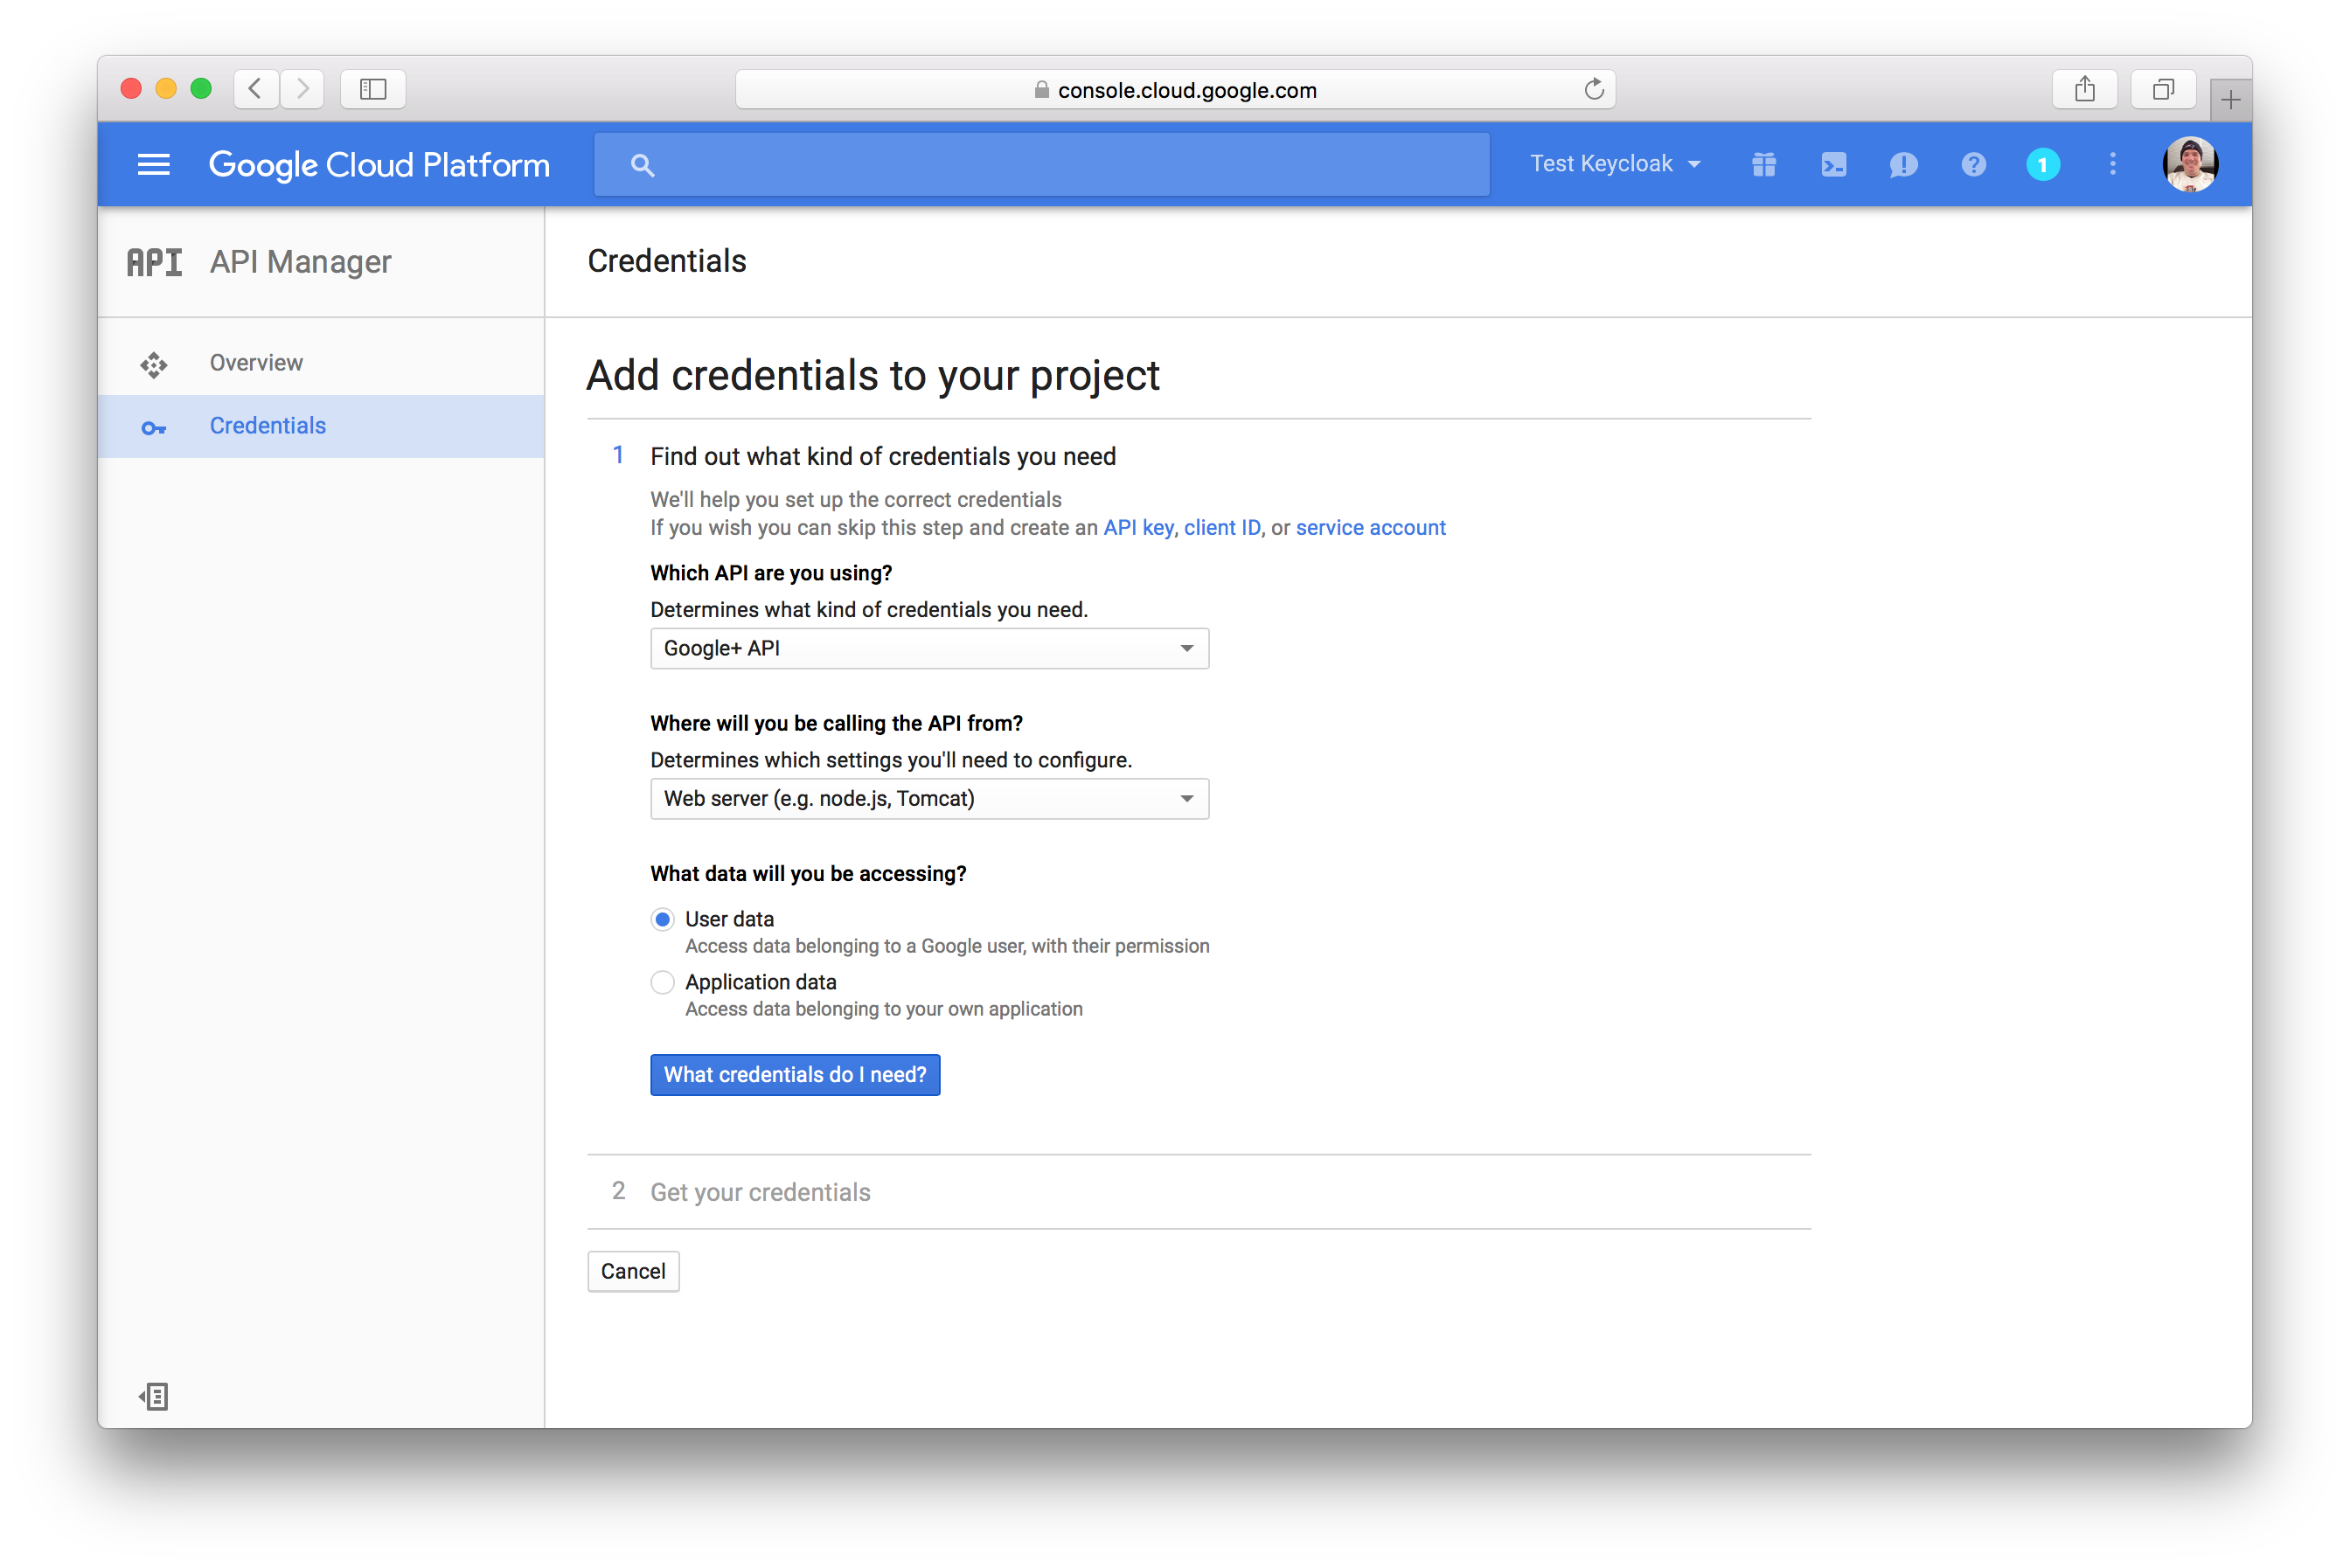
Select Web server and User data and click the What credentials do I need? button.
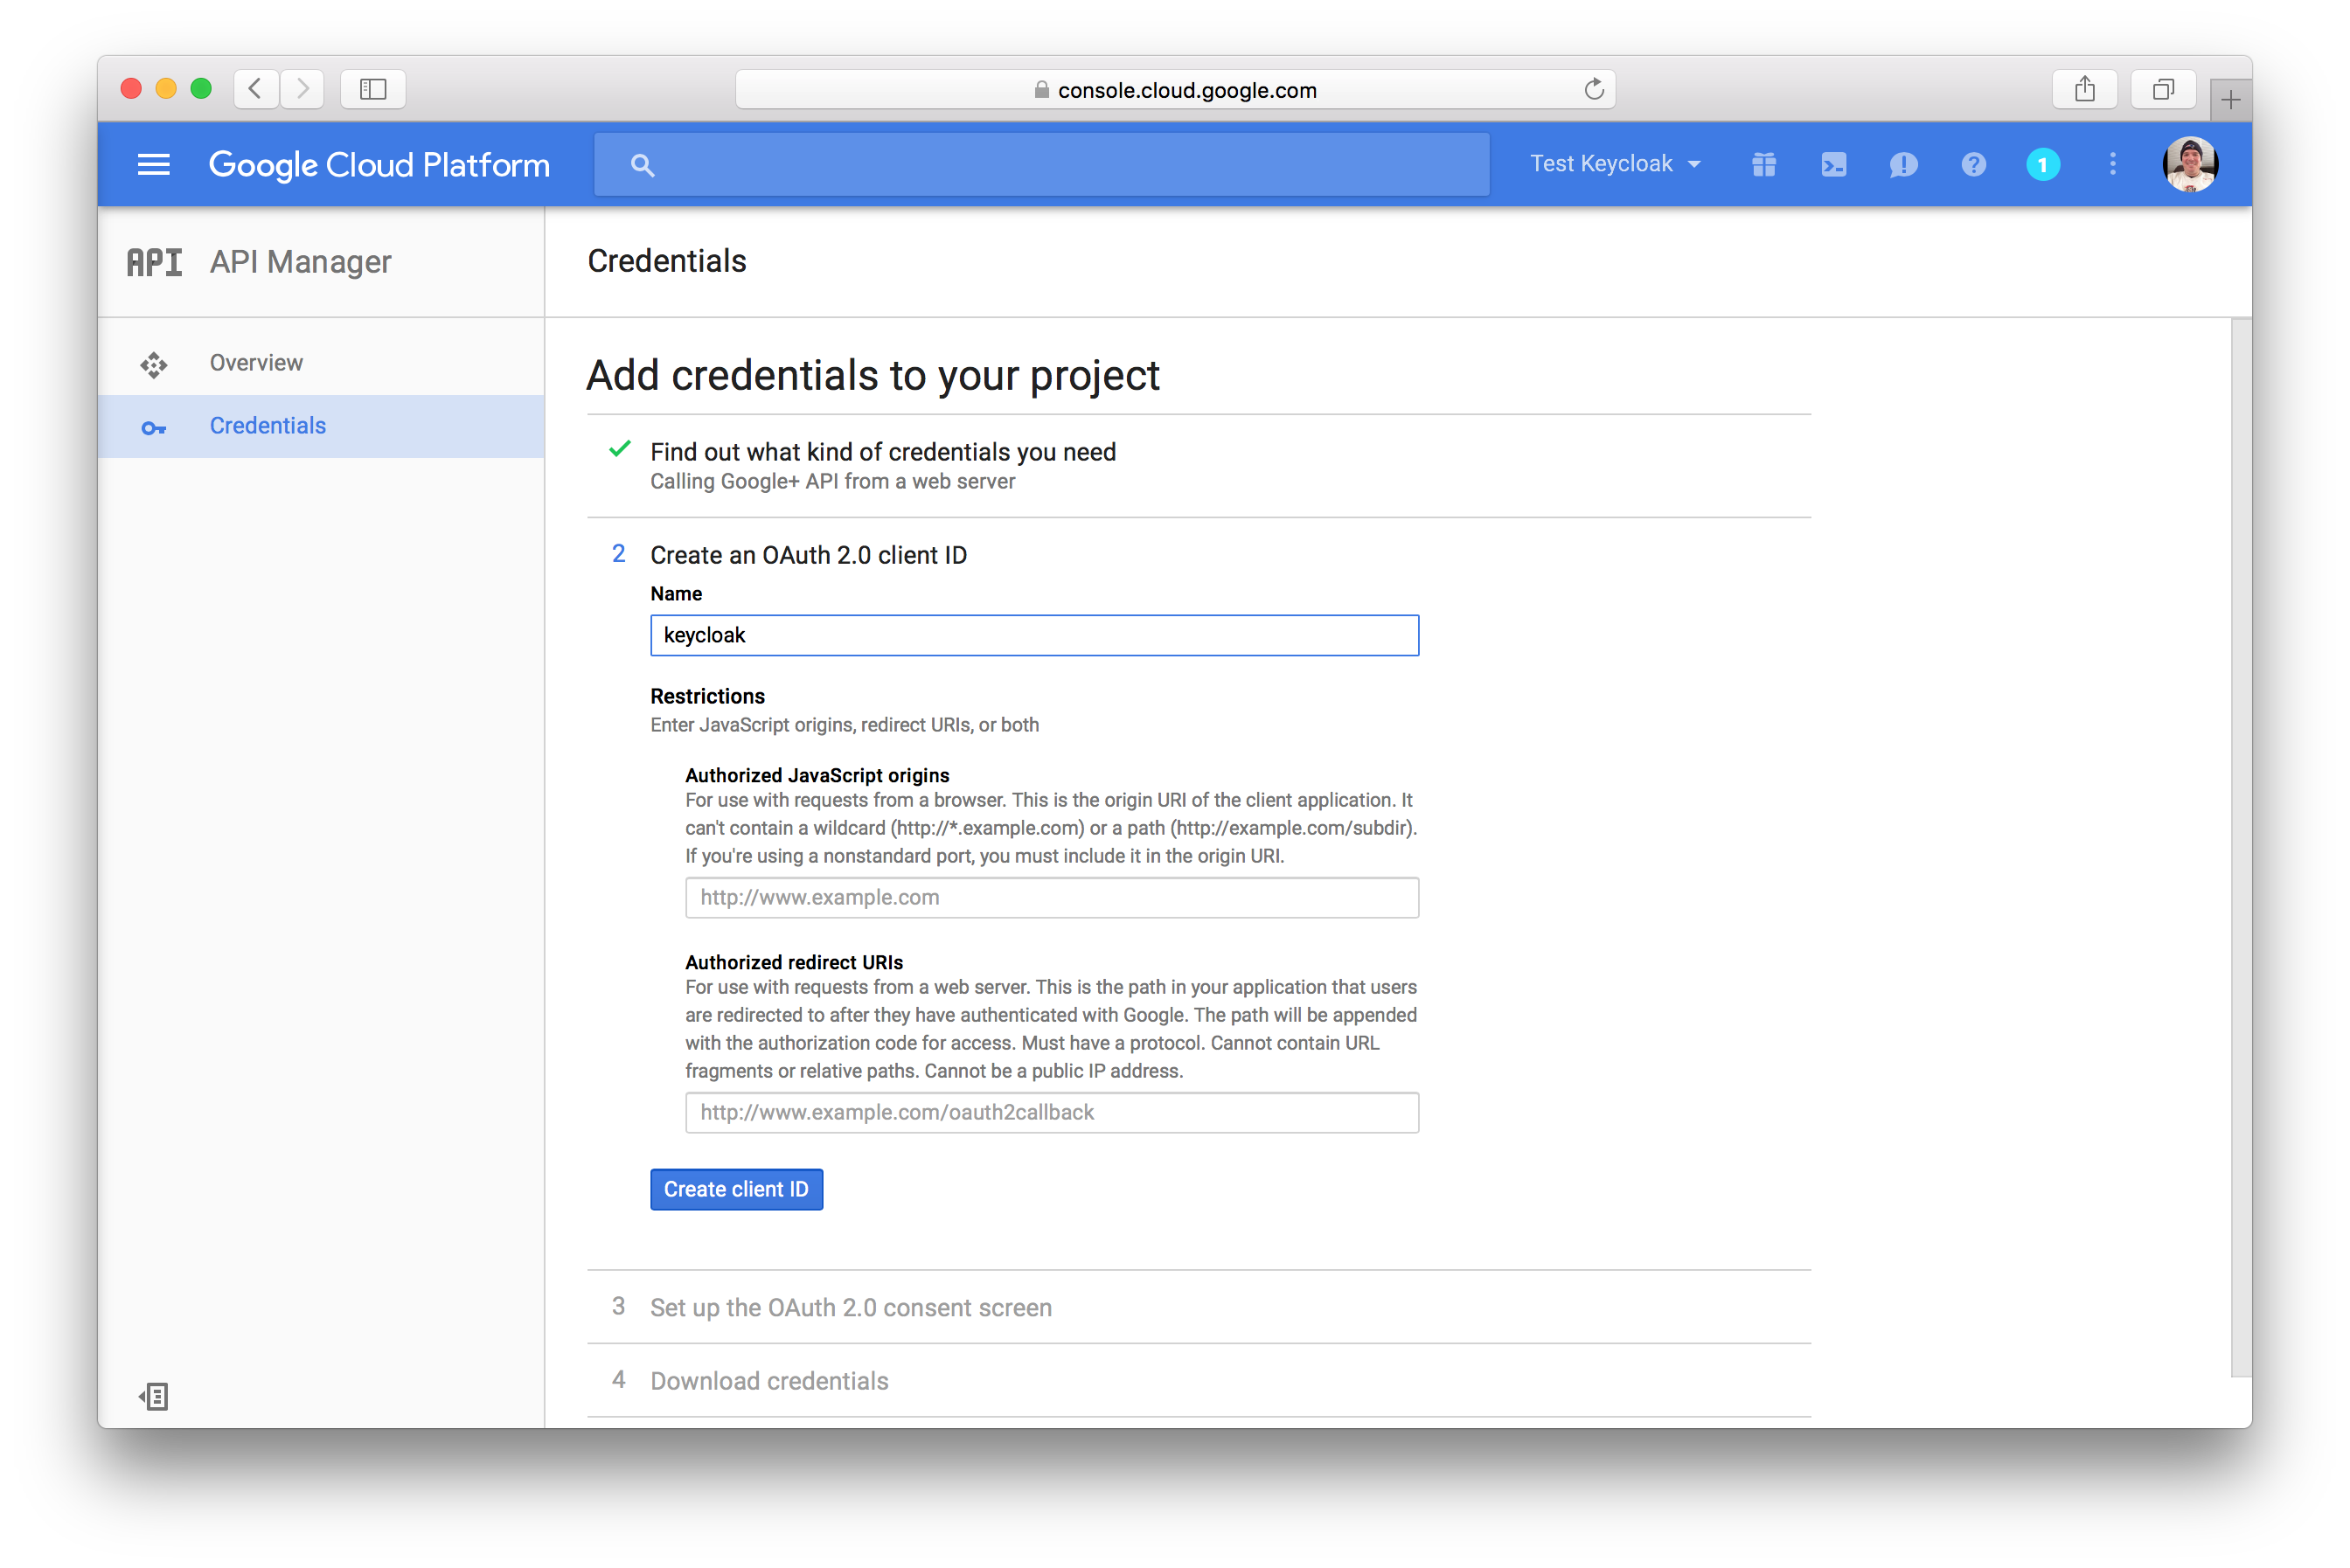
Next you’ll need to create an OAuth 2.0 client ID. Specify the name you want for your client. You’ll also need to
copy and paste the Redirect URI from the Keycloak Add Identity Provider page into the
Authorized redirect URIs field. After you do this, click the Create client ID button.
When users log into Google from Keycloak they will see a consent screen from Google which will ask the user if Keycloak is allowed to view information about their user profile. The next Google config screen asks you for information about this screen.
Once you click Done you will be brought to the Credentials page. Click on your new OAuth 2.0 Client ID to view
the settings of your new Google Client.
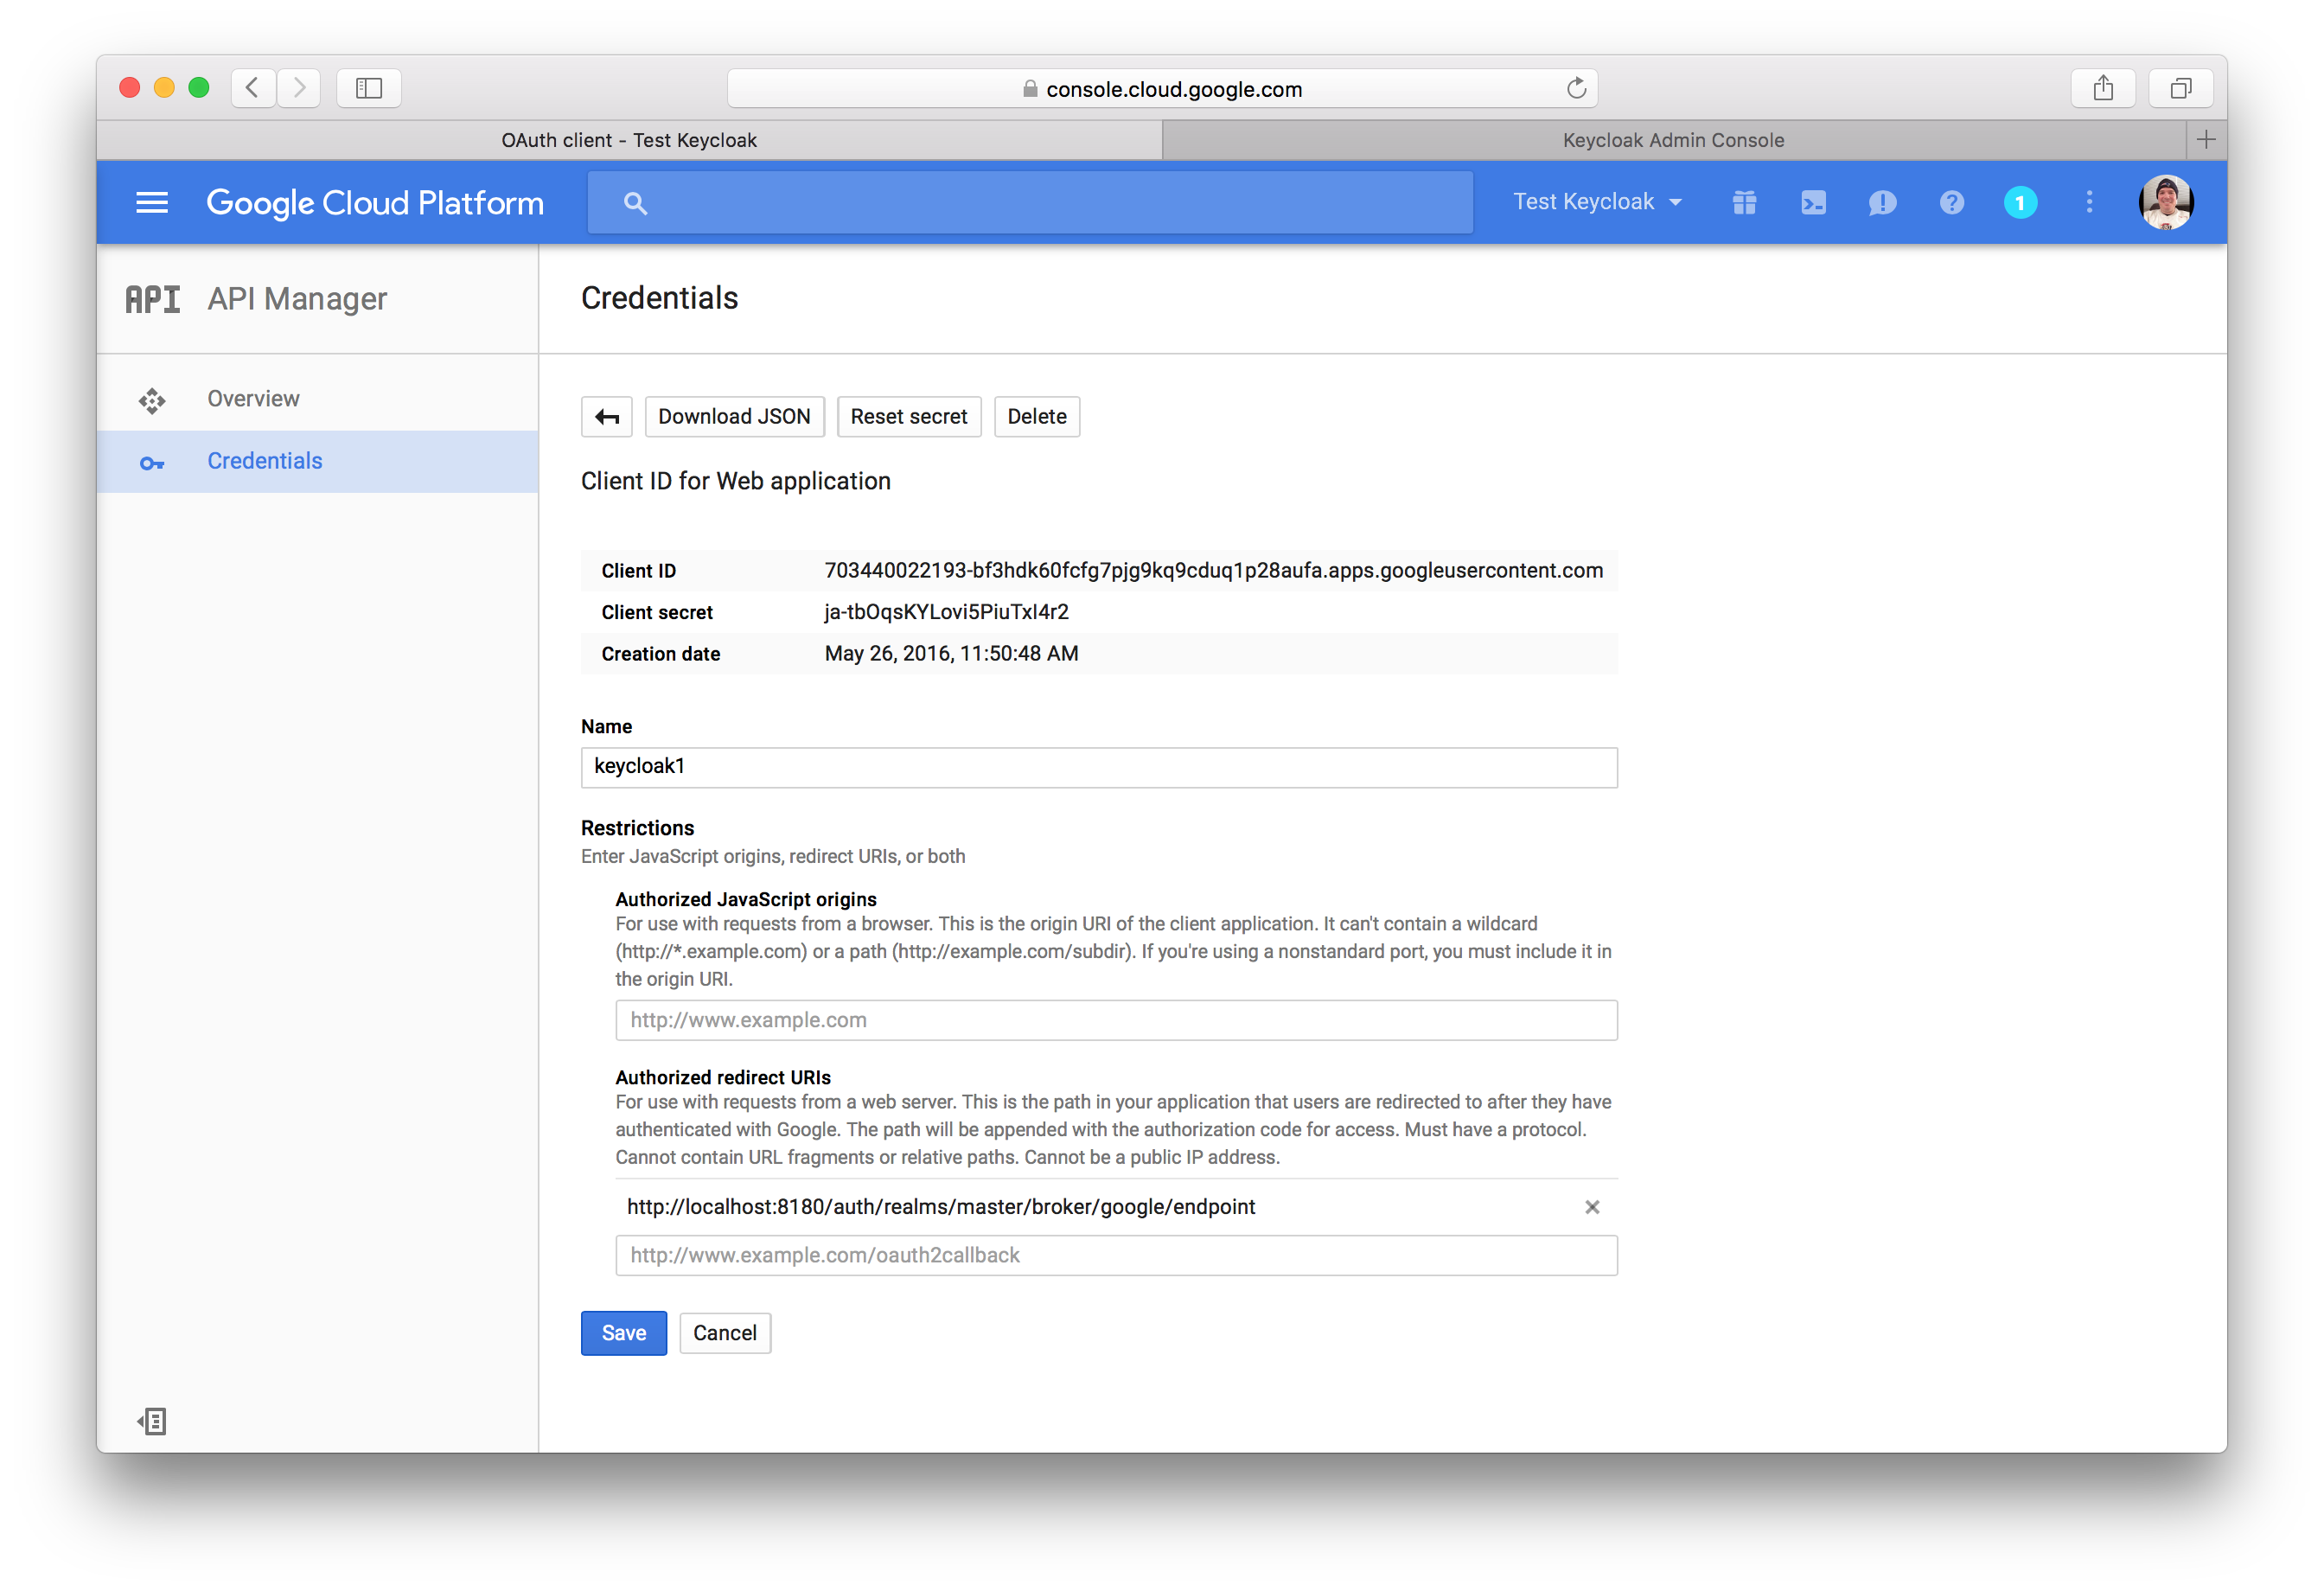
You will need to obtain the client ID and secret from this page so you can enter them into the Keycloak Add identity provider page.
Go back to Keycloak and specify those items.
One config option to note on the Add identity provider page for Google is the Default Scopes field.
This field allows you to manually specify the scopes that users must authorize when authenticating with this provider.
For a complete list of scopes, please take a look at https://developers.google.com/oauthplayground/ . By default, Keycloak
uses the following scopes: openid profile email.