Enabling Authorization Services
You can enable authorization services in an existing client application configured to use the OpenID Connect Protocol. You can also create a new client.
To create a new client, complete the following steps:
-
Click Clients to start creating a new client application and fill in the Client ID, Client Protocol, and Root URL fields.
Create Client Application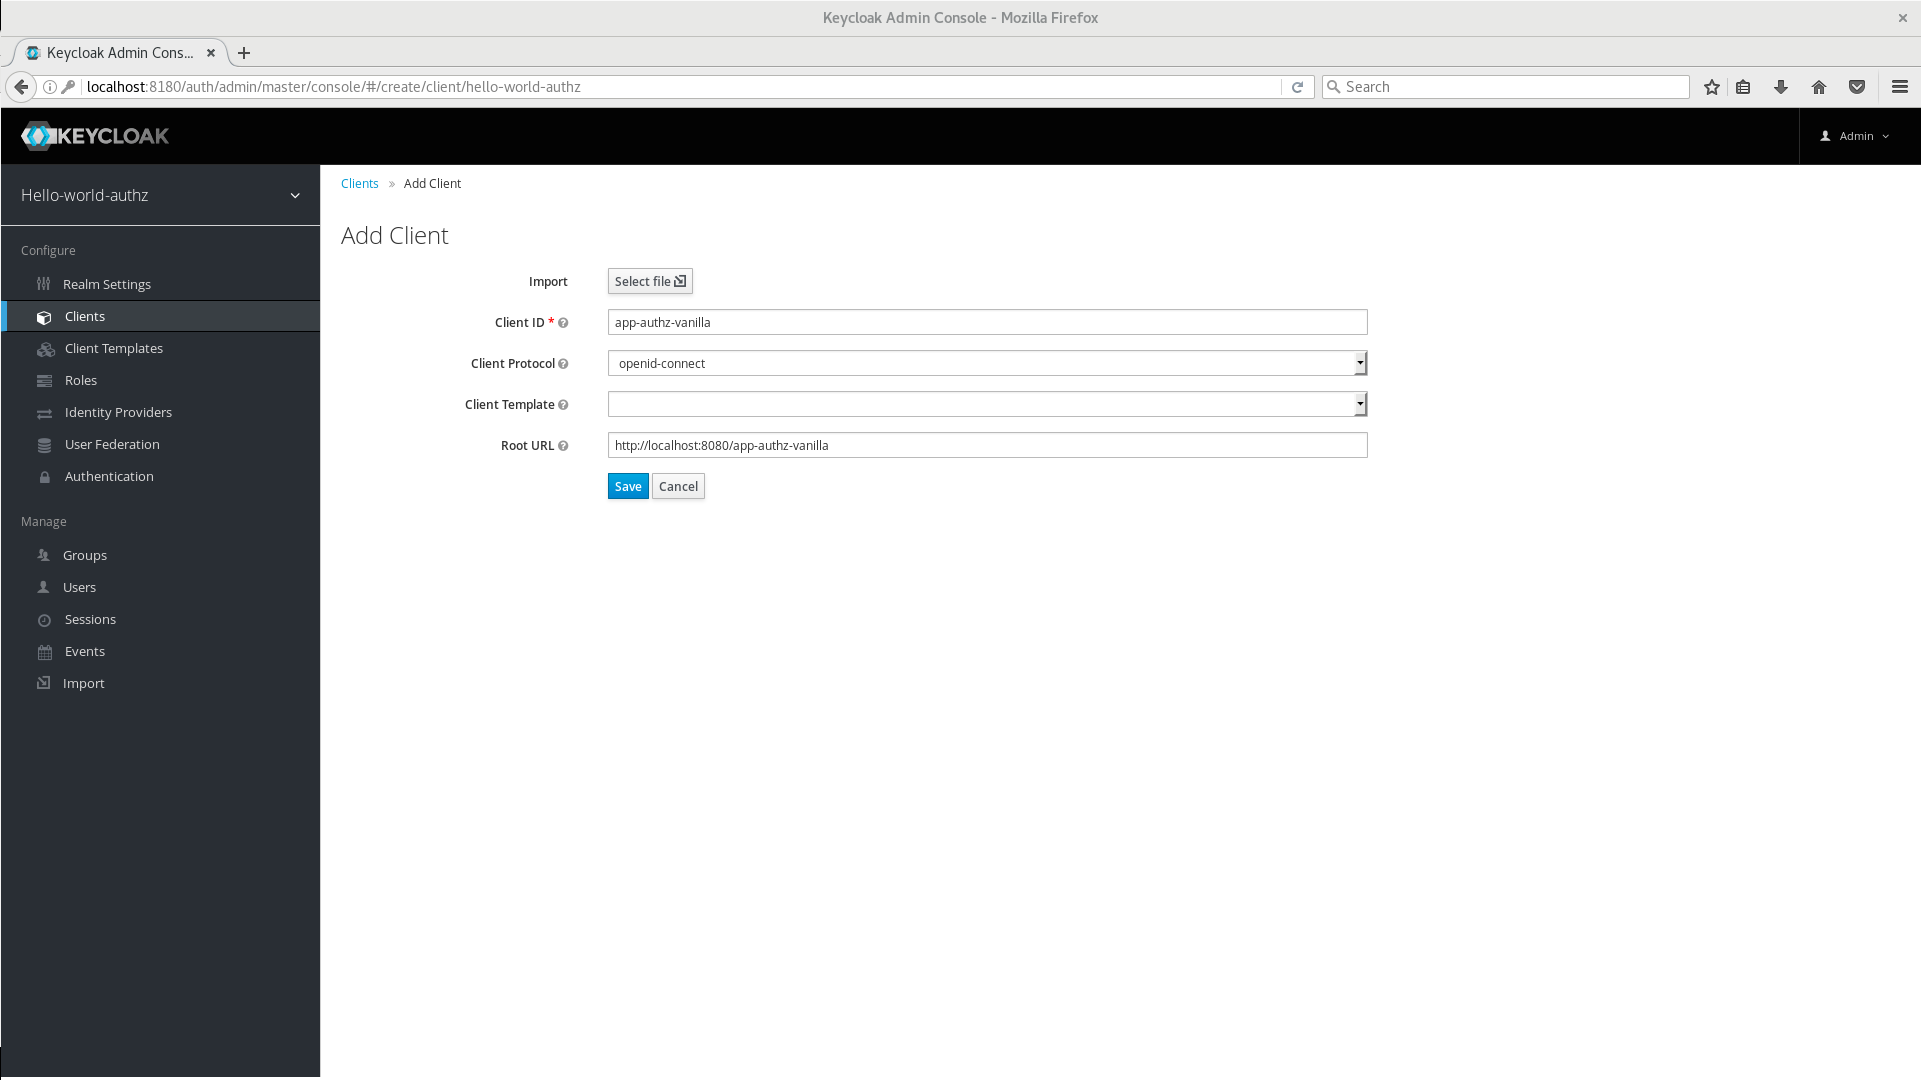
-
Click Save. The Client Details page is displayed.
Client Details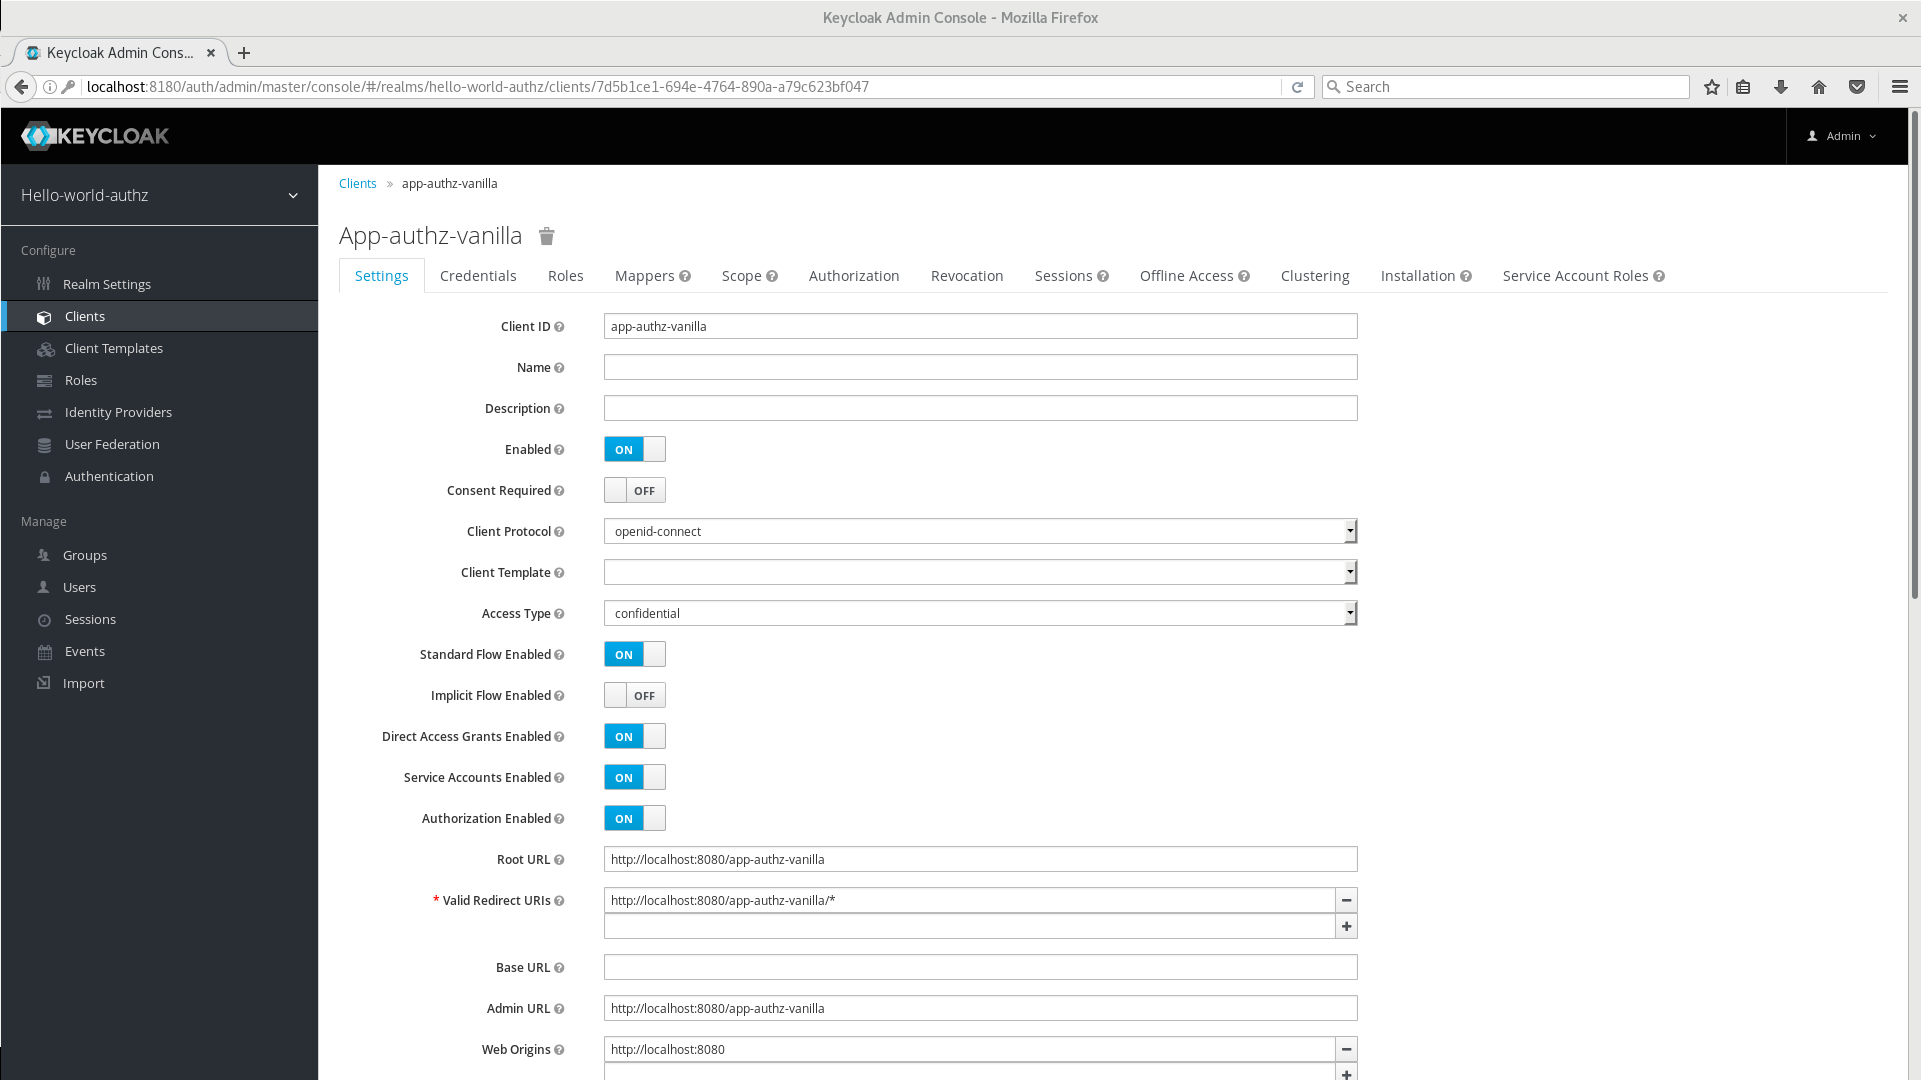
-
On the Client Details page, click the Authorization Enabled switch to ON, and then click Save. A new Authorization tab is displayed for the client.
-
Click the Authorization tab and an Authorization Settings page similar to the following is displayed:
Authorization Settings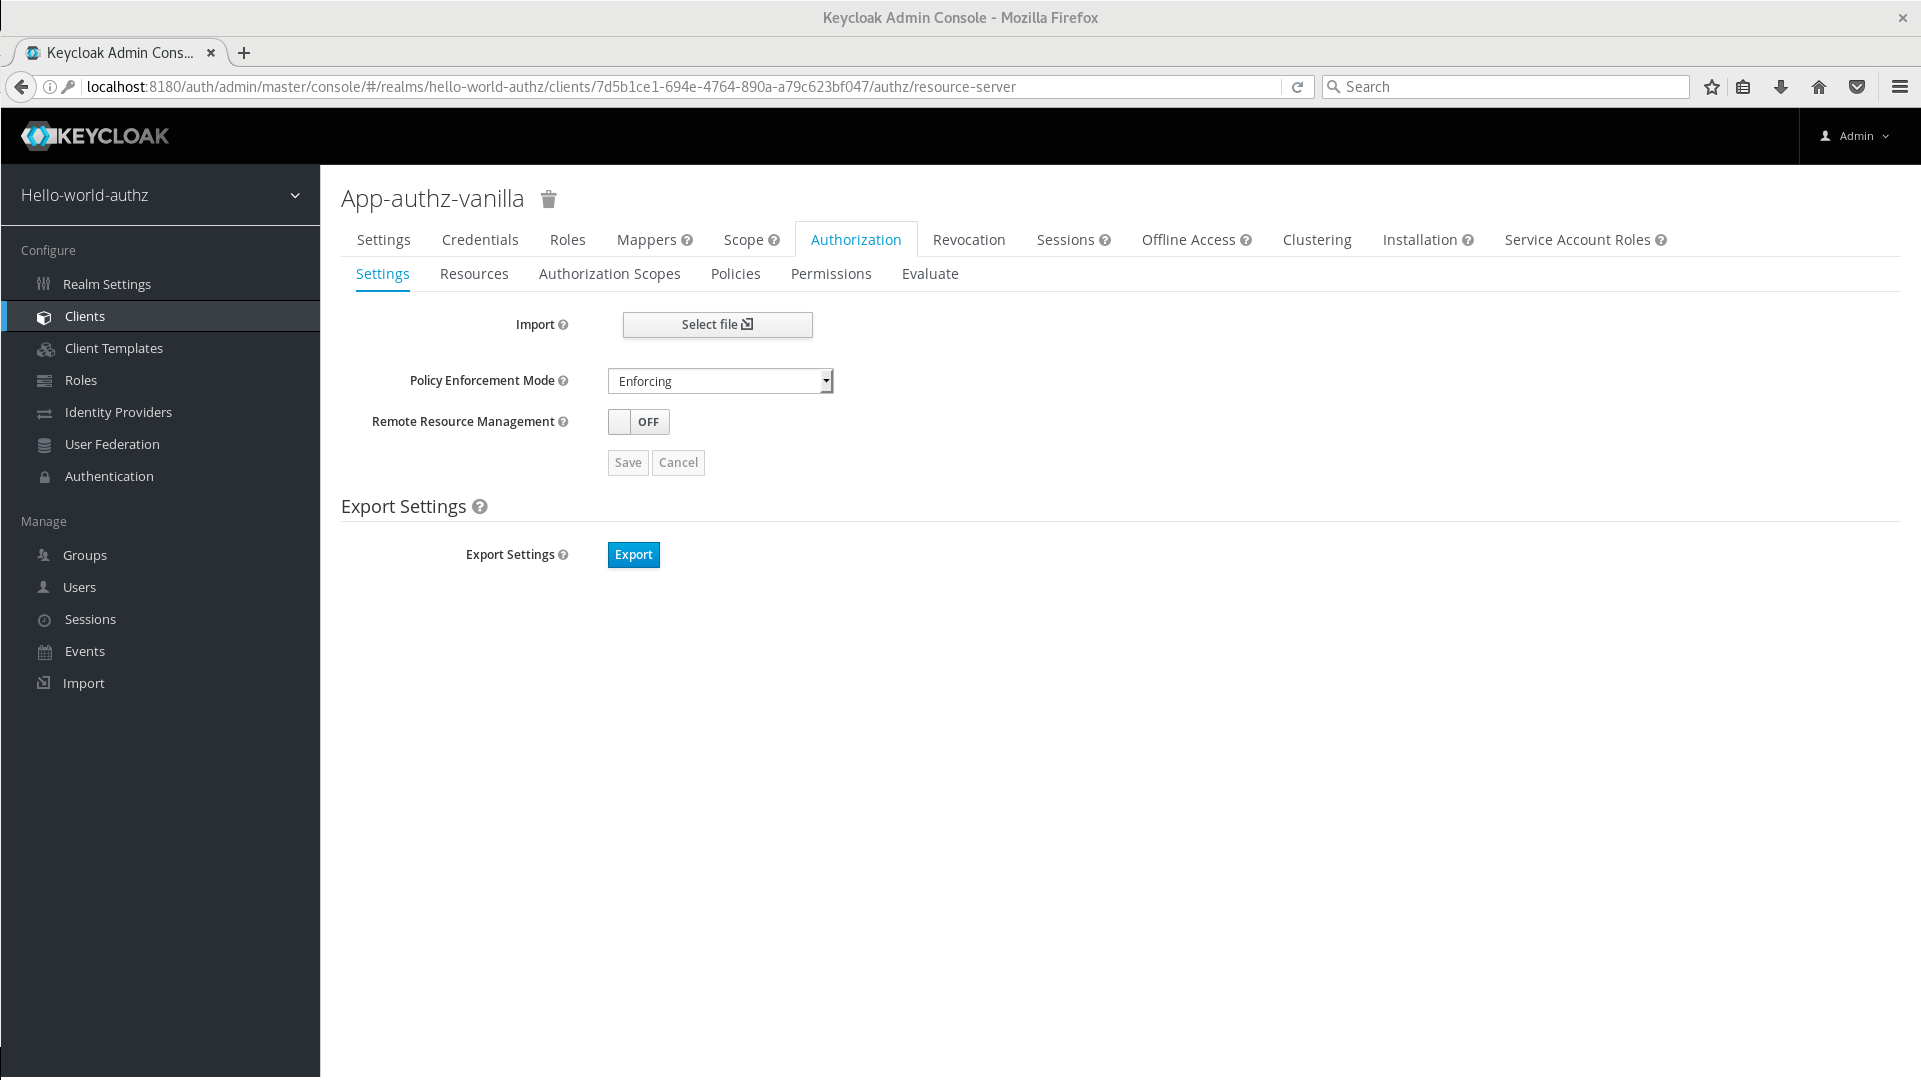
When you enable authorization services for a client application, Keycloak automatically creates several default settings for your client authorization configuration.
For more information about authorization configuration, see Enabling Authorization Services.