There are a number of steps you have to complete to be able to login to LinkedIn. First, go to the Identity Providers left menu item
and select LinkedIn from the Add provider drop down list. This will bring you to the Add identity provider page.
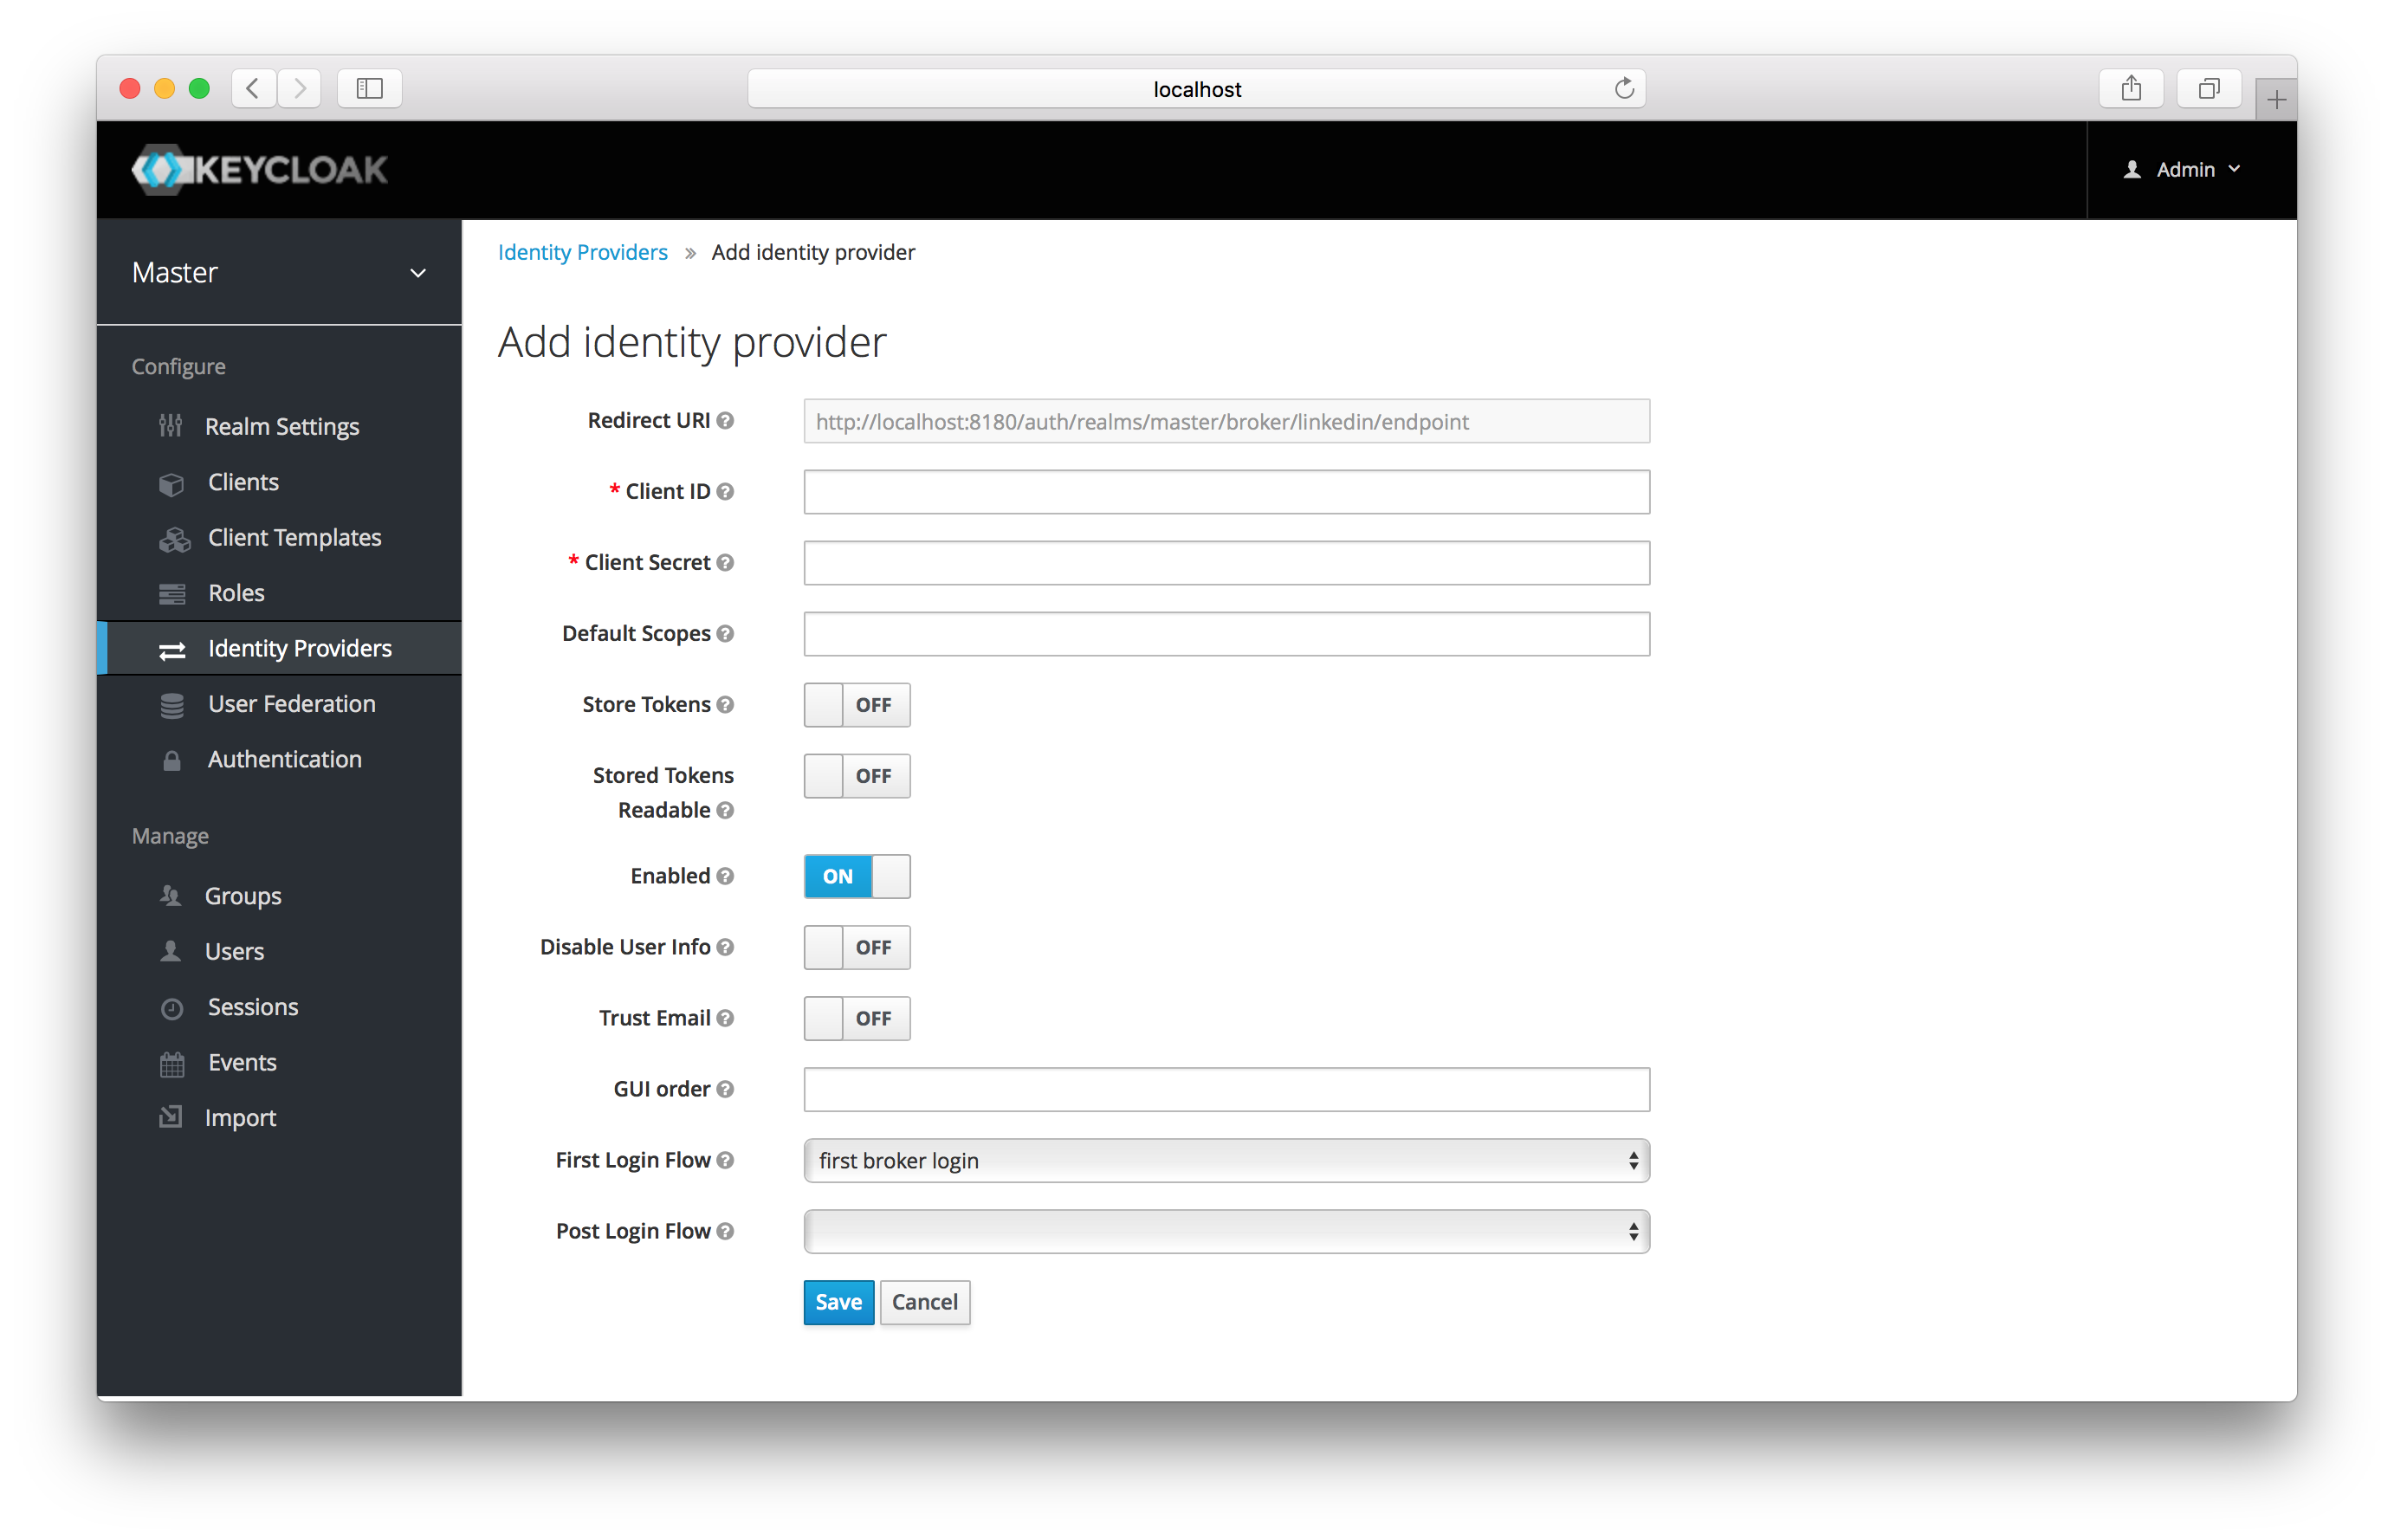
You can’t click save yet, as you’ll need to obtain a Client ID and Client Secret from LinkedIn. One piece of data you’ll need from this
page is the Redirect URI. You’ll have to provide that to LinkedIn when you register Keycloak as a client there, so
copy this URI to your clipboard.
To enable login with LinkedIn you first have to create an application in LinkedIn Developer Network.
|
Note
|
LinkedIn may change the look and feel of application registration, so these directions may not always be up to date. |
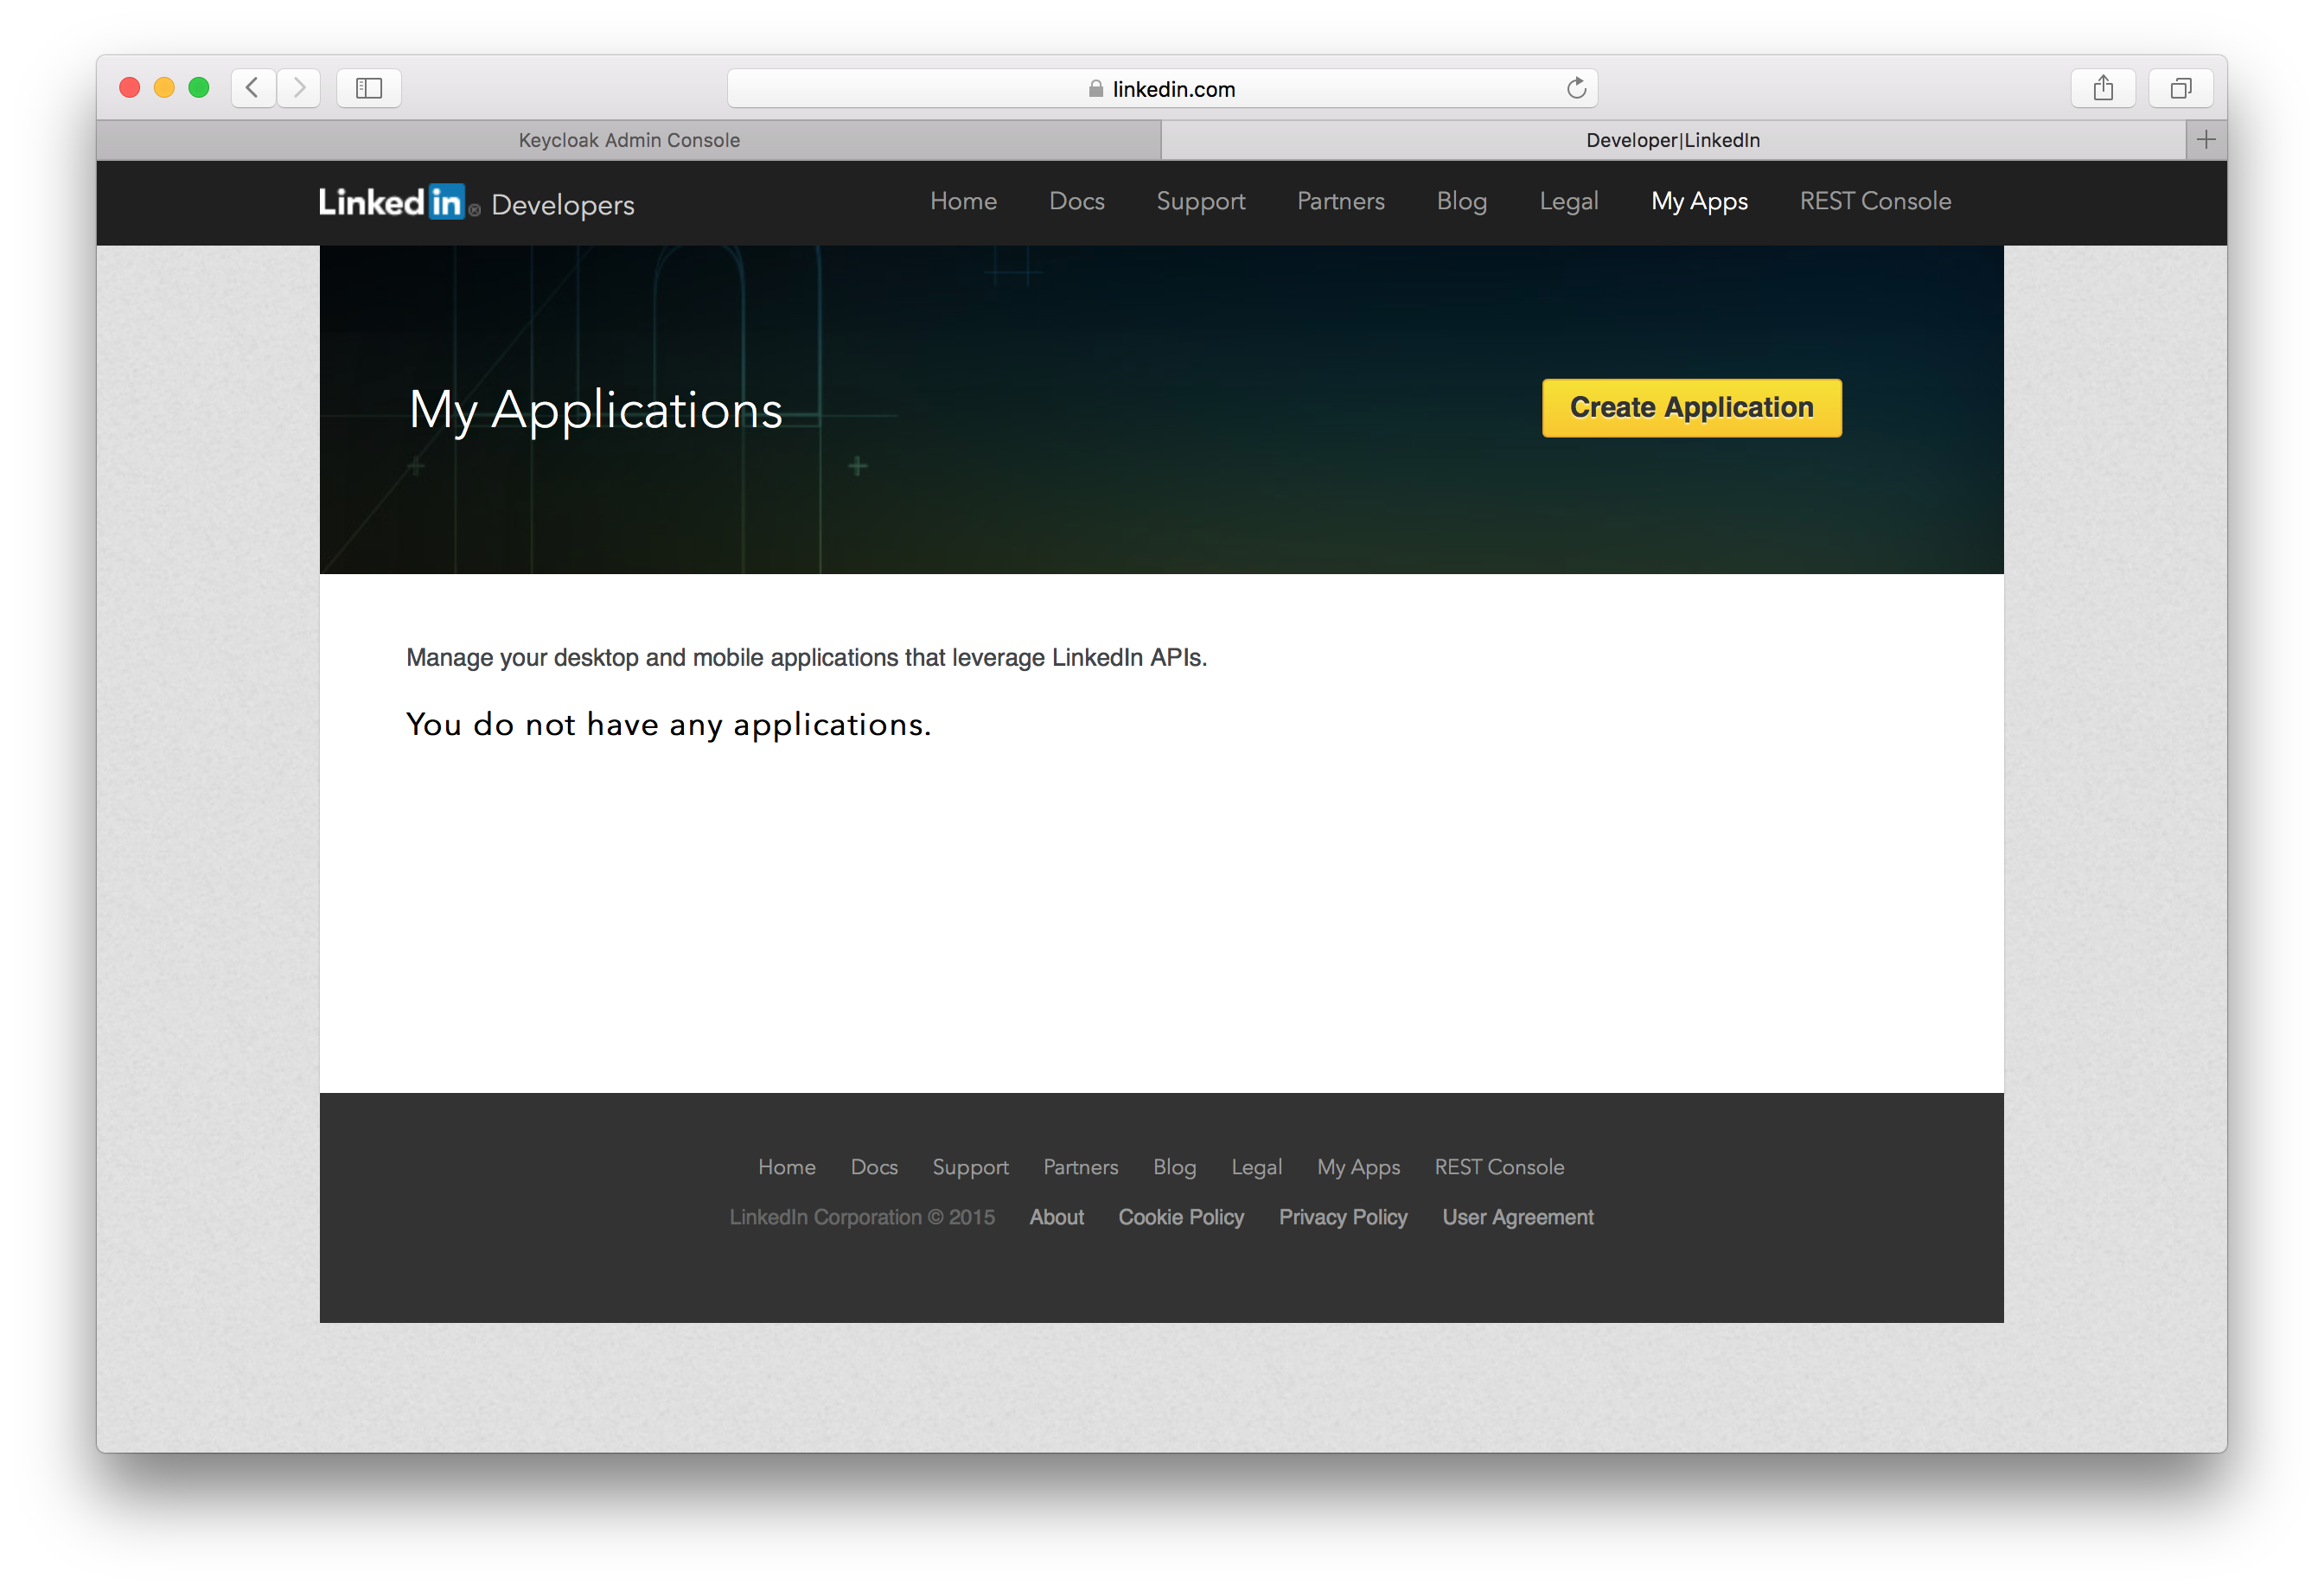
Click on the Create Application button. This will bring you to the Create a New Application Page.
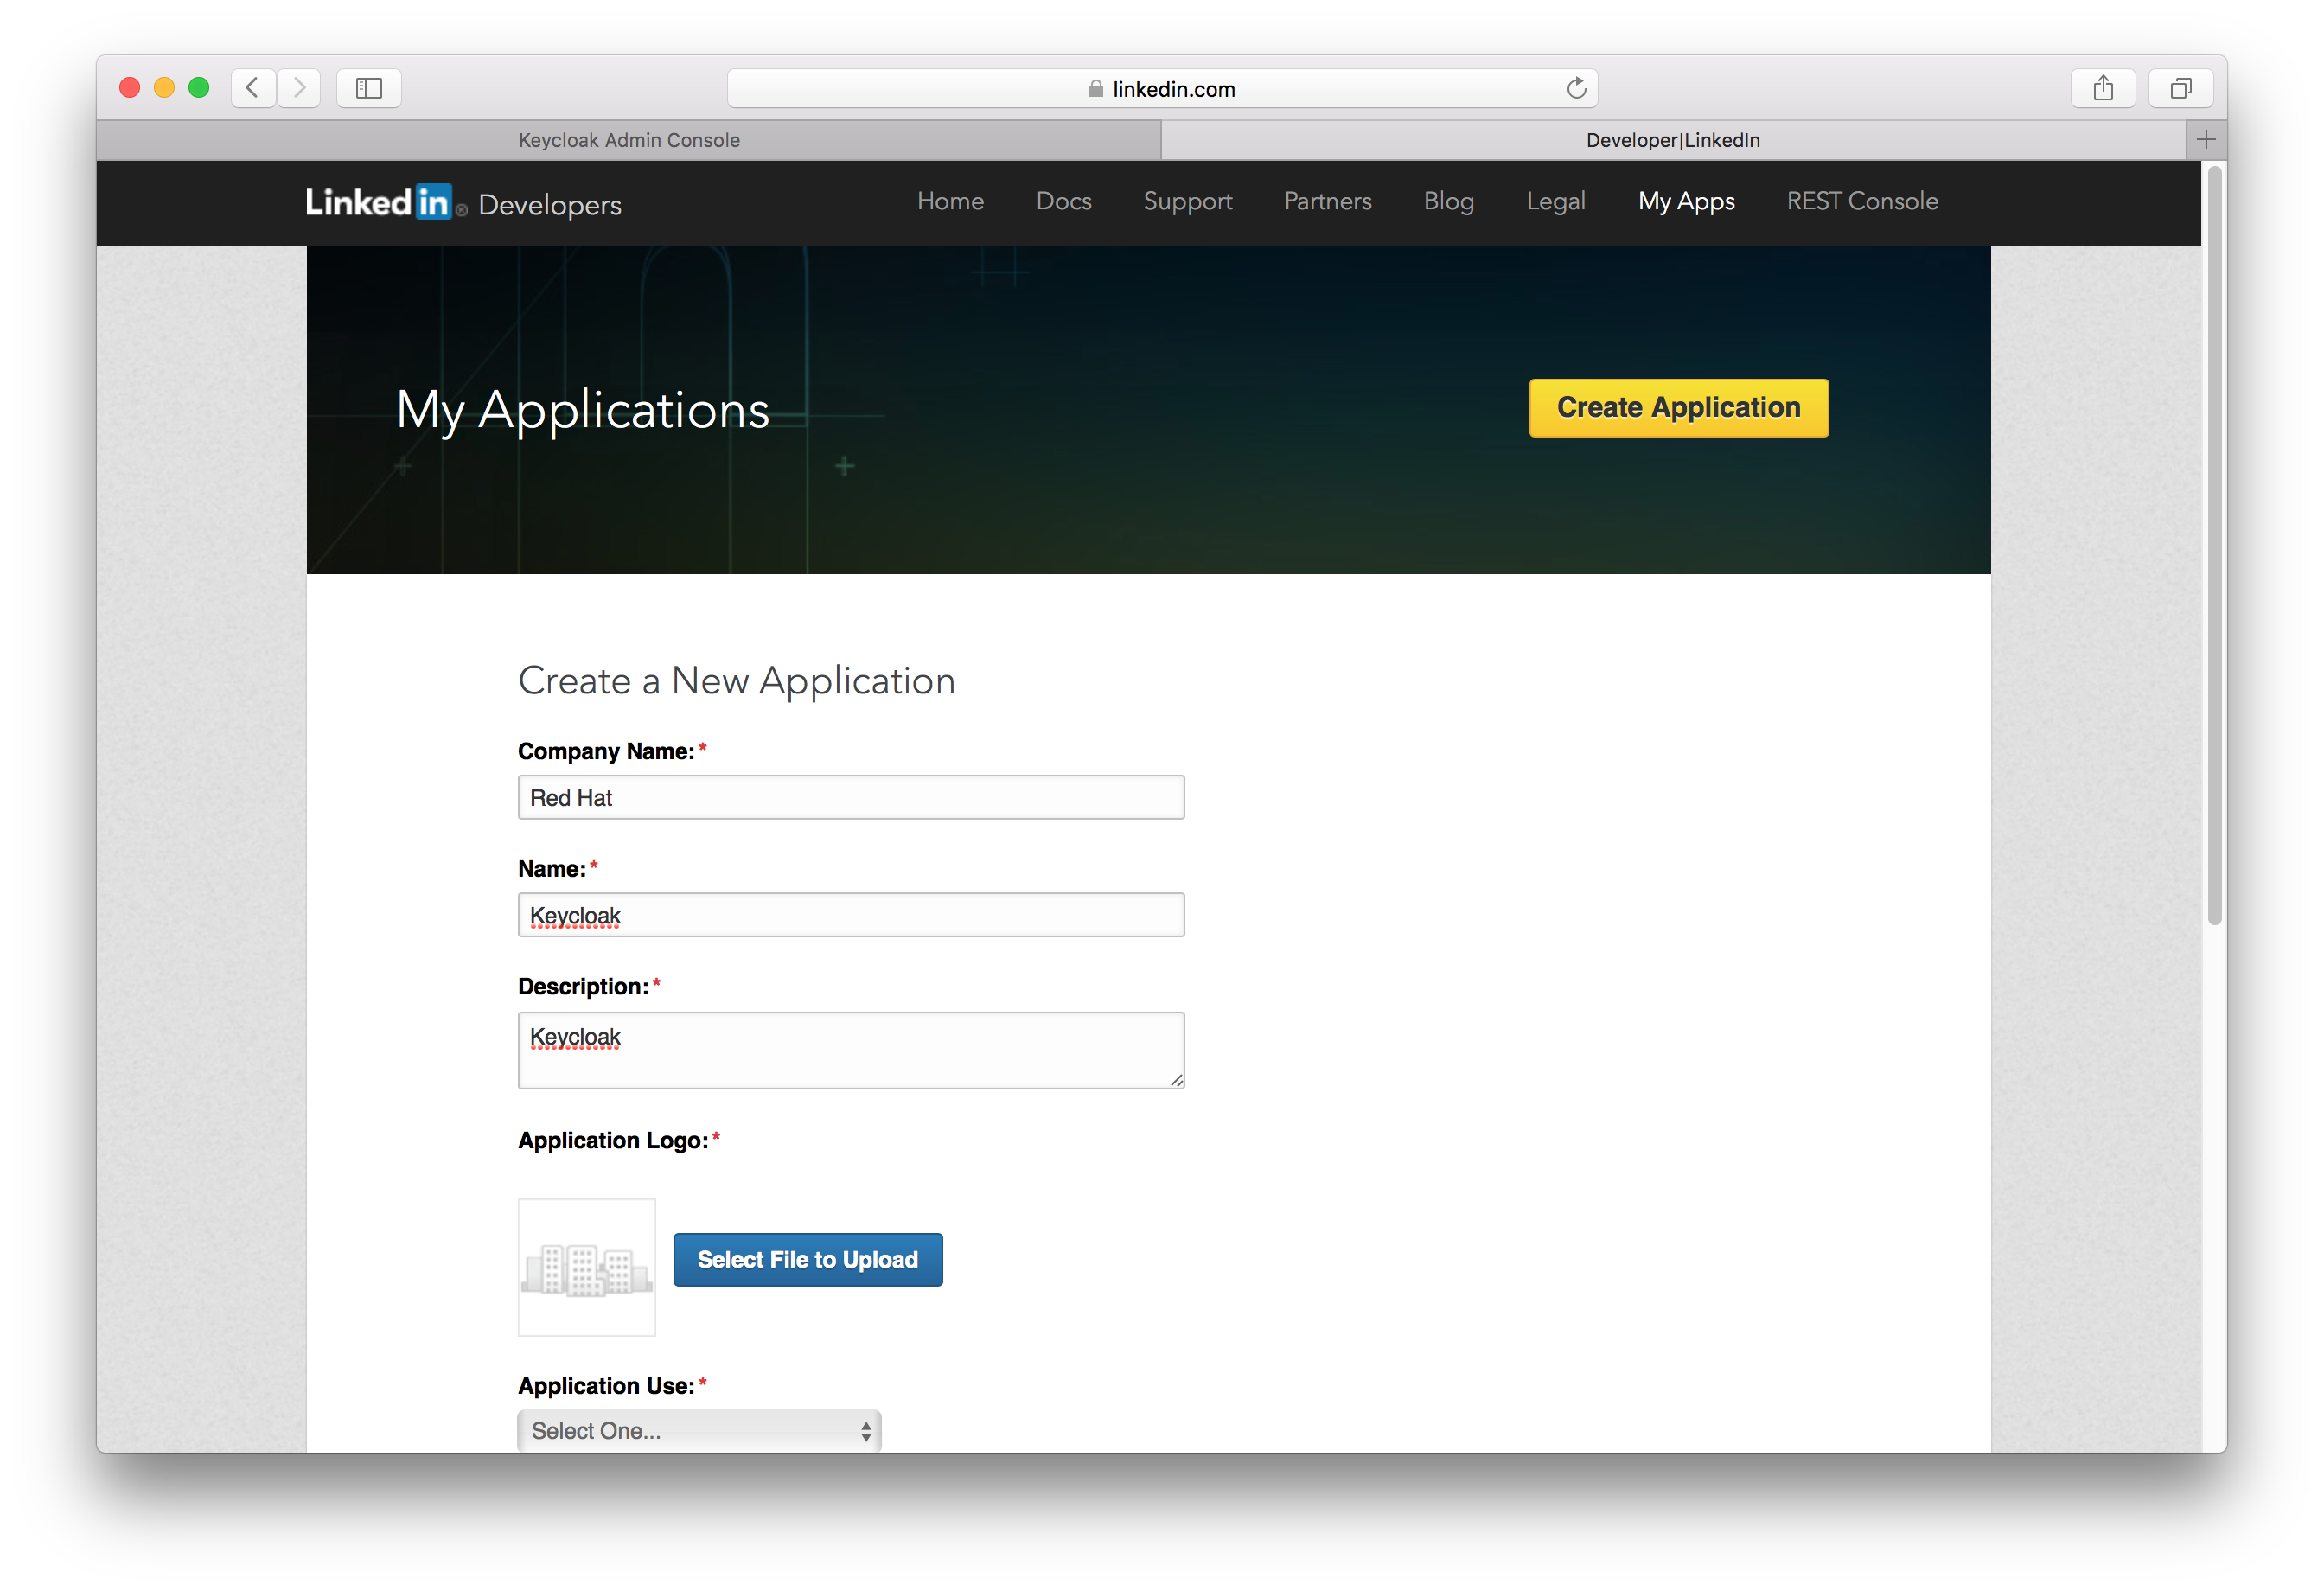
Fill in the form with the approriate values, then click the Submit button. This will bring you to the new application’s settings page.
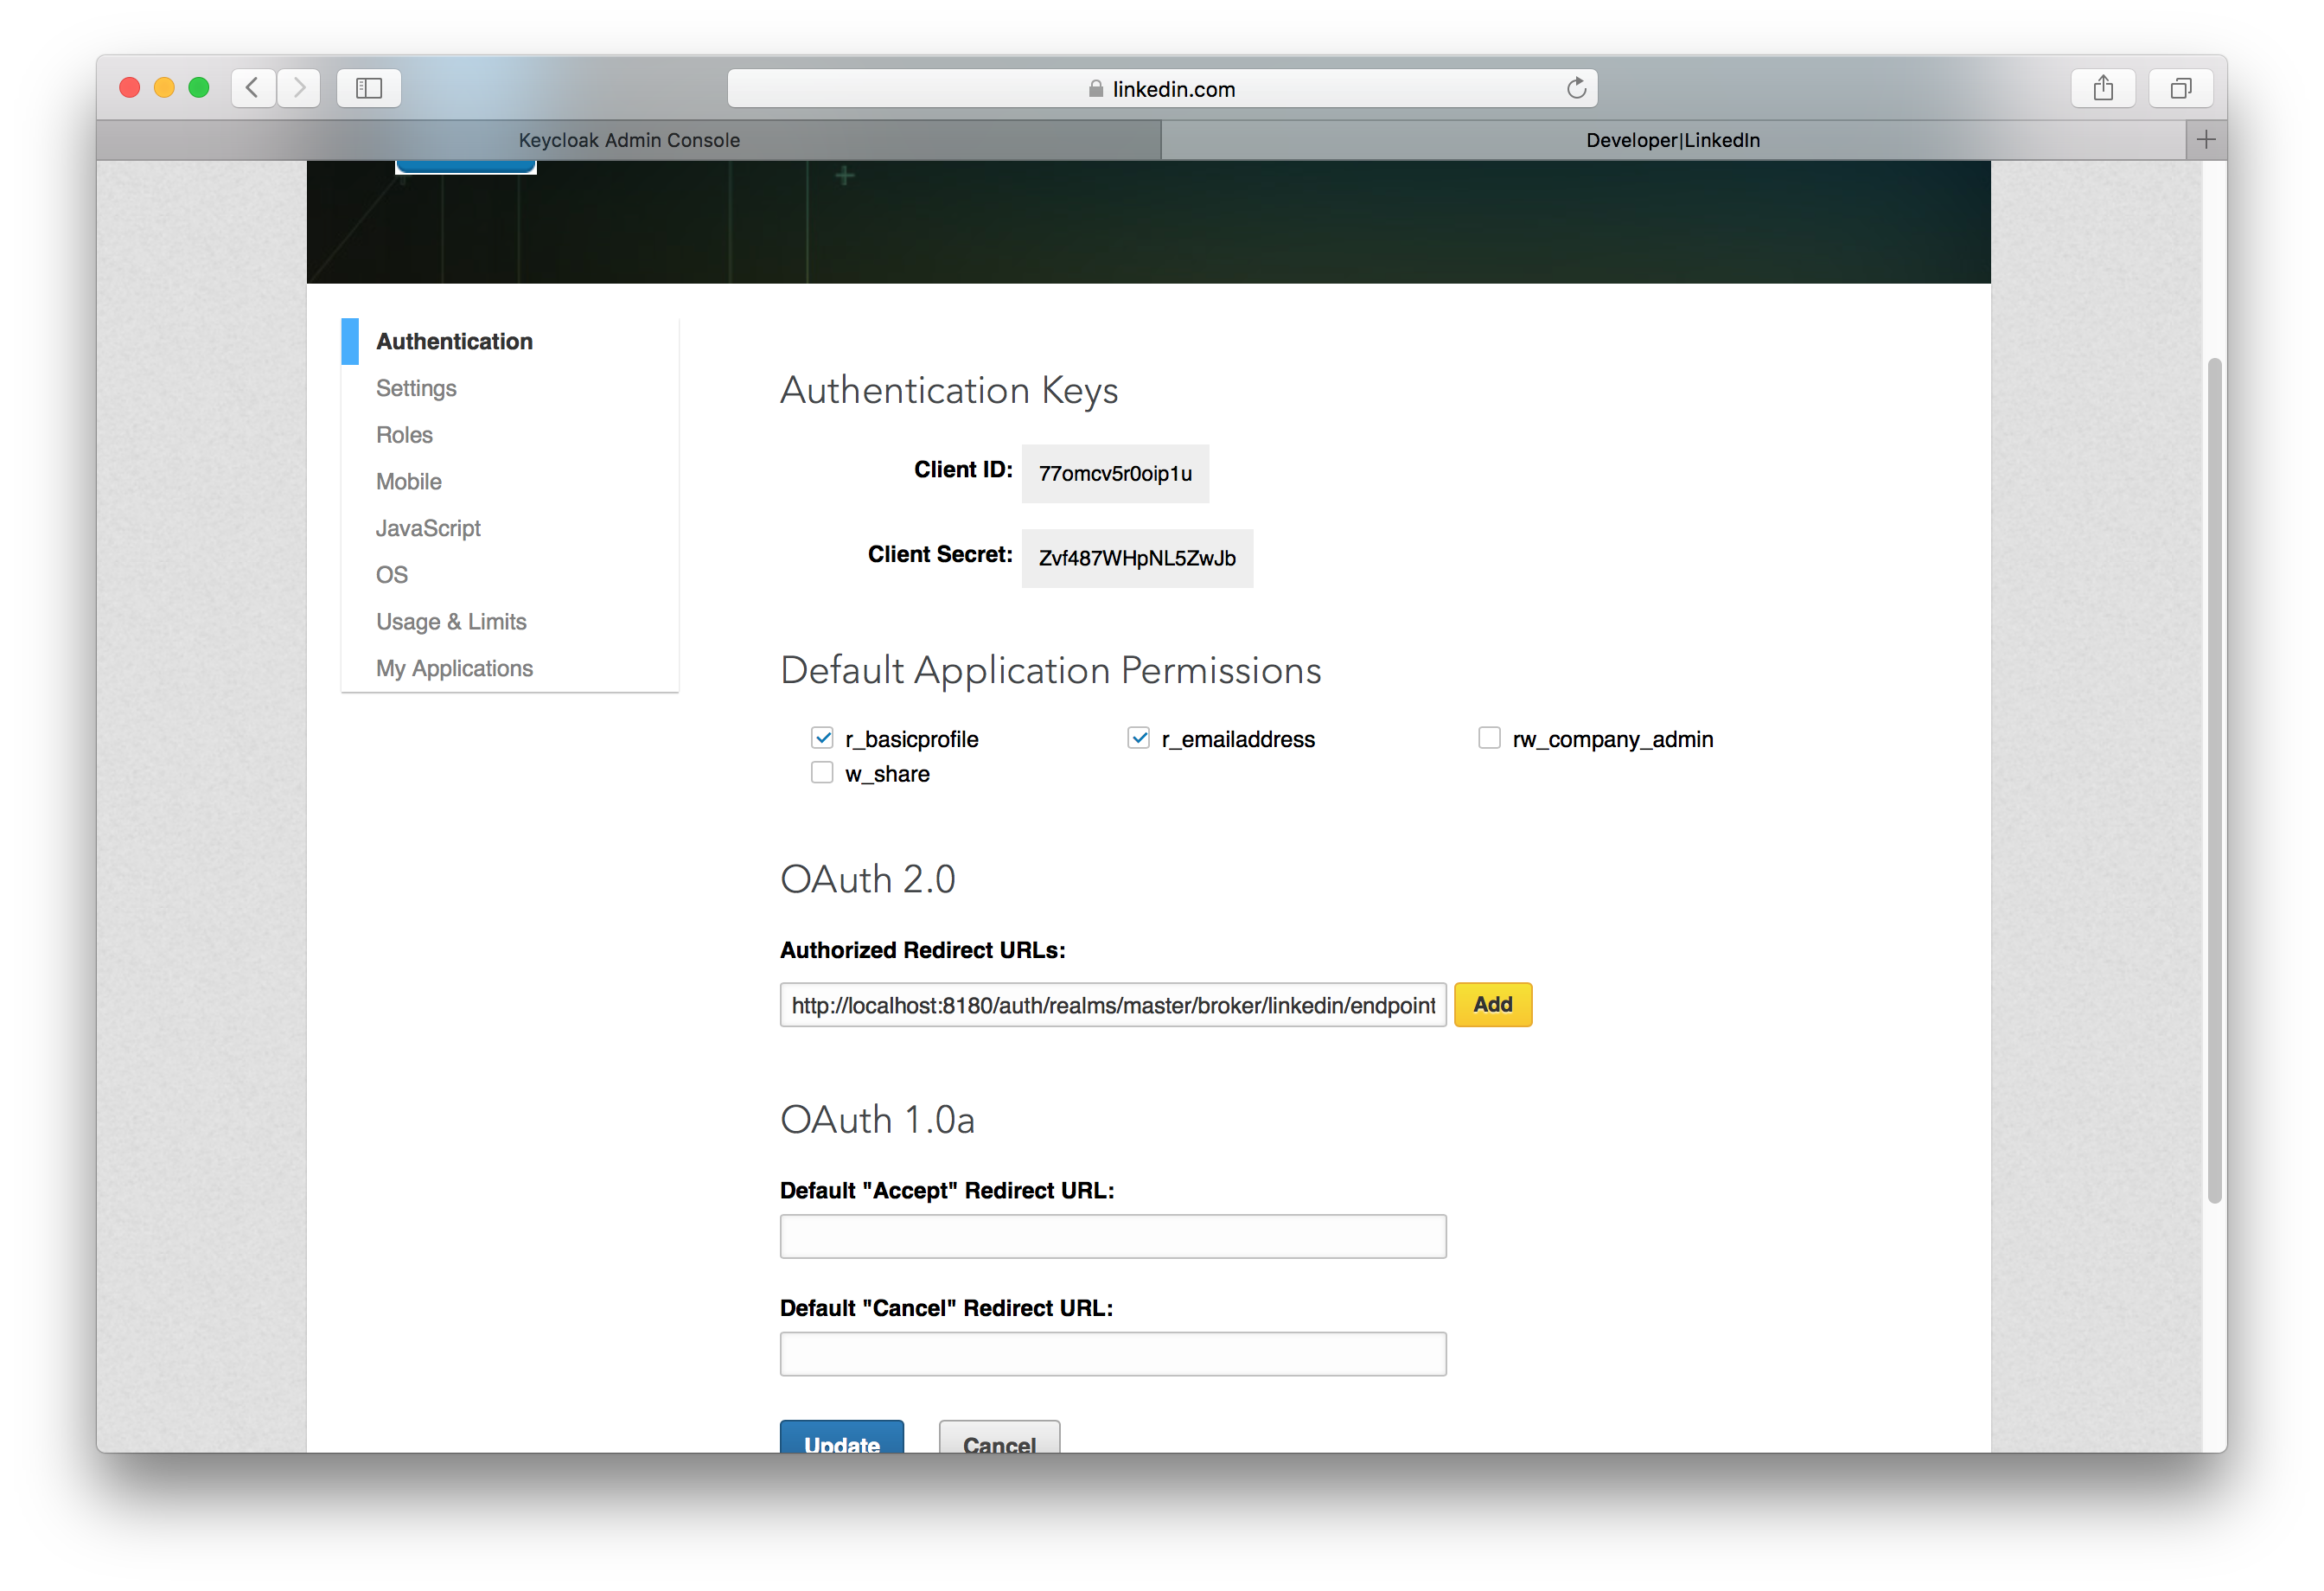
Select r_basicprofile and r_emailaddress in the Default Application Permissions section.
You’ll have to copy the Redirect URI from the Keycloak Add Identity Provider page and enter it into the
OAuth 2.0 Authorized Redirect URLs field on the LinkedIn app settings page. Don’t forget to click the Update button after
you do this!
You will then need to obtain the client ID and secret from this page so you can enter them into the Keycloak Add identity provider page.
Go back to Keycloak and specify those items.