$ git clone https://github.com/keycloak/keycloak-quickstartsBuild, Deploy, and Test Your Application
Now that the app-authz-vanilla resource server (or client) is properly configured and authorization services are enabled, it can be deployed to the server.
The project and code for the application you are going to deploy is available in Keycloak Quickstarts Repository. You will need the following installed on your machine and available in your PATH before you can continue:
-
Java JDK 8
-
Apache Maven 3.1.1 or higher
-
Git
You can obtain the code by cloning the repository at https://github.com/keycloak/keycloak-quickstarts. The default branch corresponds to the latest release of Keycloak. Follow these steps to download the code.
Clone Project
The application we are about to build and deploy is located at
$ cd keycloak-quickstarts/app-authz-jee-vanillaObtaining the Adapter Configuration
You must first obtain the adapter configuration before building and deploying the application.
To obtain the adapter configuration from the Keycloak Administration Console, complete the following steps.
-
Click Clients. In the client listing, click the app-authz-vanilla client application. The Client Details page opens.
Client Details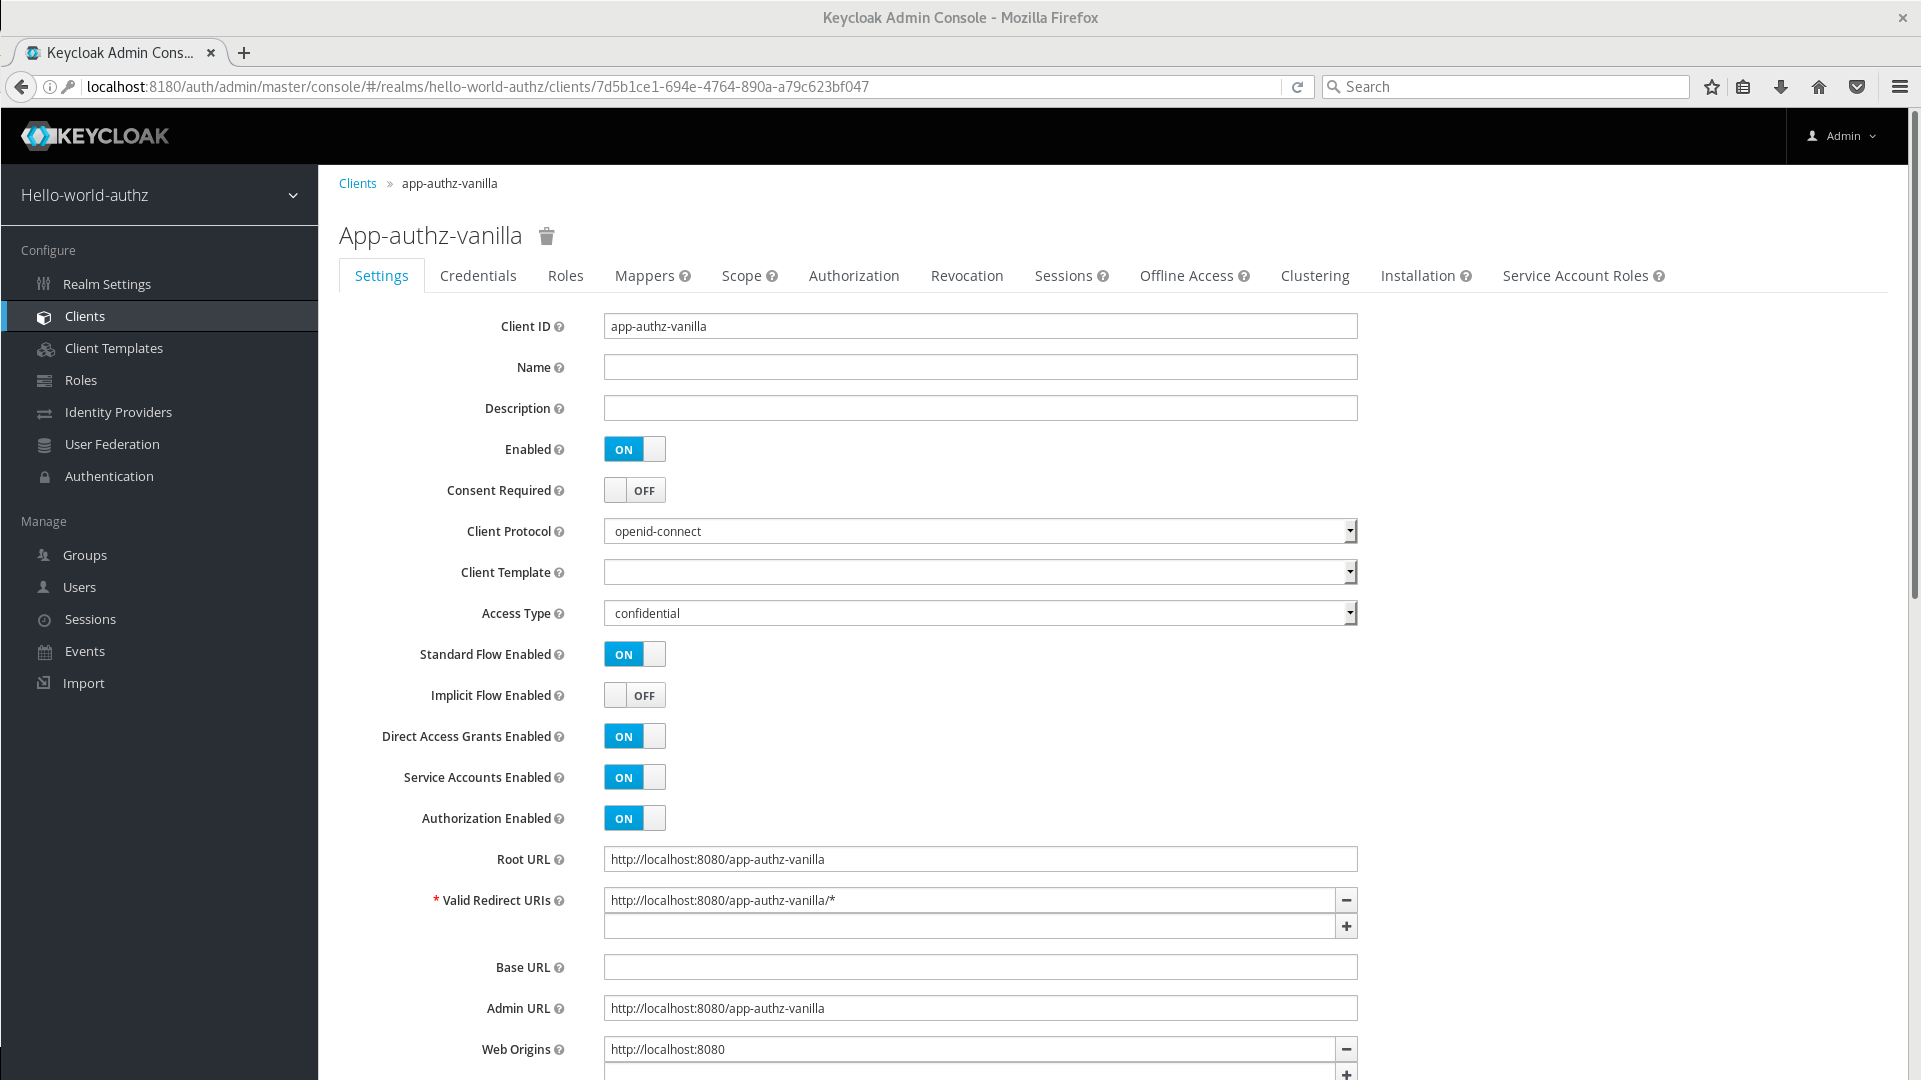
-
Click the Installation tab. From the Format Option dropdown list, select Keycloak OIDC JSON. The adapter configuration is displayed in JSON format. Click Download.
Adapter Configuration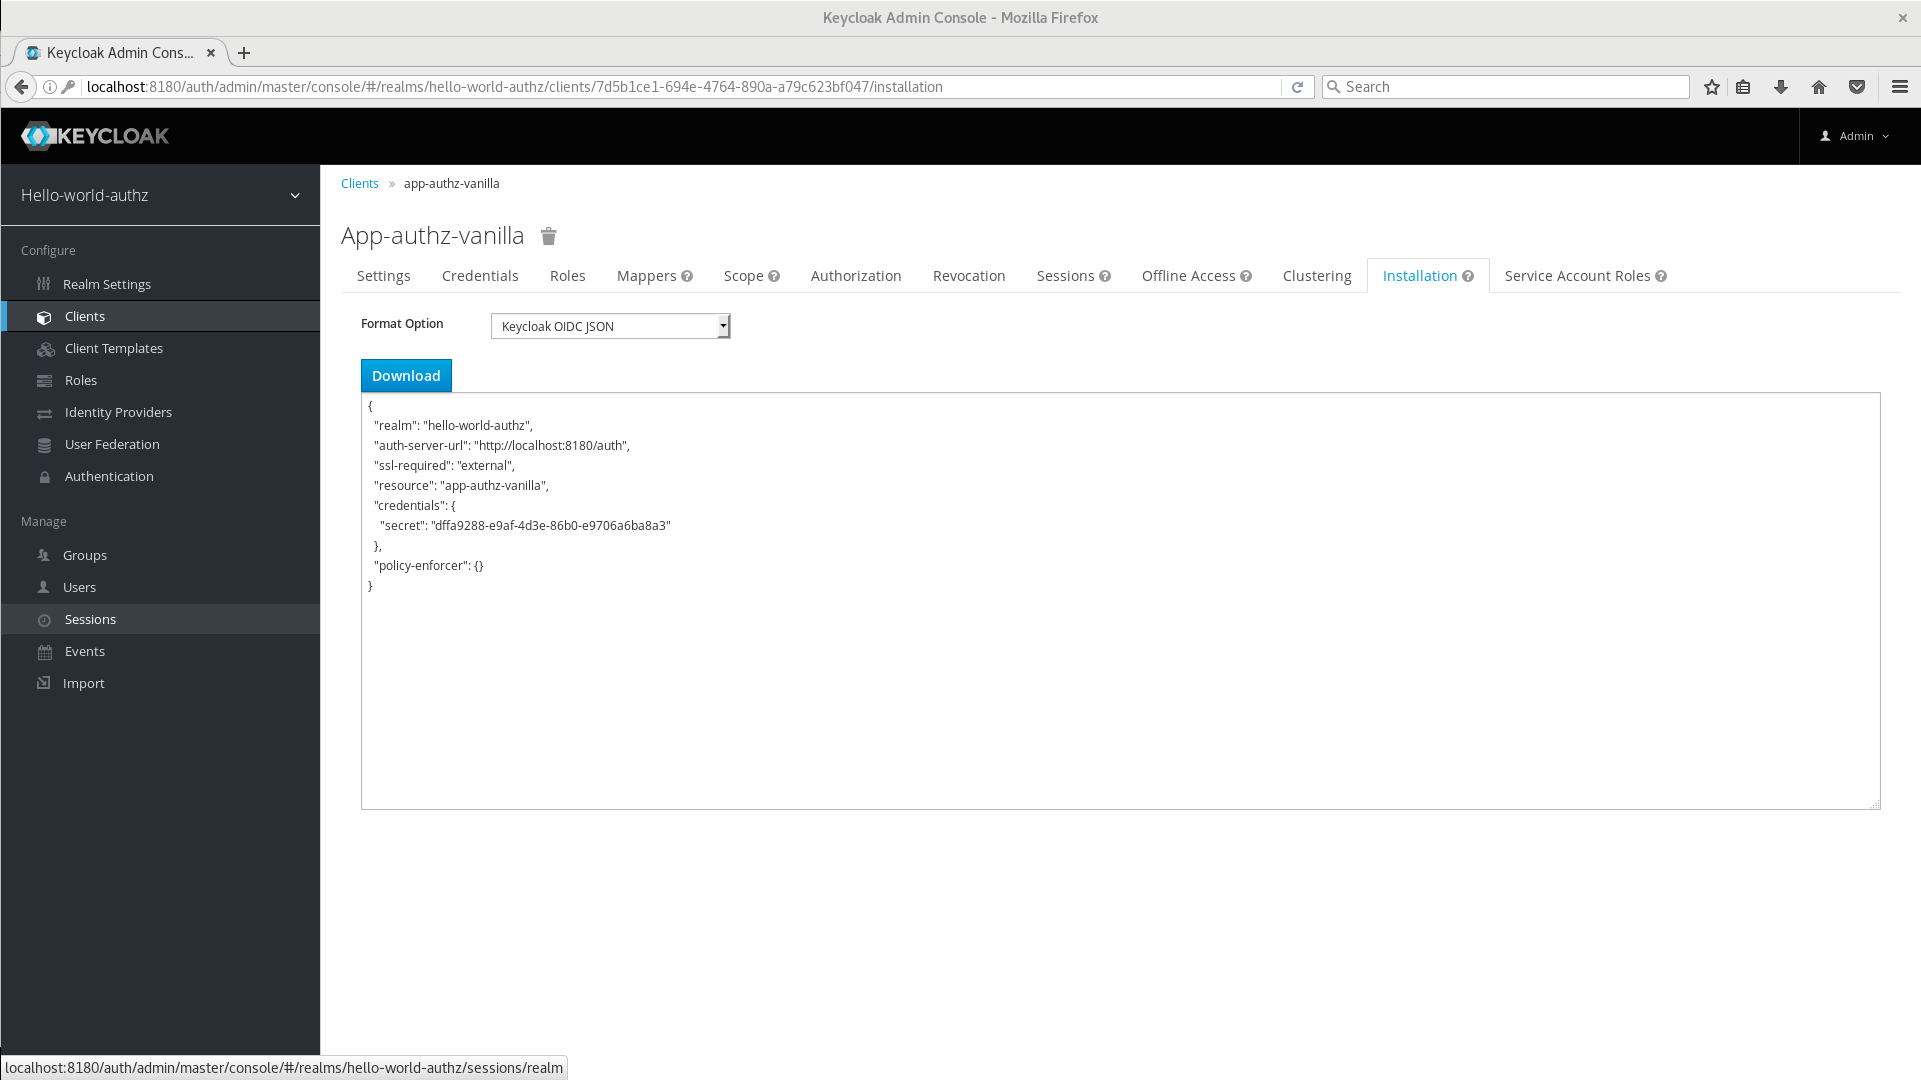
-
Move the file
keycloak.jsonto theapp-authz-jee-vanilla/configdirectory. -
(optional) By default, the policy enforcer responds with a
403status code when the user lacks permission to access protected resources on the resource server. However, you can also specify a redirection URL for unauthorized users. To specify a redirection URL, edit the keycloak.json file you updated in step 3 and replace thepolicy-enforcerconfiguration with the following:"policy-enforcer": { "on-deny-redirect-to" : "/app-authz-vanilla/error.jsp" }This change specifies to the policy enforcer to redirect users to a
/app-authz-vanilla/error.jsppage if a user does not have the necessary permissions to access a protected resource, rather than an unhelpful403 Unauthorizedmessage.
Building and Deploying the Application
To build and deploy the application execute the following command:
$ cd redhat-sso-quickstarts/app-authz-jee-vanilla
$ mvn clean package wildfly:deploy
Testing the Application
If your application was successfully deployed you can access it at http://localhost:8080/app-authz-vanilla. The Keycloak Login page opens.
Login Page
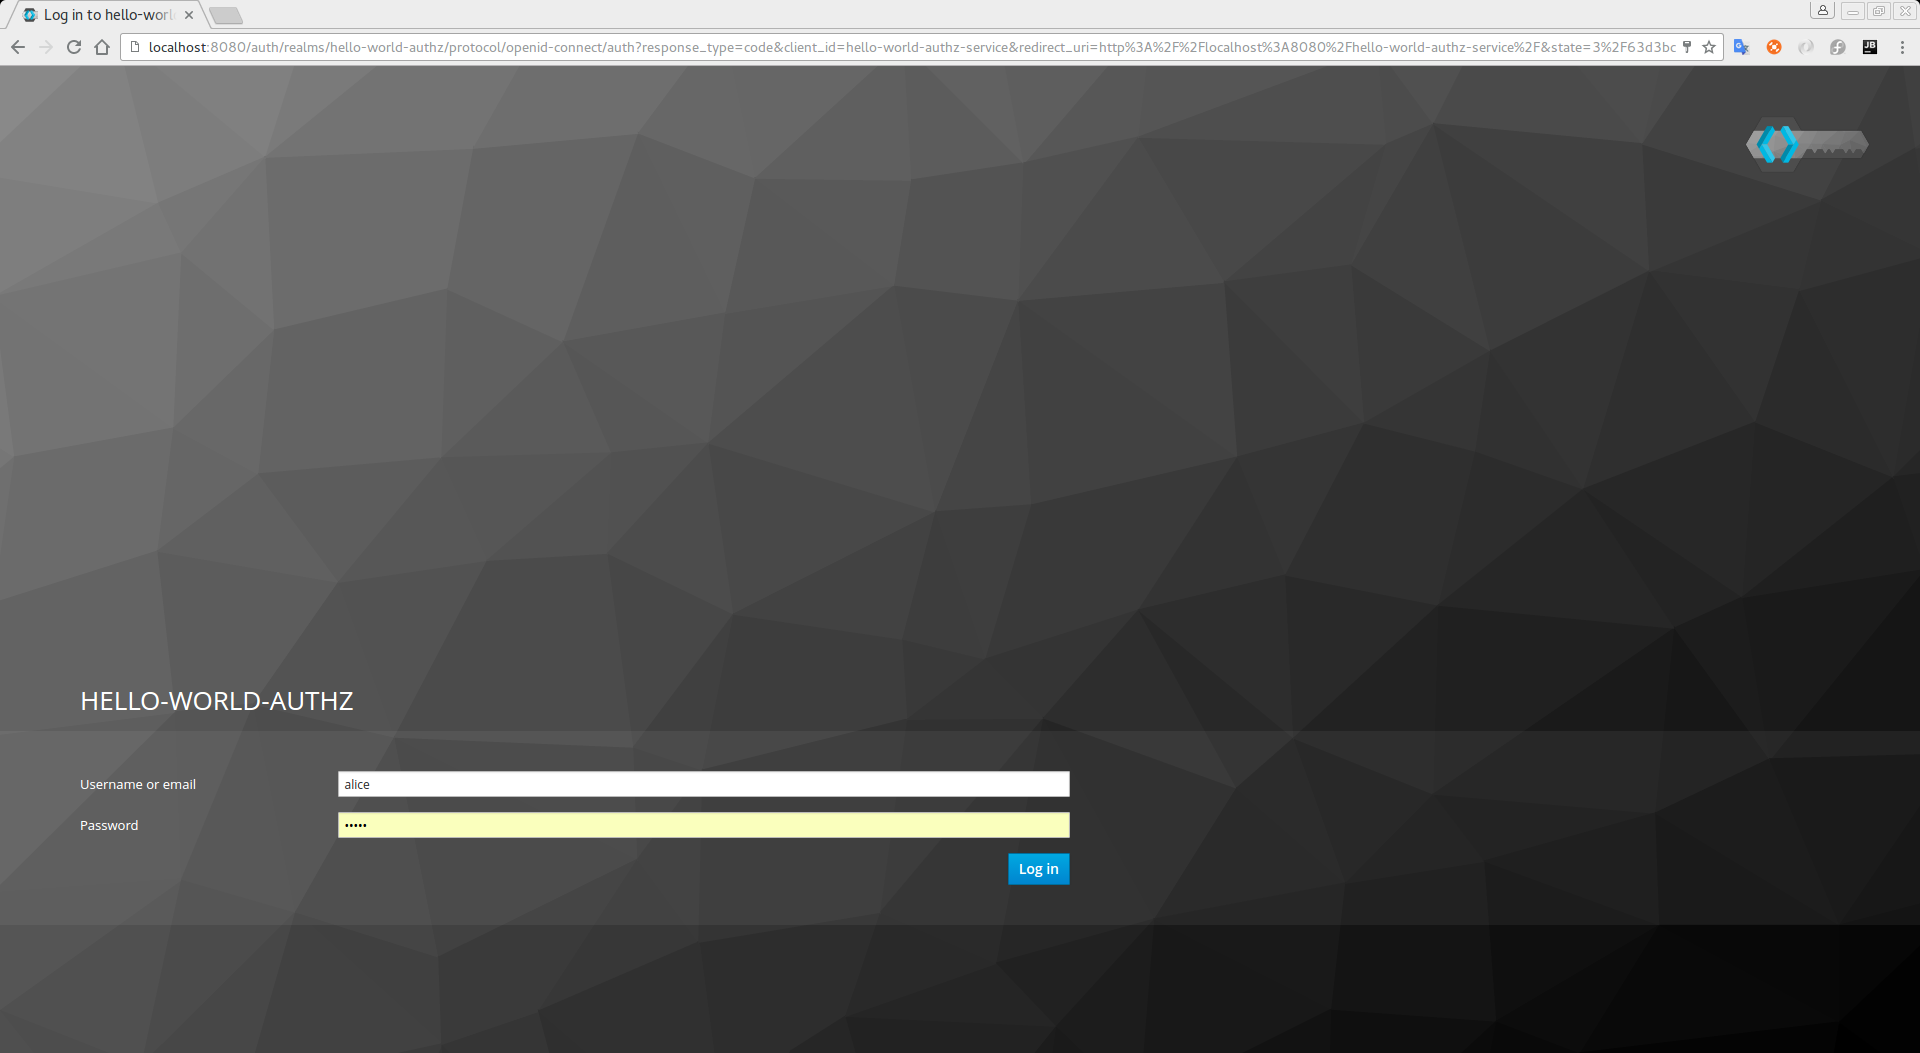
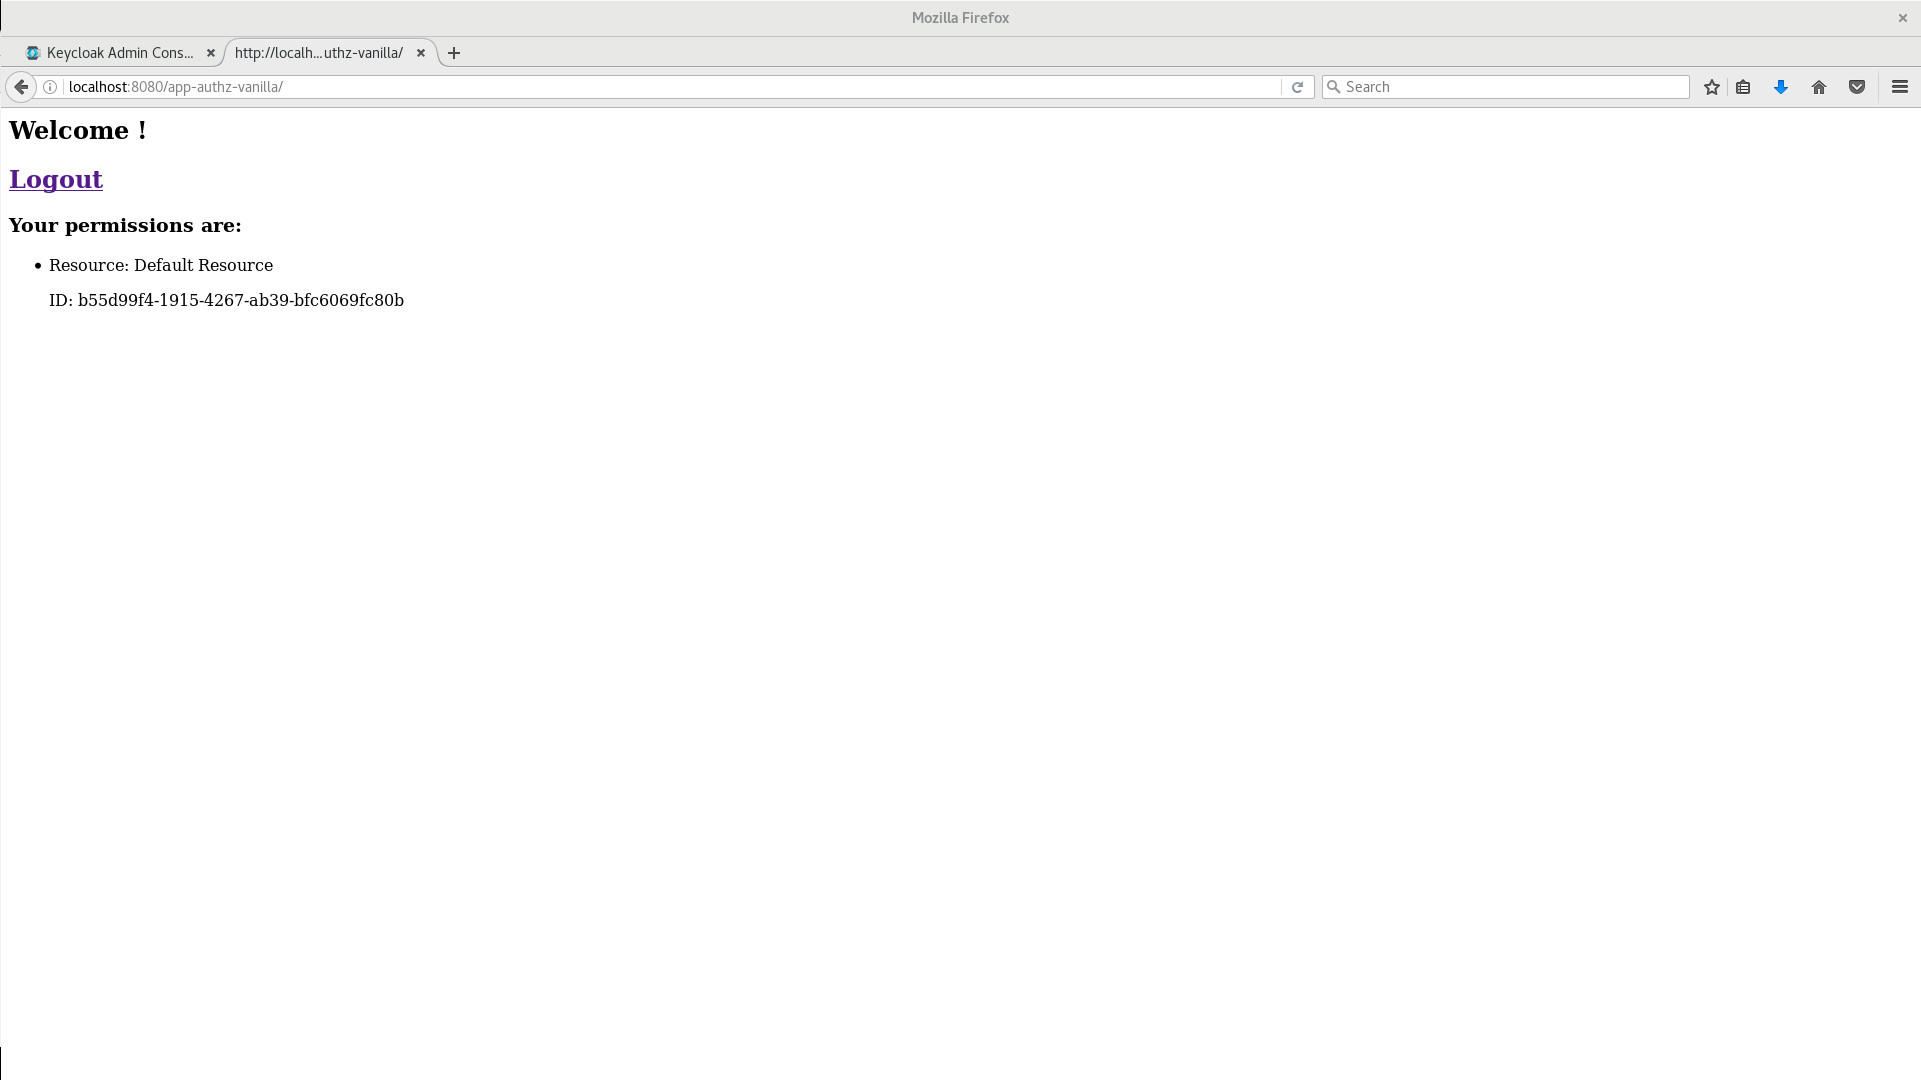
Log in as alice using the password you specified for that user. After authenticating, the following page is displayed:
Hello World Authz Main Page
The default settings defined by Keycloak when you enable authorization services for a client application provide a simple policy that always grants access to the resources protected by this policy.
You can start by changing the default permissions and policies and test how your application responds, or even create new policies using the different policy types provided by Keycloak.
There are a plenty of things you can do now to test this application. For example, you can change the default policy by clicking the Authorization tab for the client, then Policies tab, then click on Default Policy in the list to allow you to change it as follows:
// The default value is $evaluation.grant(),
// let's see what happens when we change it to $evaluation.deny()
$evaluation.deny();
Now, log out of the demo application and log in again. You can no longer access the application.

Let’s fix that now, but instead of changing the Default Policy code we are going to change the Logic to Negative using the dropdown list below the policy code text area.
That re-enables access to the application as we are negating the result of that policy, which is by default denying all requests for access. Again, before testing this change, be sure to log out and log in again.
Next Steps
There are additional things you can do, such as:
-
Create a scope, define a policy and permission for it, and test it on the application side. Can the user perform an action (or anything else represented by the scope you created)?
-
Create different types of policies such as role-based, user-based, time-based, aggregated policies, or rule-based, and associate these policies with the
Default Permission. -
Apply multiple policies to the
Default Permissionand test the behavior. For example, combine multiple policies and change theDecision Strategyaccordingly. -
For more information about how to view and test permissions inside your application see Obtaining the Authorization Context.